

谷粒商城基础篇(保姆级总结)
谷粒商城基础篇文章目录谷粒商城基础篇项目相关基础知识介绍微服务架构图和项目描述**微服务划分图**Vrgrantsystemctl命令配置环境Docker自启动命令下载mysql5.7检查所有镜像配置git创建仓库创建其他微服务安装10.15.1node.js,逆向工程Spring Cloud Alibabanacos作为注册中心Fegin声明式远程调用如何使用nacos作为配置中心统一管理配置n
谷粒商城基础篇
文章目录
-
-
- 谷粒商城基础篇
-
- 项目相关基础
- 知识介绍
- 微服务架构图和项目描述
- **微服务划分图**
- Vrgrant
- systemctl命令
- 配置环境
- 配置git
- 创建仓库
- 创建其他微服务
- 安装10.15.1node.js,
- 逆向工程
- Spring Cloud Alibaba
- nacos作为注册中心
- Fegin声明式远程调用
- 如何使用nacos作为配置中心统一管理配置
- nacos核心
- 加载多配置集
- GateWay网关
- 前端基础
- Vue
- vue模块化开发
- 三级分类开发
- 配置网关路由与位置重写
- 配置跨域
- 树形展示三级分类数据
- 逻辑删除
- 拖动结点
- 拖拽数据收集
- 云存储的开通与使用
- 服务端签名后直传
- OSS前后联调测试上传
- 调试品牌新增
- JSR303
- 统一的异常处理@ControllerAdvance
- JSR303分组校验与自定义校验器
- SPU&SKU规格参数&销售属性
- 接口文档地址
- 前端组件抽取,父子组件维护
- 获取分类属性分组
- 分组新增&级联选择器
- 分组修改&级联选择器修改
- 品牌分类关联及级联更新
- 规格参数新增与VO
- 查询参数规格列表功能
- 规格修改
- 销售属性维护
- 查询分组关联属性&&删除关联
- 查询分组未关联的属性
- 新增分组与属性关联
- 新增商品,调试会员等级接口
- 获取分类关联的品牌
- 获取分类下所有分组及其属性
- 商品新增vo抽取
- 商品新增业务流程分析
- 调用远程服务保存优惠等信息
- Spring依赖注入的时候发现的问题
- 设置每一个服务的内存占用,商品保存debug
- 商品保存其他问题处理
- Sku检索
- 获取仓库列表
- 创建采购需求
- 合并采购需求
- 仓库管理-领取采购单
- SPU规格维护
- 分布式基础总结
-
项目相关基础
知识介绍
[外链图片转存失败,源站可能有防盗链机制,建议将图片保存下来直接上传(img-jD4A5PiN-1603541570025)(assets/1586317141614.png)]


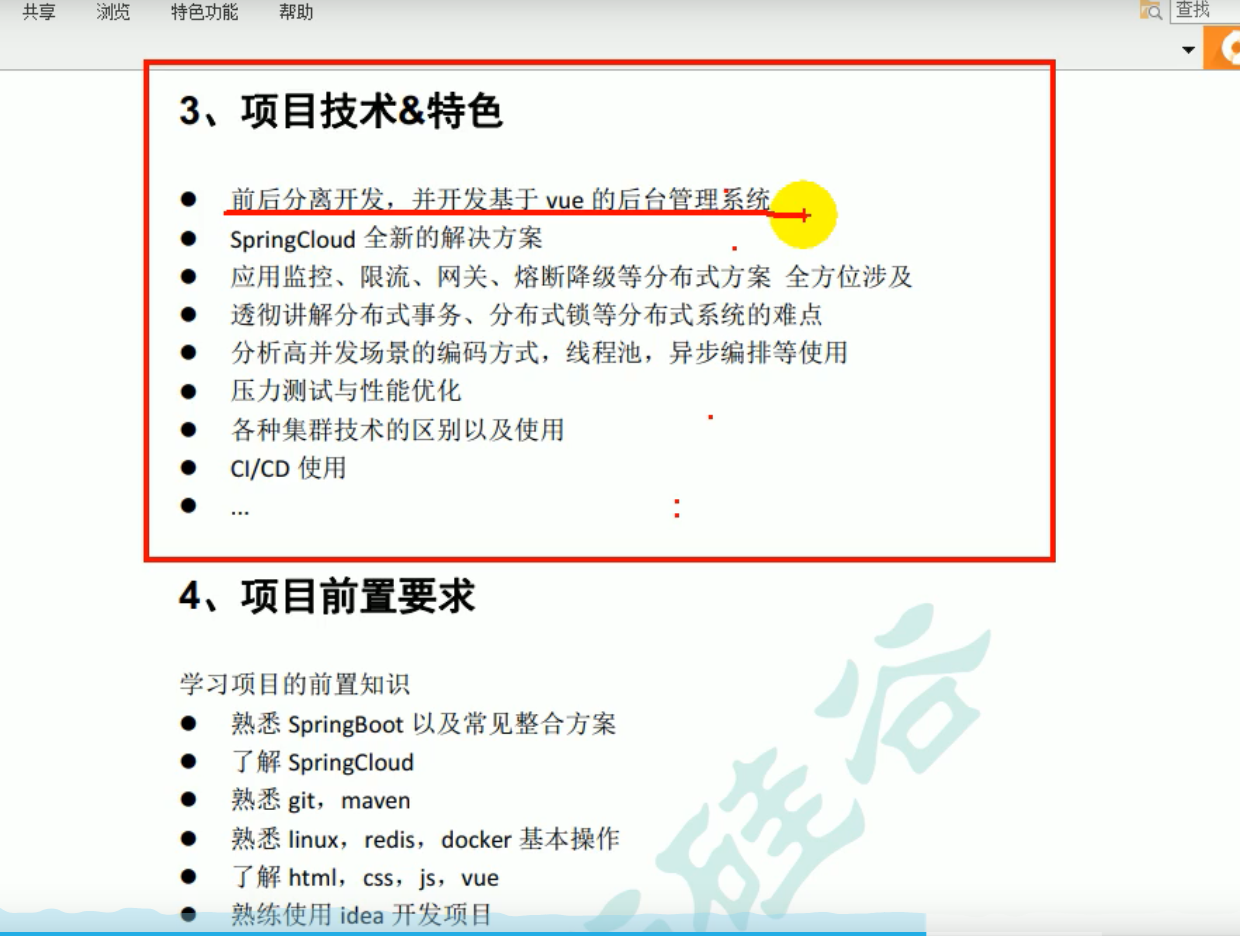
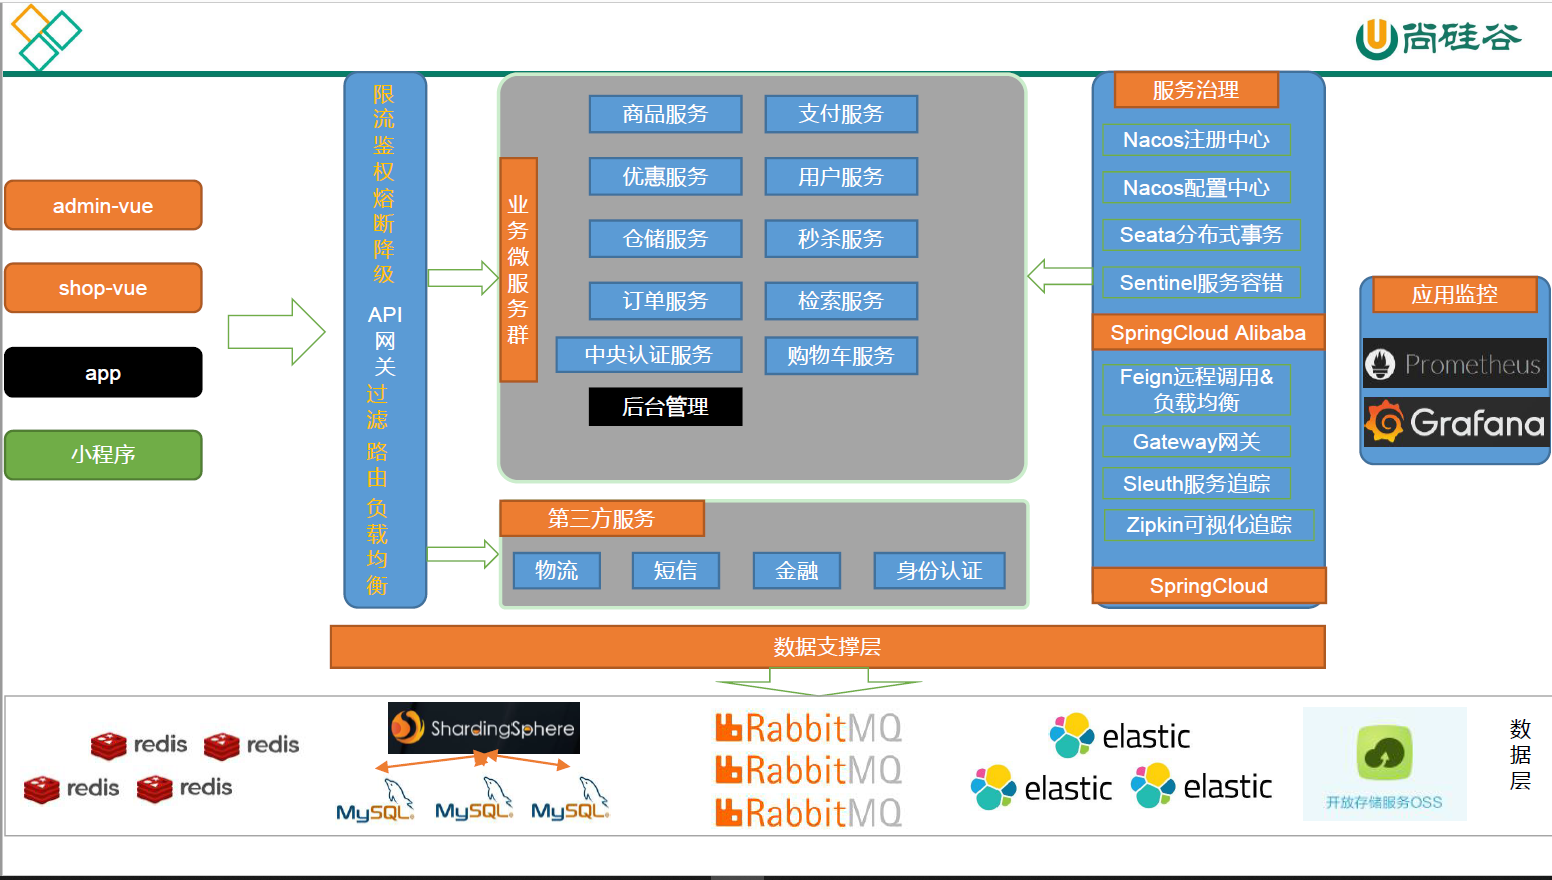
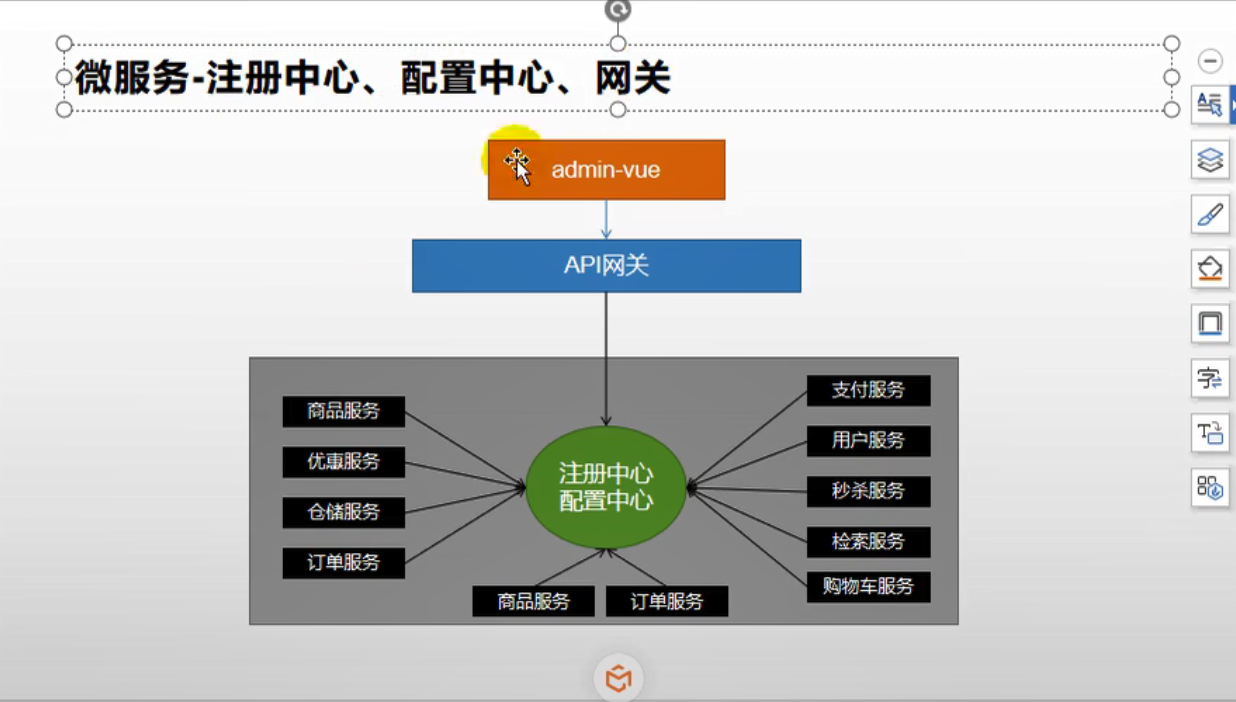
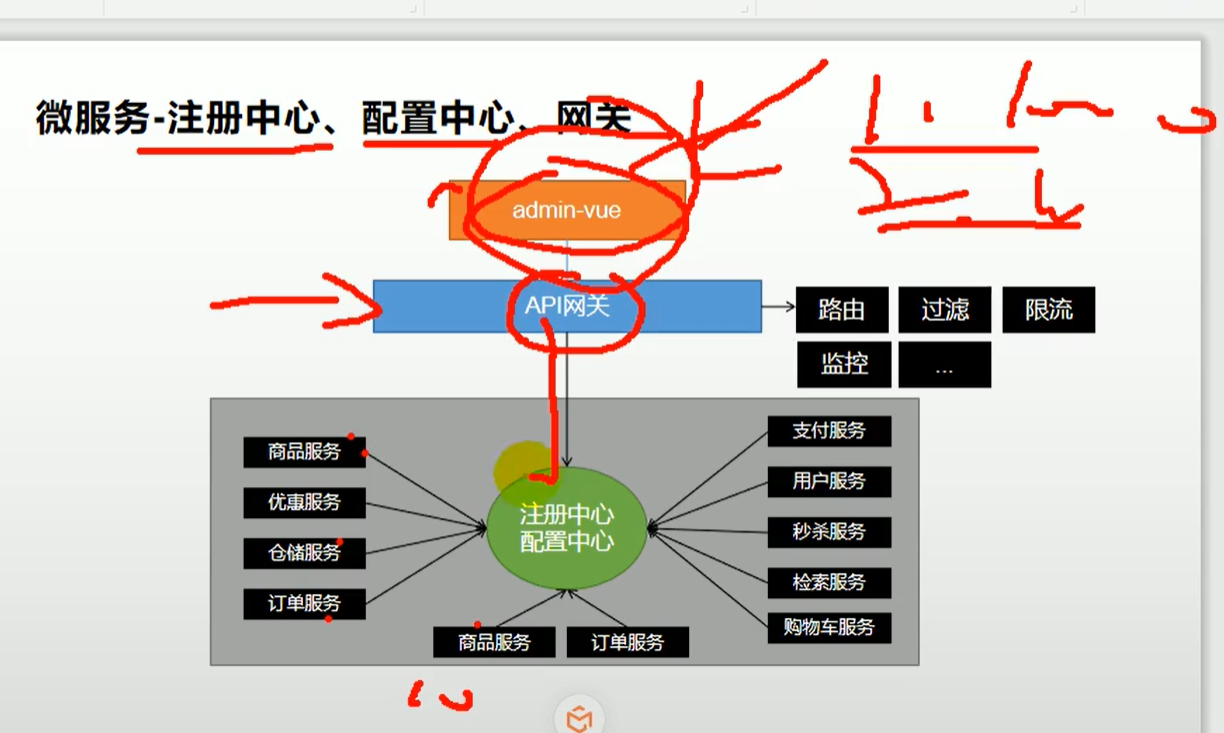
微服务架构图和项目描述
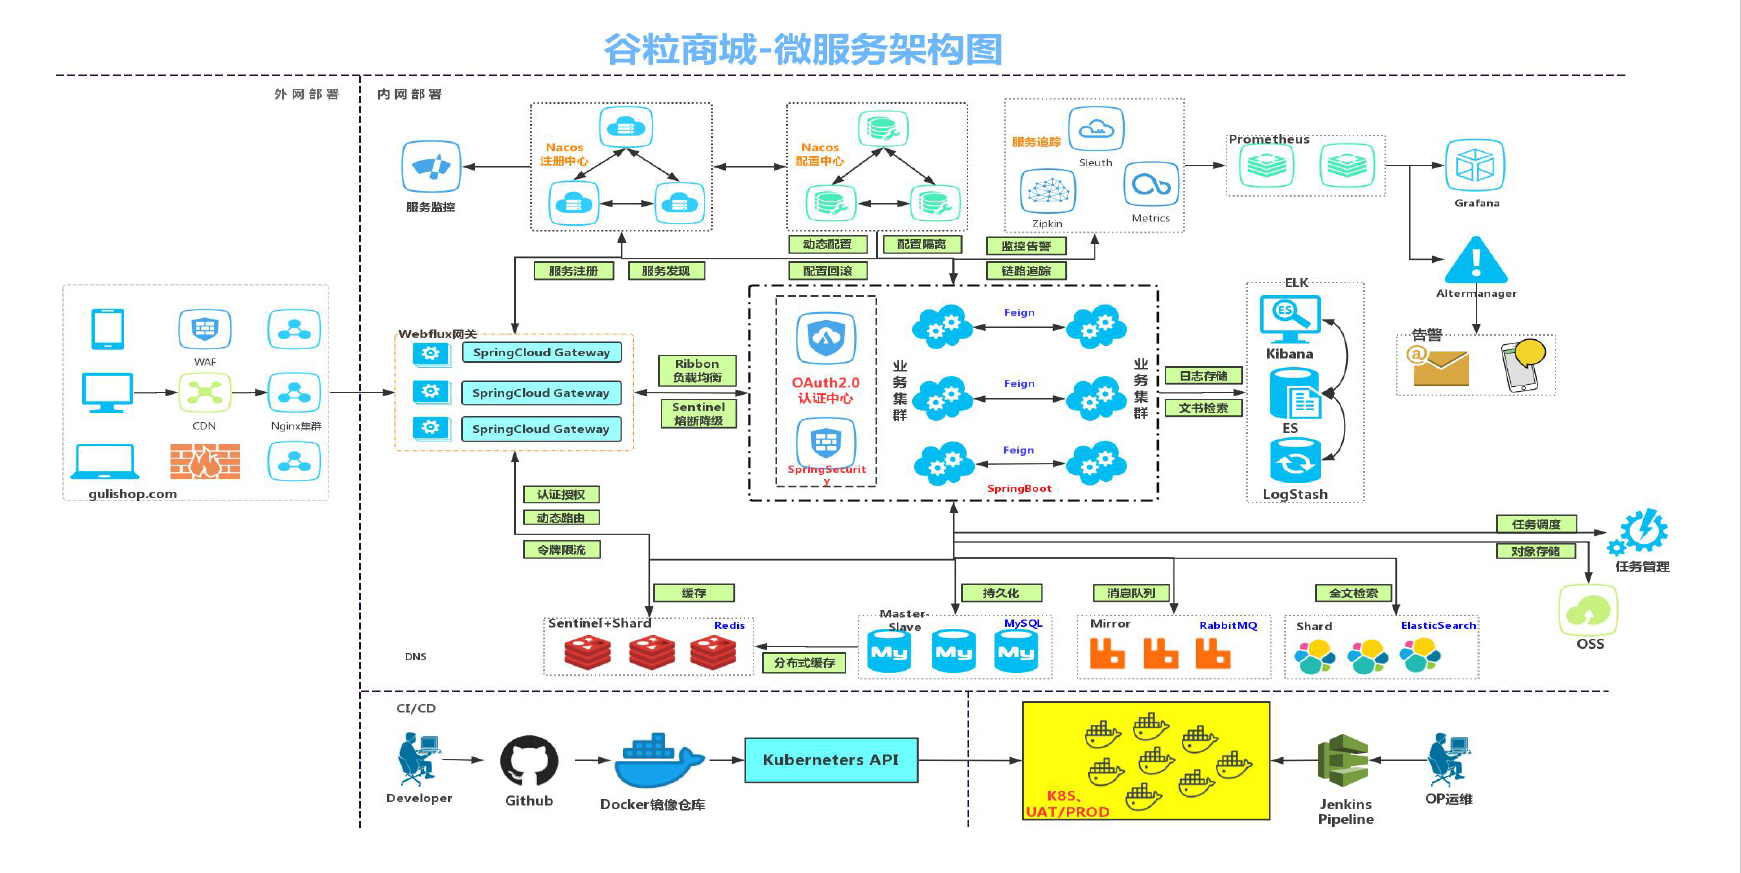
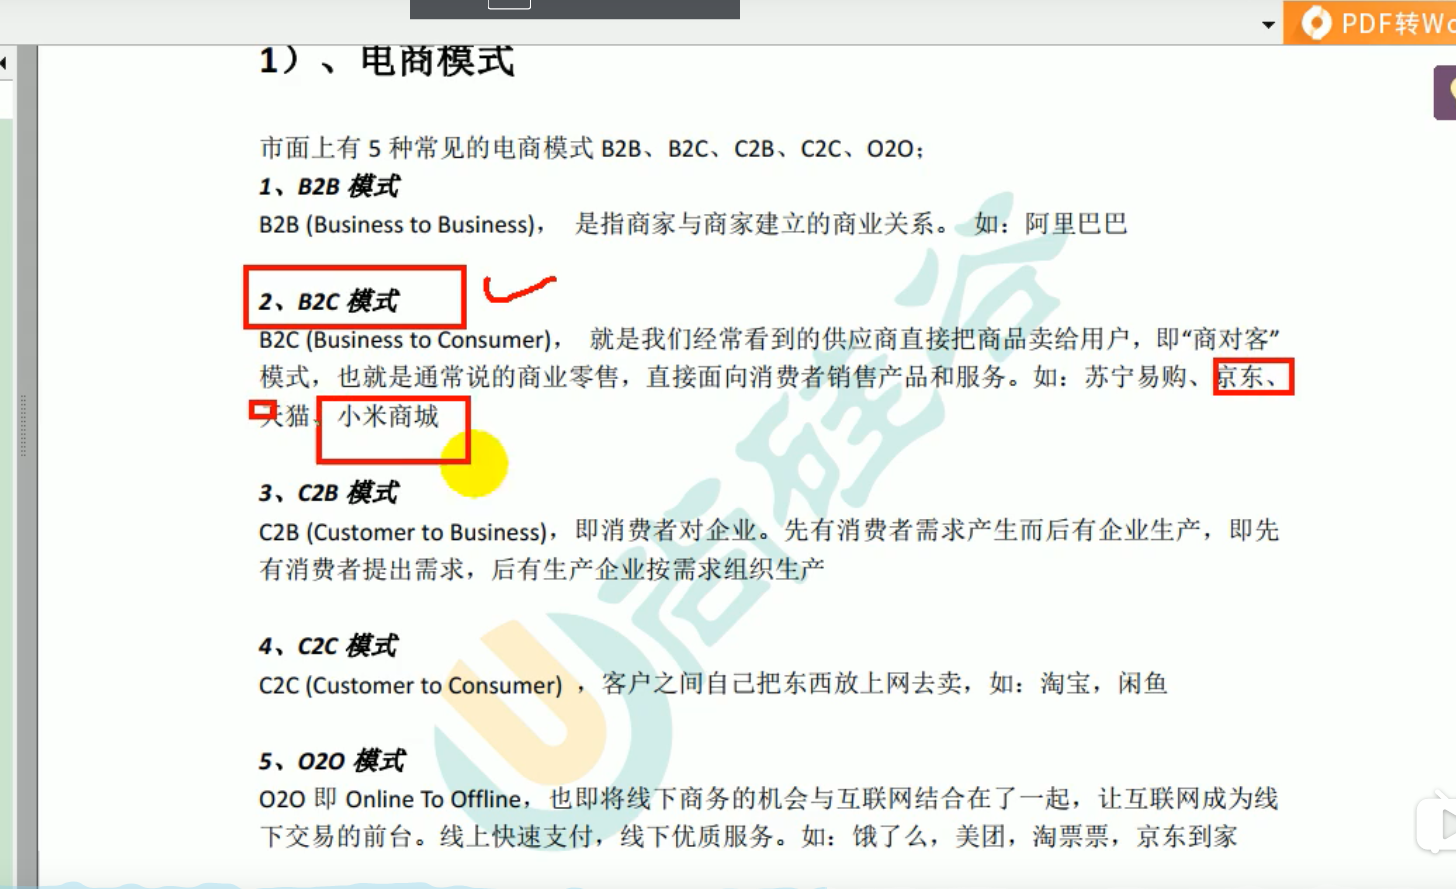
项目描述:
前后分离开发,分为内网部署和外网部署,外网就是面向公众访问,部署前端项目,内网部署是整个后台的服务集群,公众是通过客户端完成相应功能,比如登录注册等需要通过客户端,向后台服务 发送请求。
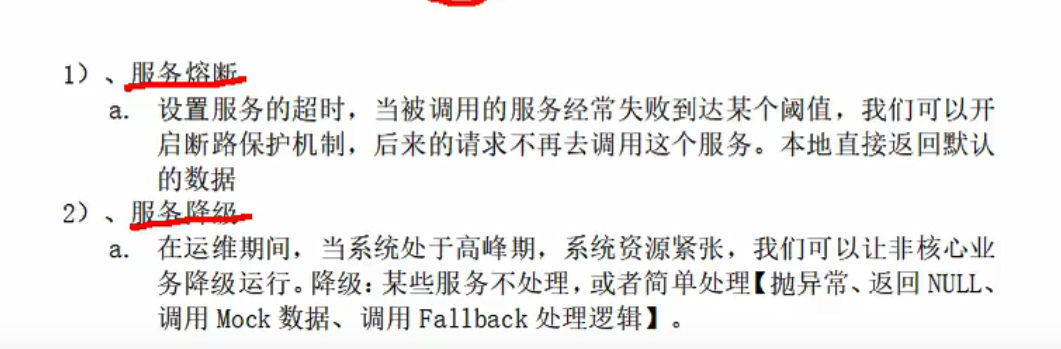
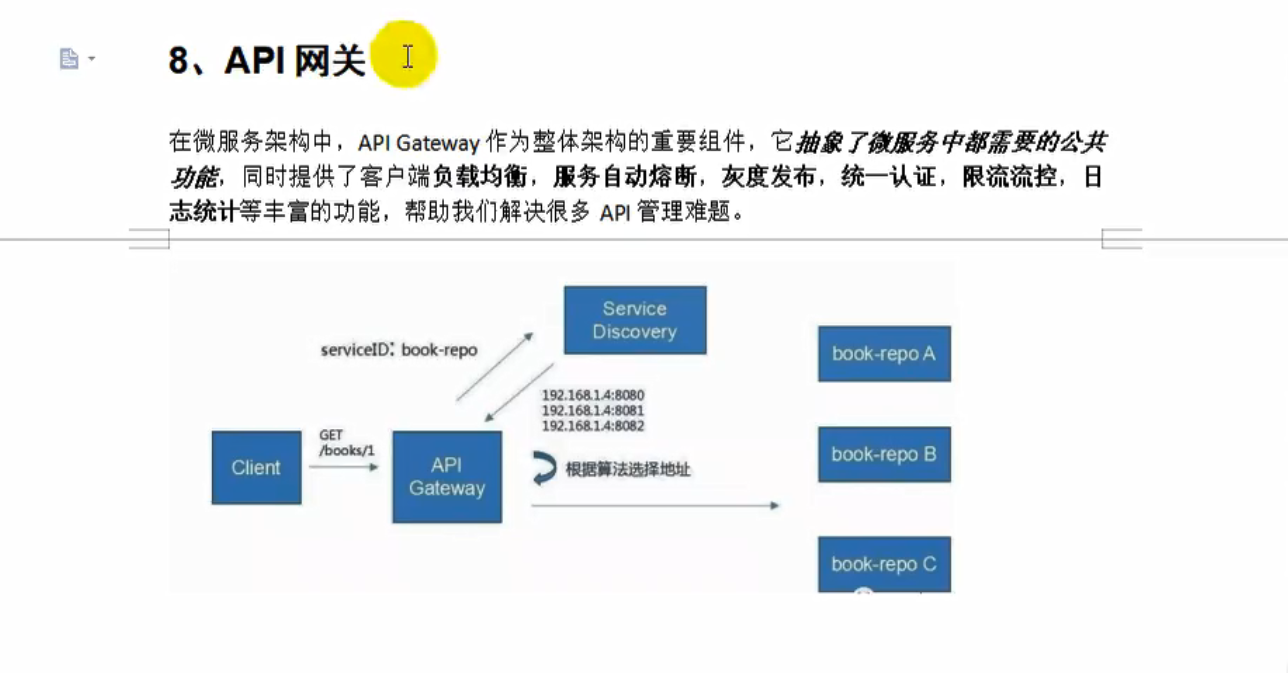
完整的请求流程:通过任意客户端发请求来到Nginx集群,Nginx把请求转交给后台服务,先将请求服务交给Api网关,Api网关为SpringCloud GateWay,网关可以根据当前请求,动态路由到指定的服务,例如要调用商品服务,购物车服务,还是检索服务,如果路由过来后,某一个服务众多,网关会负载均衡的调用服务,当某些服务出现问题,会在网关级别对服务做统一的熔断或者降级,使用Spring Cloud alibaba提供的Sentinel,当然网关还有其他工能,如认证授权,是否合法,限流,限制瞬时流量,降级。当请求通过网关到达服务后,进行处理,都是Spring Boot的一个个微服务,服务与服务之间会相互调用,下订单时调用商品服务,有些请求需要登录以后才会处理,所以有一个基于OAuth 2的认证中心,OAuth 2的社交登录,整个应用的安全和权限控制用SpringSecurity来进行控制。
特别是这些服务要保存一些数据或缓存,缓存使用的是redis集群,分片集群加哨兵集群,持久化使用的是mysql集群。可以读写分离,或分库分表。服务与服务之间,利用消息队列进行异步解耦,完成分布式事务的最终一致性,RabbitMQ做消息队列,检索用ElasticSearch,有些服务运行期间,存取图片视频等,利用阿里云对象存储服务(OSS)。这些是整个服务关于数据存储的解决方案。
项目上线后,为了快速定位项目中可能出现的一些问题,使用ELK对日志进行处理,用LogStash收集业务里面各种日志,存储到ES中,用Kibana从ES中检索到日志信息,快速度定位线上问题所在。
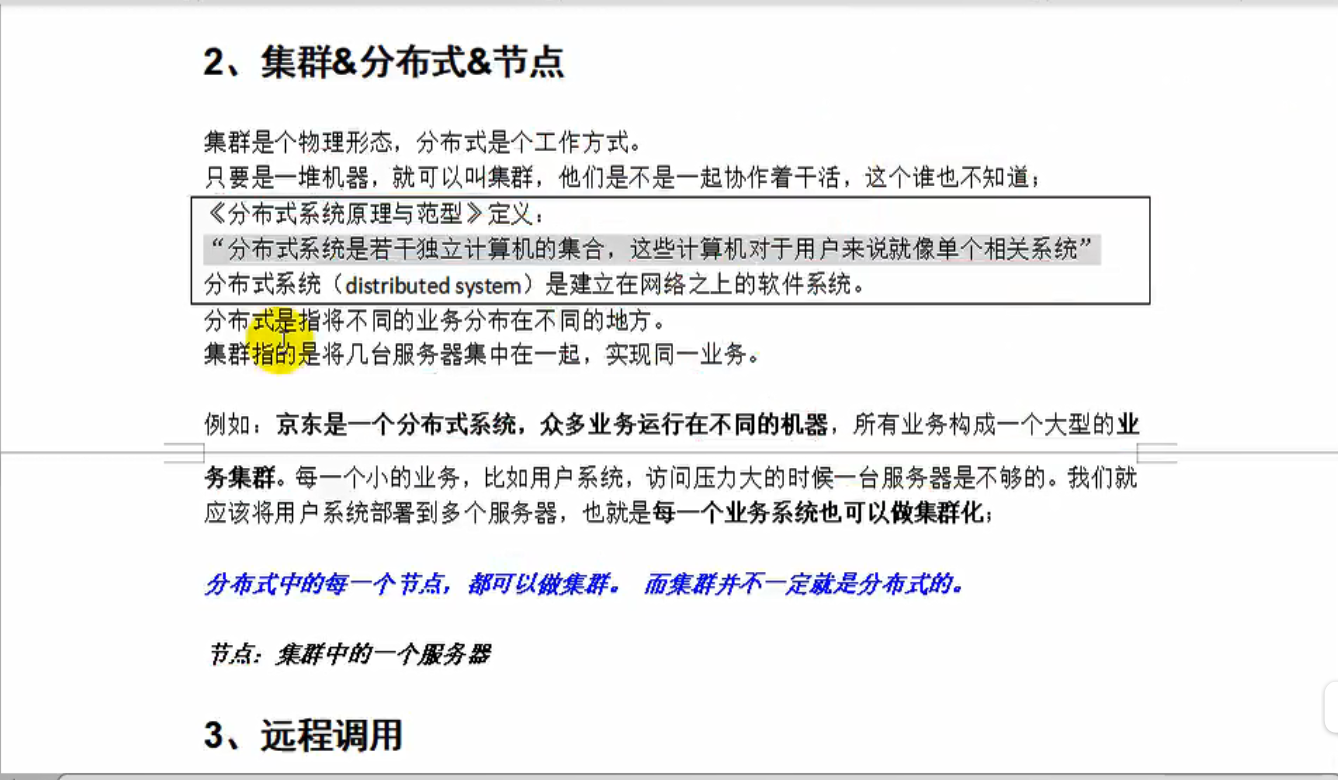
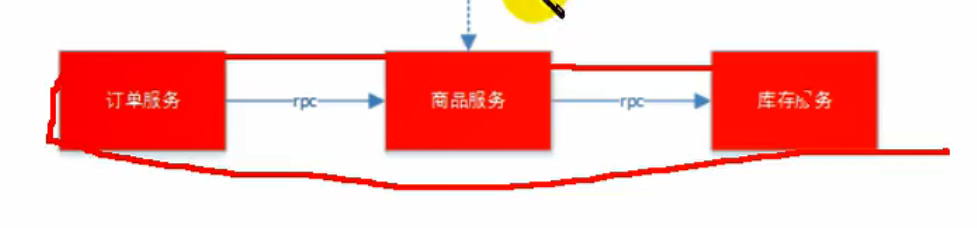
在分布式系统中,每一个服务都可能部署在每一台机器,而且服务与服务之间要相互调用,就得知道彼此都在哪里,将所有服务注册到服务中心,别的服务可以通过注册中心发现其他服务的注册所在位置,使用Spring Cloud Alibaba Nacos来作为服务的注册中心,同样每一个服务配置众多,后来要集中管理这些配置,实现改一处配置,其他服务都要修改掉,使用Spring Cloud Alibaba Nacos来作为服务的配置中心,所有服务可以动态的从配置中心中获取配置,包括服务在调用期间可能出现的问题,比如下订单服务调用商品服务,商品服务调用库存服务,可能某一个链路出现问题,我们要追踪某一个调用链哪里出现问题,该怎么解决等等,使用Spring Cloud Sleuth+Zipkin 把每一个服务的信息交给交给开源的Prometheus进行聚合分析,再由Grafana进行可视化展示,Altermananger实时得到服务的报警信息,以邮件和手机短信方式通知开发运维人员。
提供持续继承和持续部署,开发人员可以将修改后的代码提交给GitHub,运维人员通过自动化工具Jenkins Pipeline,从GitHub获取代码,将它打包成Docker镜像,最后通过Kuberneters 集成整个Docker服务,将服务以Docker容器的方式运行,
微服务划分图
项目基于前后端分离开发,admin-vue是面向工作人员使用的后台管理系统,shop-vue是面向公众访问的Web网站系统…
Vrgrant
复制下载链接,用迅雷下会快很多
镜像仓库
https://app.vagrantup.com/boxes/search

vagrant init centos/7
vagrant up 启动
vagrant ssh 连接
vagrant reload 重启
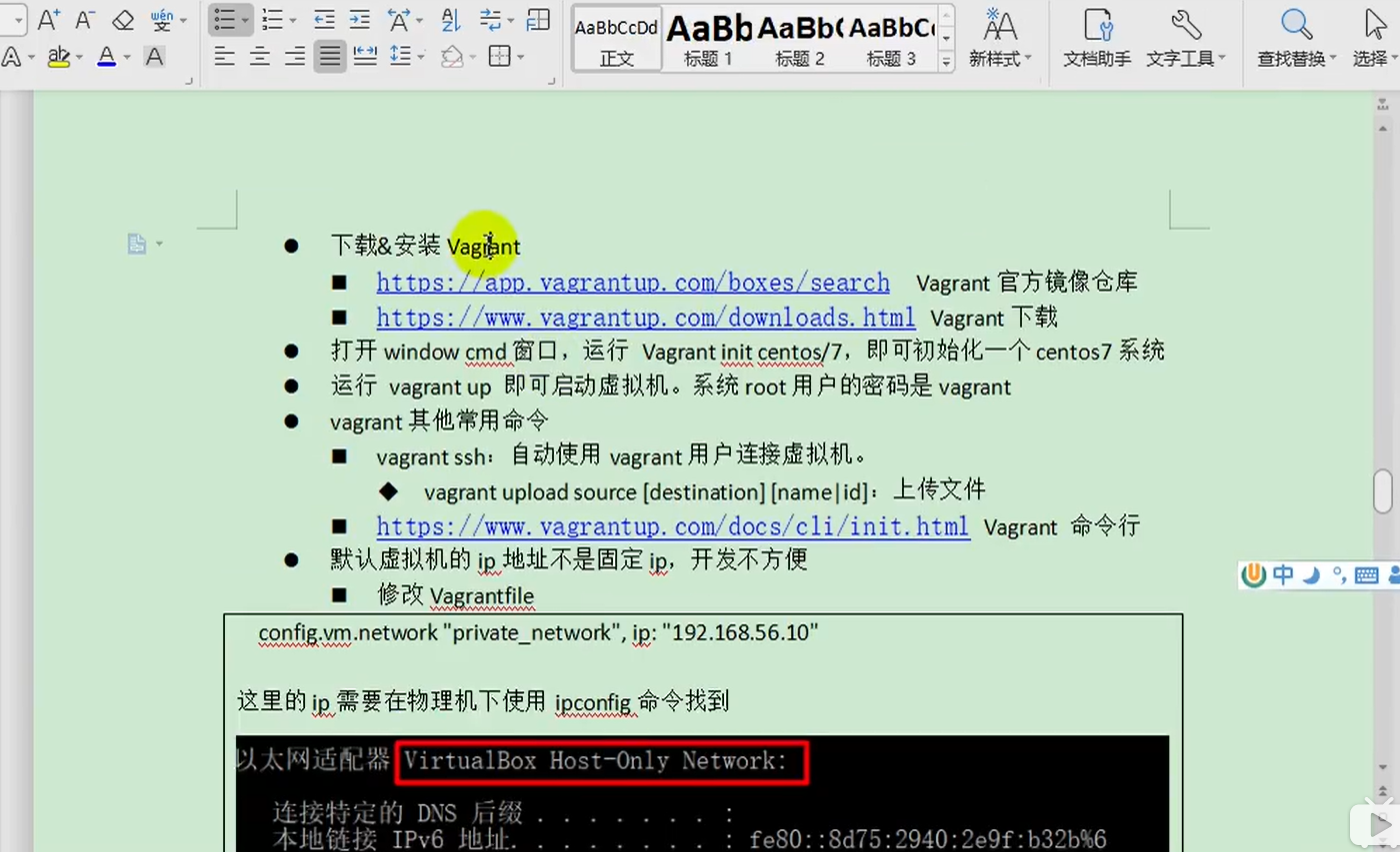
默认是网络地址转换和端口转发的方式,希望给虚拟机一个ip地址,可是直接访问
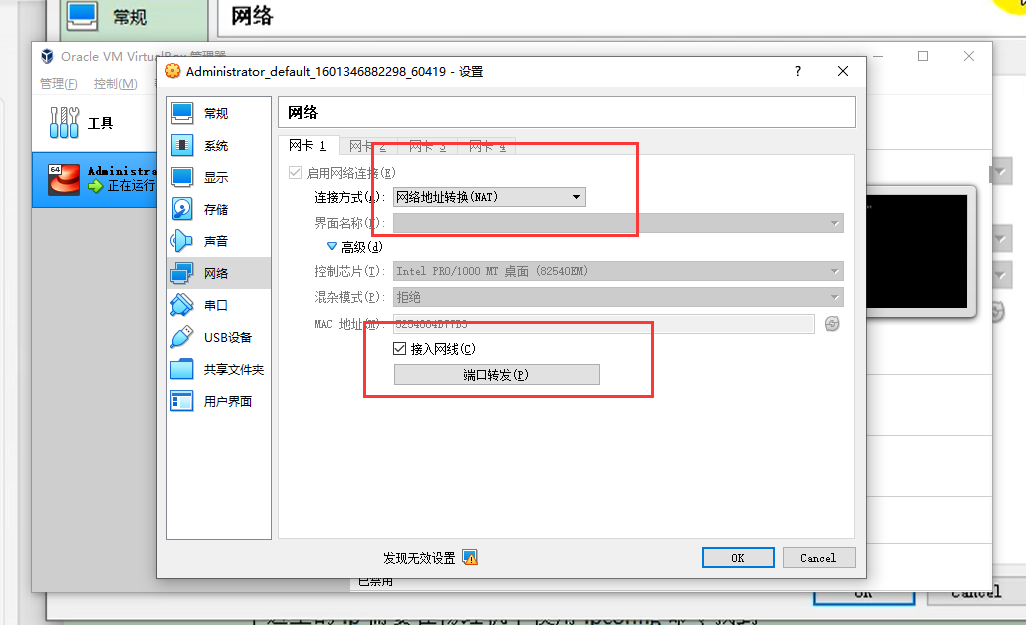
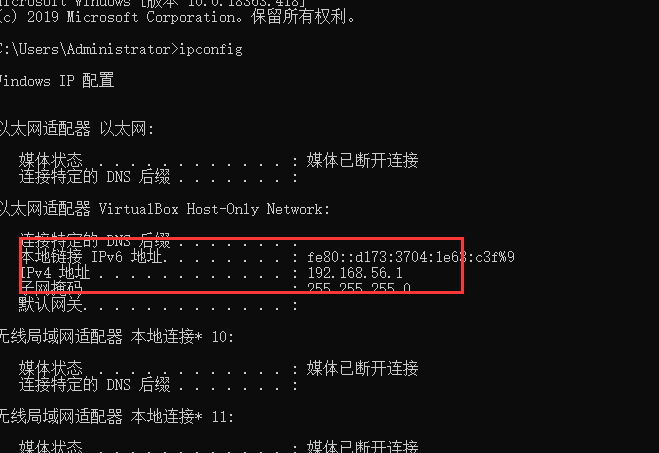
修改中agrantfile,依据是如图,必须是192.168.56开头 给虚拟机一个固定的Ip地址,和主机可以互相ping通
config.vm.network "private_network", ip: "192.168.56.10"

Docker
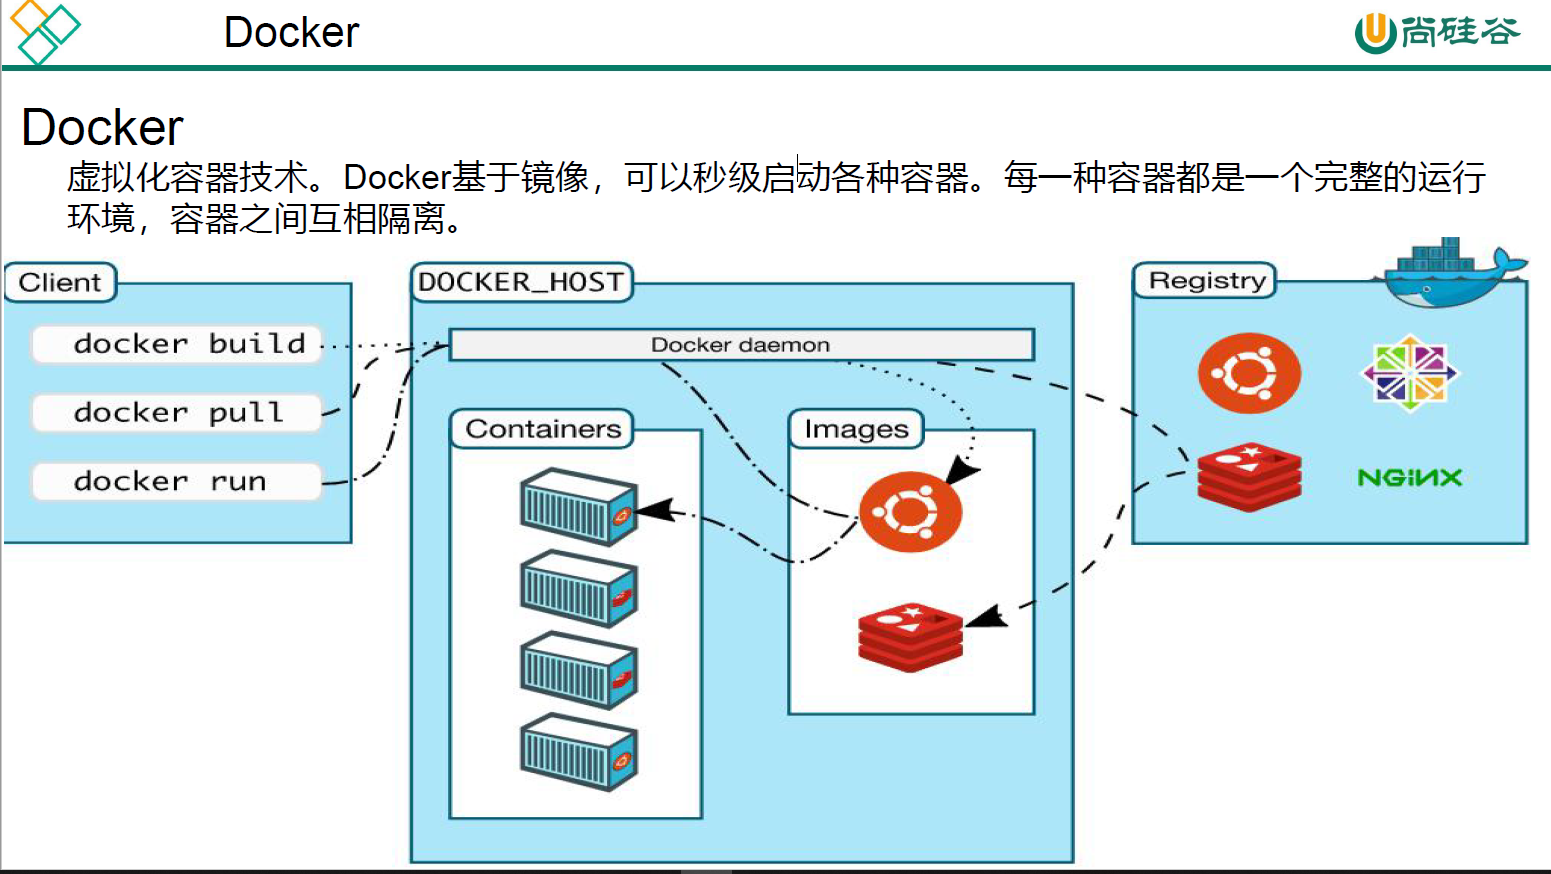
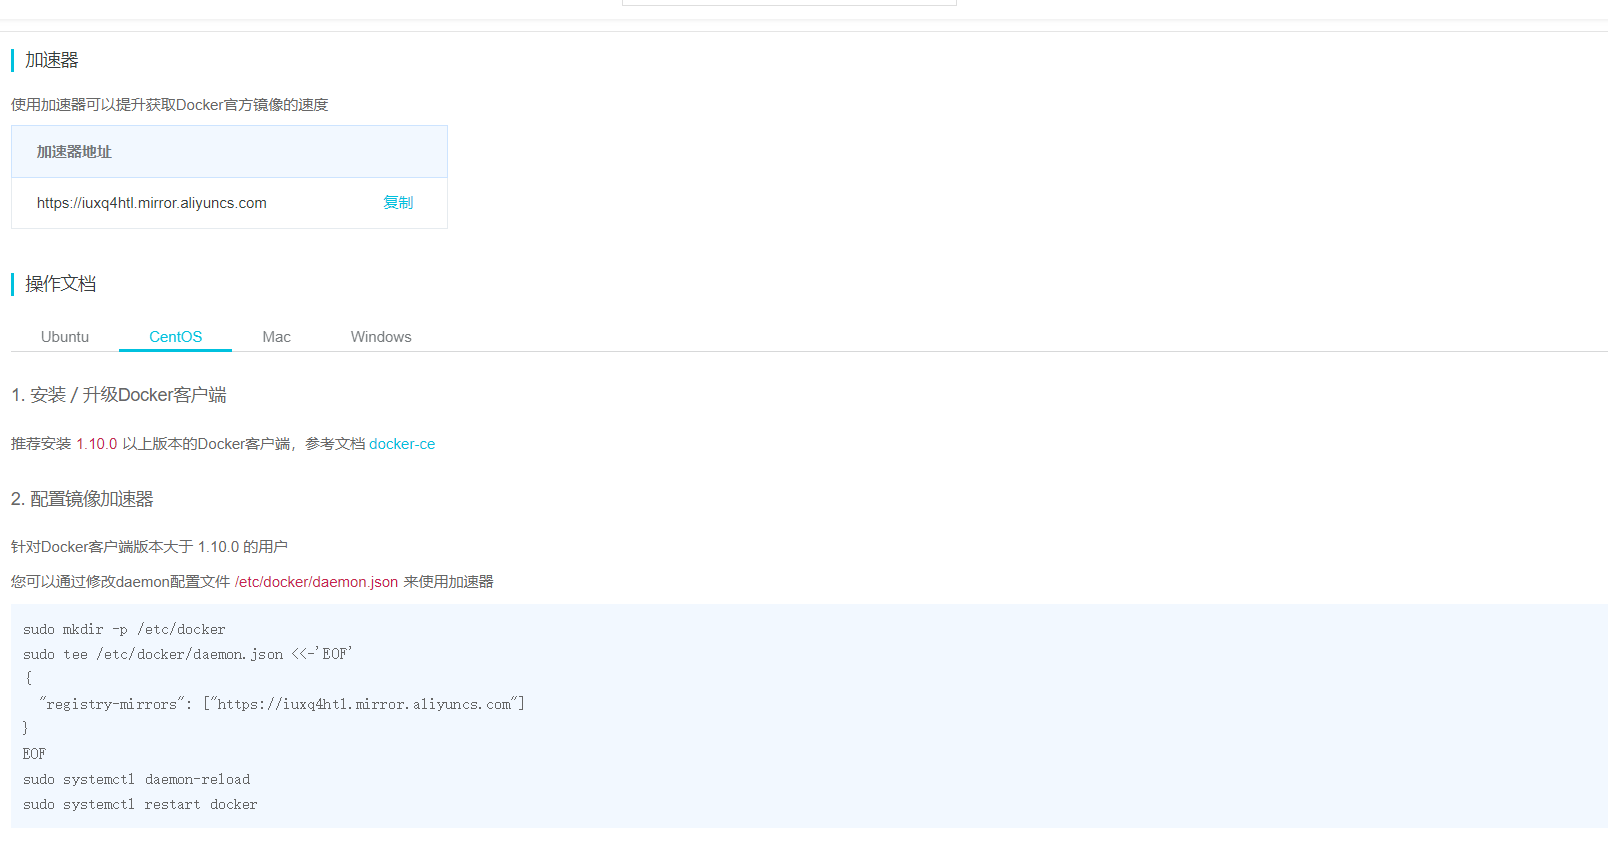
CentOS安装docker网址:https://docs.docker.com/engine/install/centos/
配置镜像加速:https://cr.console.aliyun.com/cn-hangzhou/instances/mirrors
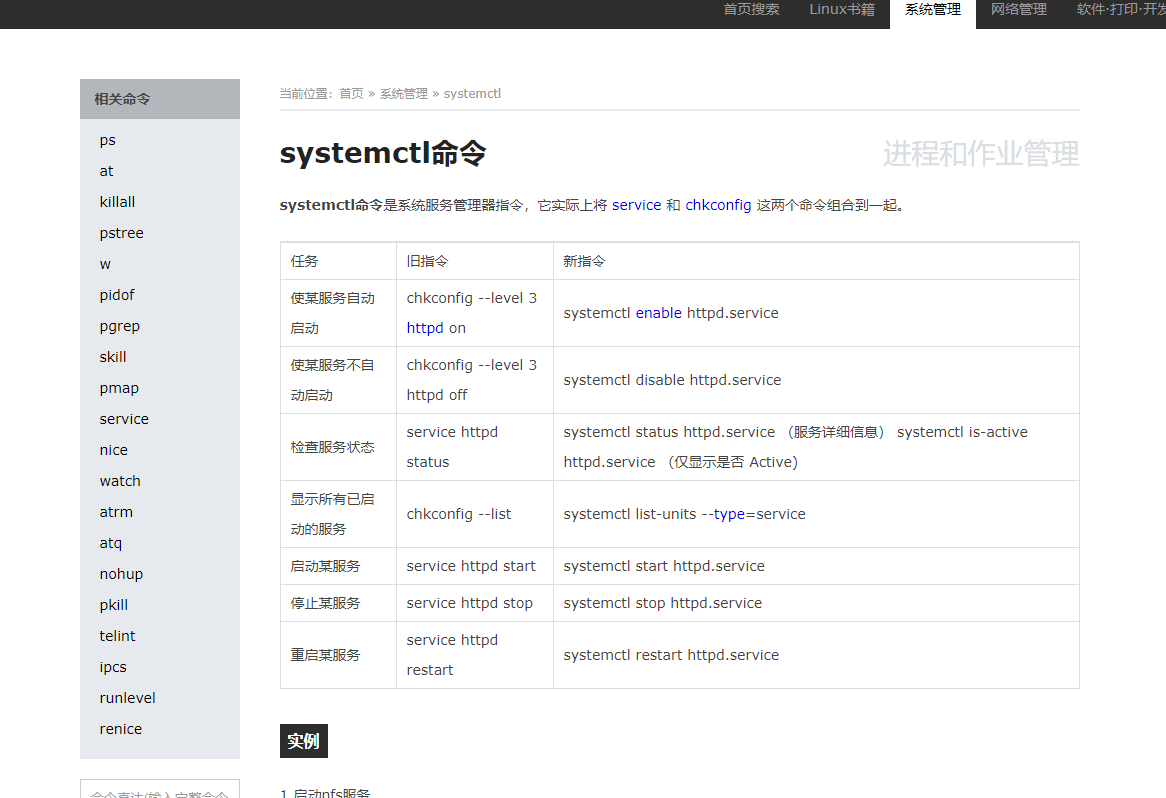
systemctl命令
配置环境
Docker自启动命令
sudo systemctl enable docker
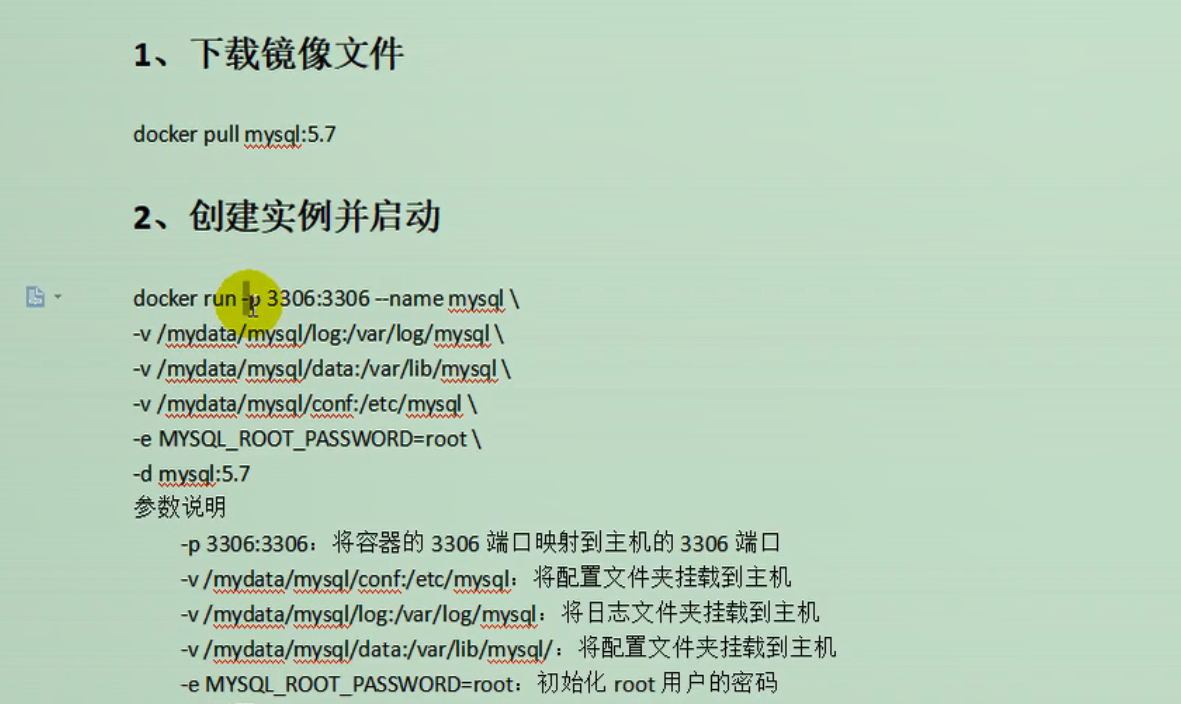
下载mysql5.7
docker pull mysql:5.7
检查所有镜像
docker images
Linux环境搭建:https://www.cnblogs.com/songjilong/p/12612383.html
docker运行mysql命令:
docker run -p 3306:3306 --name mysql \
-v /mydata/mysql/log:/var/log/mysql \
-v /mydata/mysql/data:/var/lib/mysql \
-v /mydata/mysql/conf:/etc/mysql \
-e MYSQL_ROOT_PASSWORD=root \
-d mysql:5.7


docker ps 查看docker运行中的容器

su root 切换到root用户


docker exec -it mysql /bin/bash 进入mysql容器
创建mysql配置文件
vi /mydata/mysql/conf/my.cnf
[client]
default-character-set=utf8

[mysql]
default-character-set=utf8

[mysqld]
init_connect='SET collation_connection = utf8_unicode_ci'
init_connect='SET collation_connection = utf8_unicode_ci'
init_connect='SET NAMES utf8'
character-set-server=utf8
collation-server=utf8_unicode_ci
skip-character-set-client-handshake
skip-name-resolve
重启mysql容器
docker restart mysql
下载 redis 镜像
docker pull redis
创建配置文件
mkdir -p /mydata/redis/conf
touch /mydata/redis/conf/redis.conf
启动容器
docker run -p 6379:6379 --name redis \
-v /mydata/redis/data:/data \
-v /mydata/redis/conf/redis.conf:/etc/redis/redis.conf \
-d redis redis-server /etc/redis/redis.conf
运行 redis
docker exec -it redis redis-cli
开启 aof 持久化
vi /mydata/redis/conf/redis.conf
# 添加如下内容
appendonly yes
重启 redis
docker restart redis
docker ps -a 查看所有容器

sudo docker update mysql --restart=always

sudo docker update redis --restart=always
docker安装redis mysql:https://www.cnblogs.com/songjilong/p/12613167.html
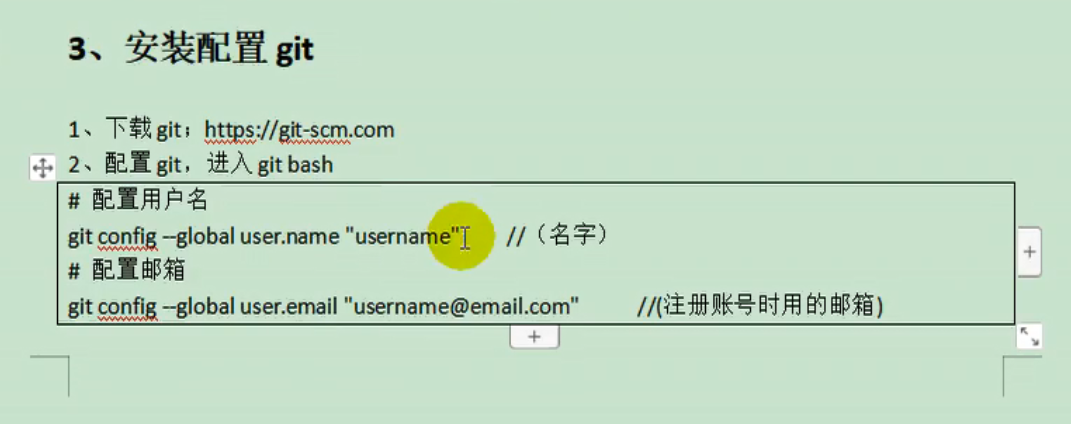
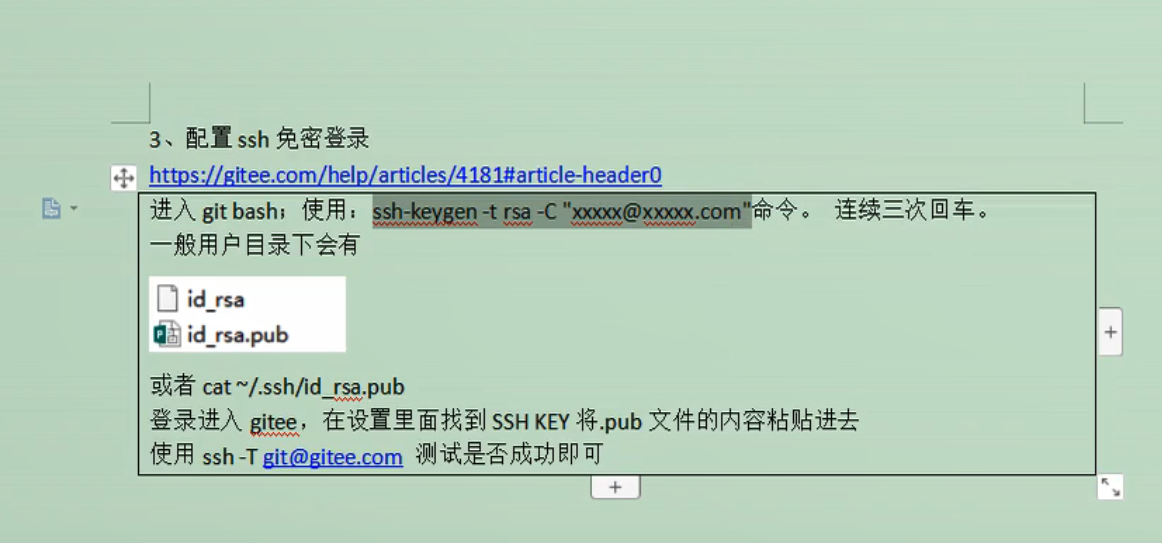
配置git
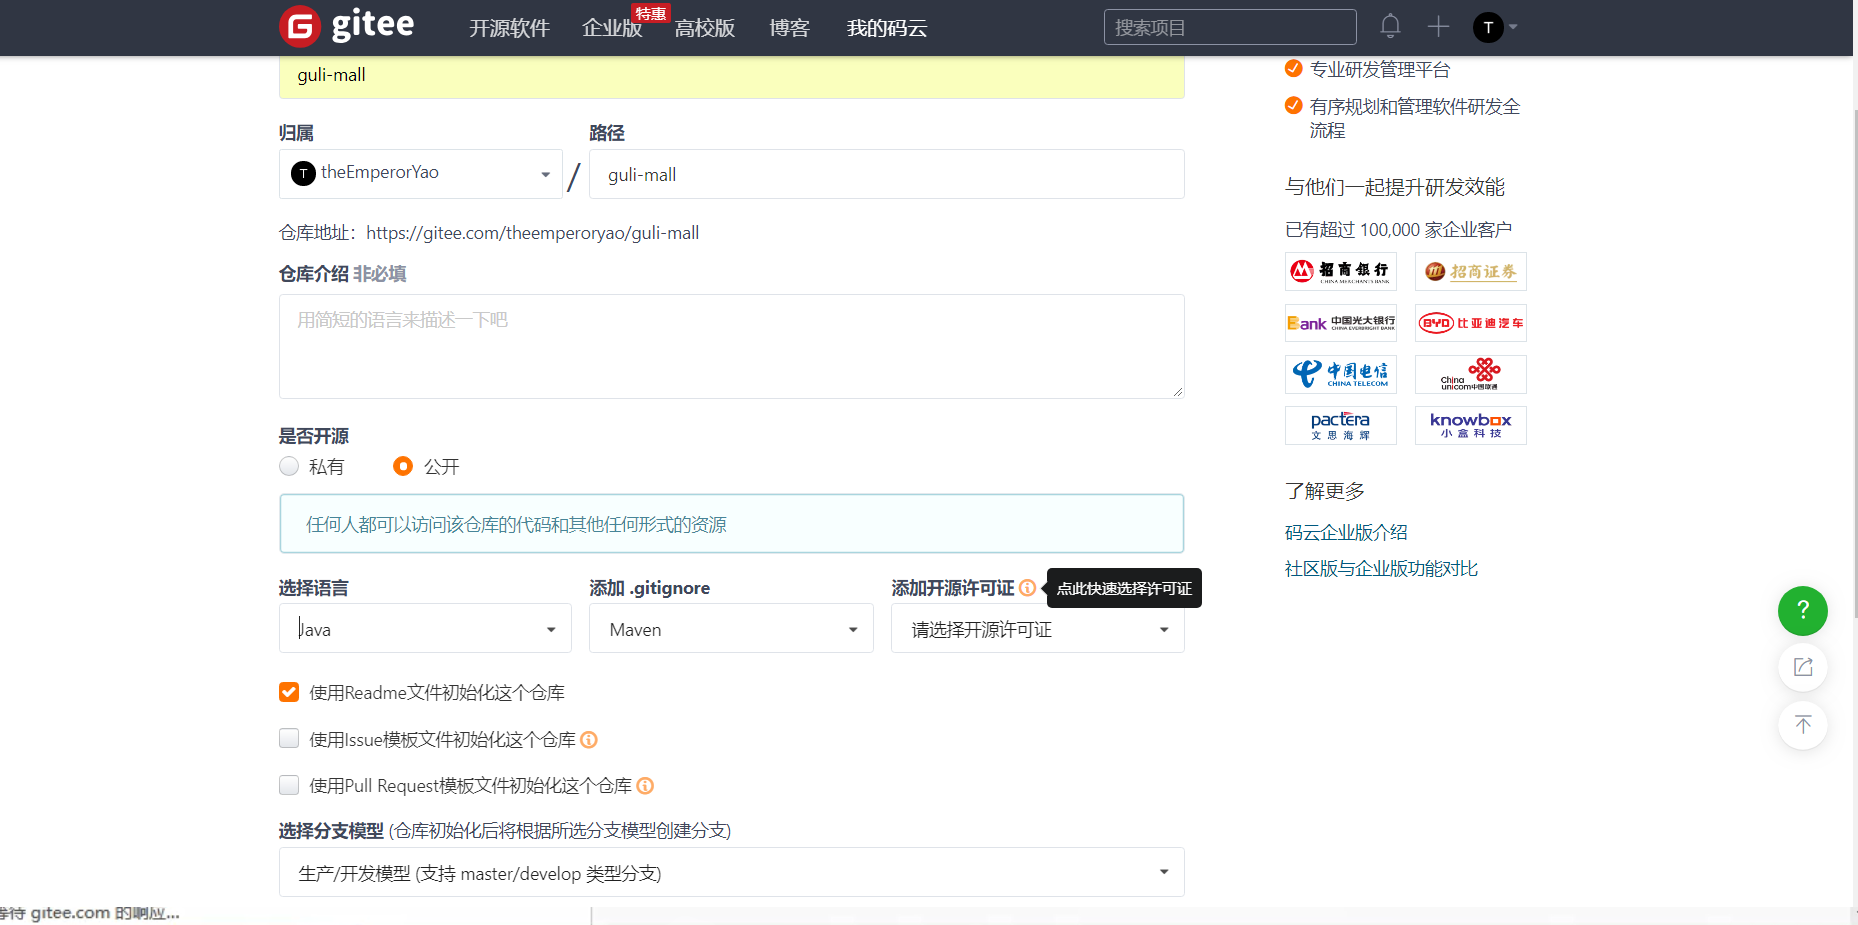
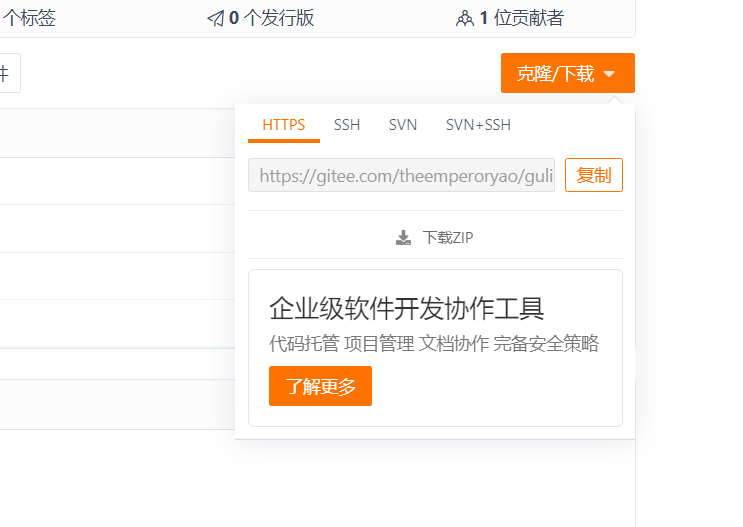
创建仓库
# Maven中的groupid和artifactid
GroupID和ArtifactID被统称为“坐标”是为了保证项目唯一性而提出的
GroupID一般分为多个段,第一段为域,第二段为公司名称。域又分为org、com、cn等等许多,其中org为非营利组织,com为商业组织。举个apache公司的tomcat项目例子:这个项目的groupId是org.apache,它的域是org(因为tomcat是非营利项目),公司名称是apache,artigactId是tomcat。
GroupID是项目组织唯一的标识符,实际对应[Java](https://link.jianshu.com/?t=http://lib.csdn.net/base/java)的包的结构,是main目录里java的目录结构。
ArtifactID就是项目的唯一的标识符,实际对应项目的名称,就是项目根目录的名称。
一般GroupID就是填com.info.test.这样子。
先把项目通过 git方式导进来,地址如下
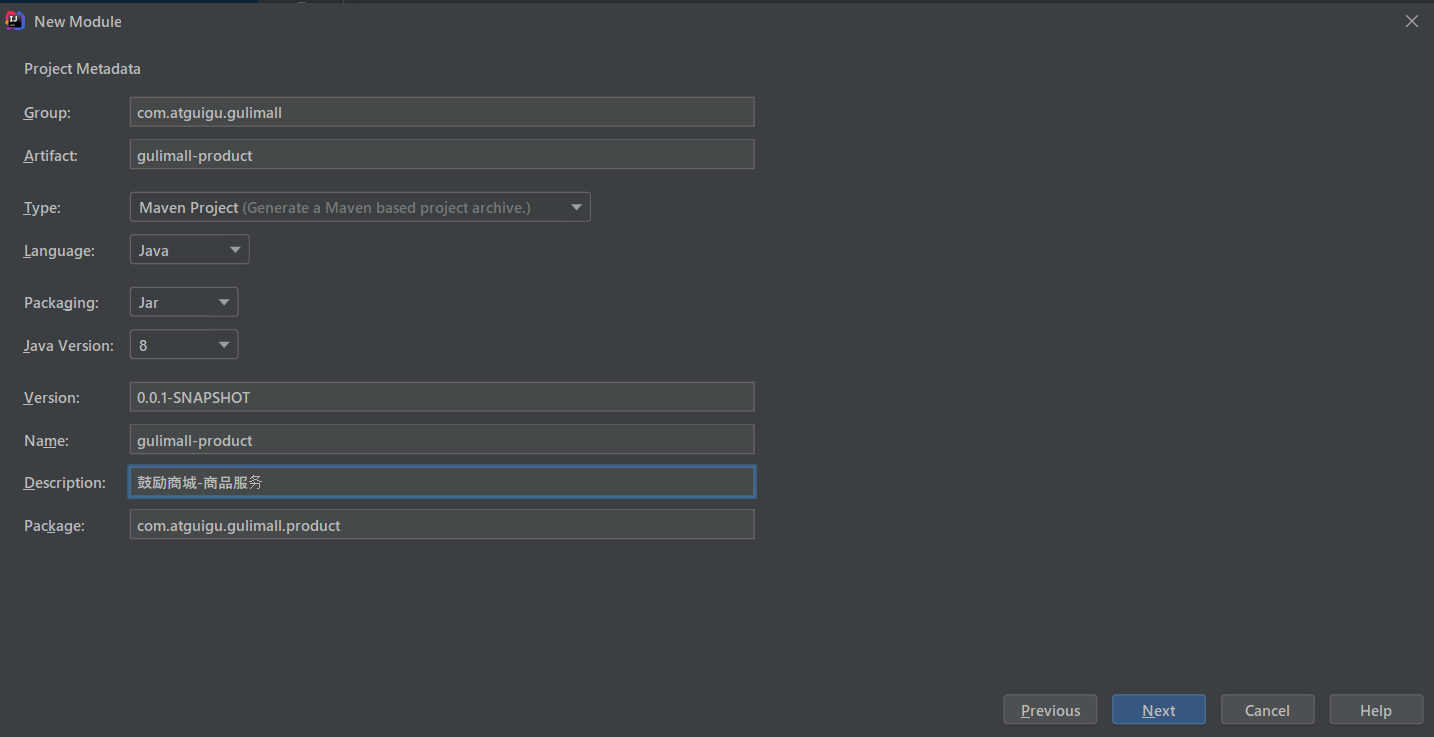
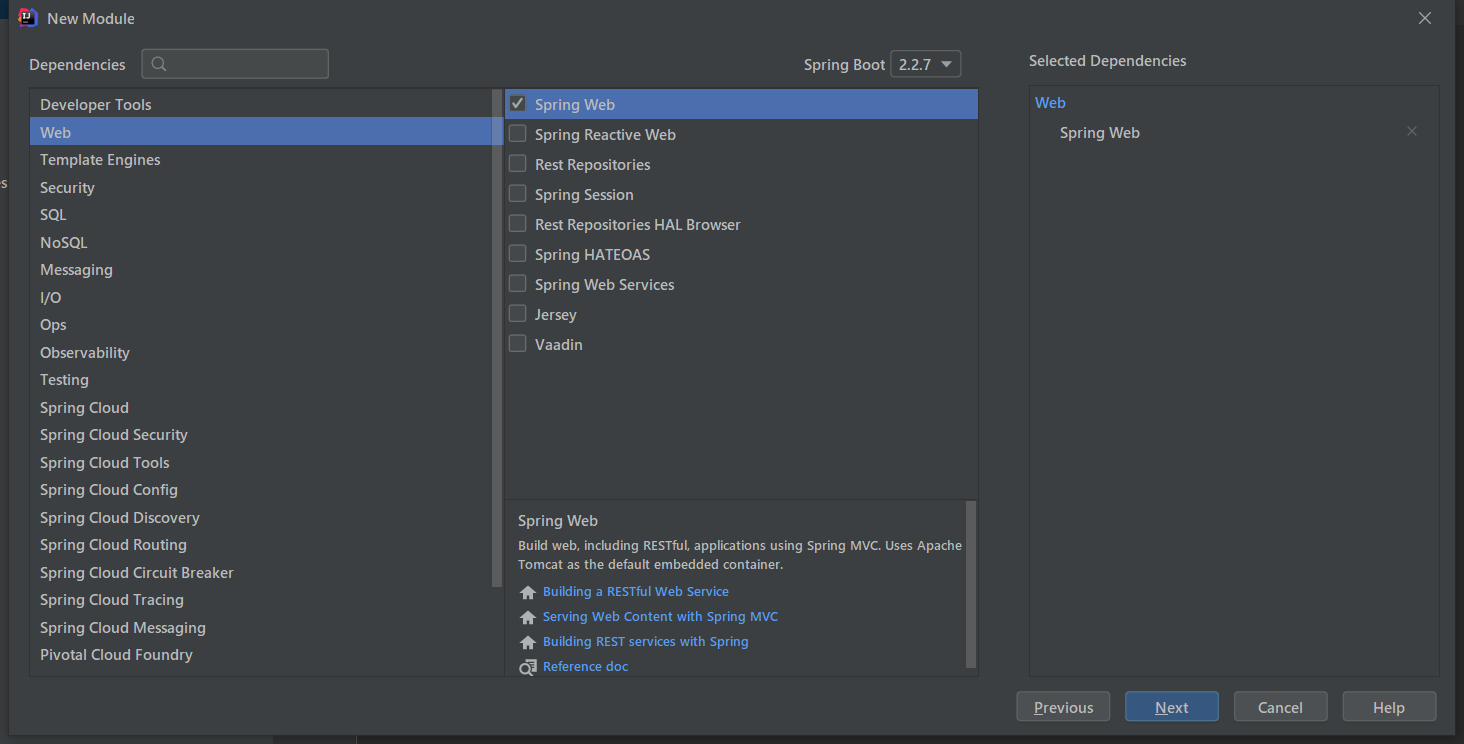
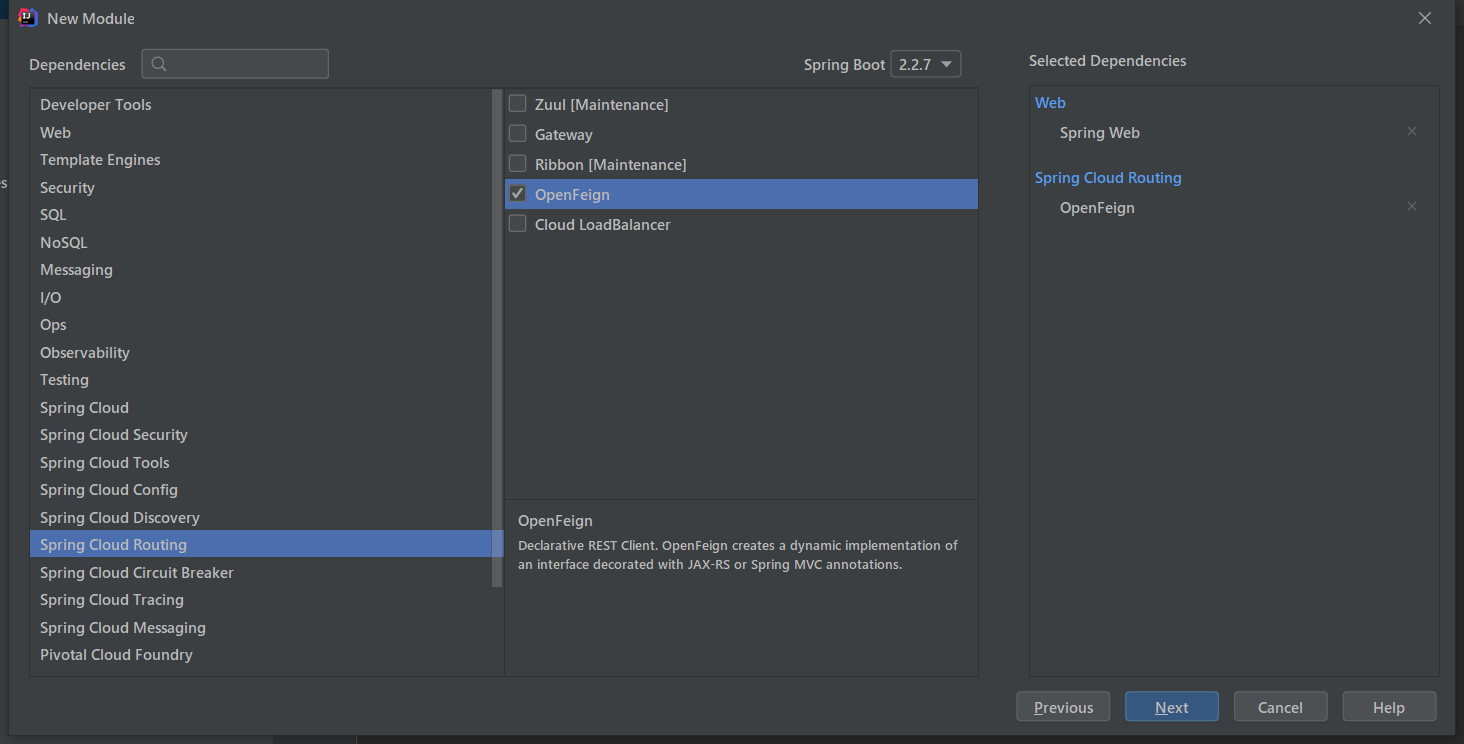
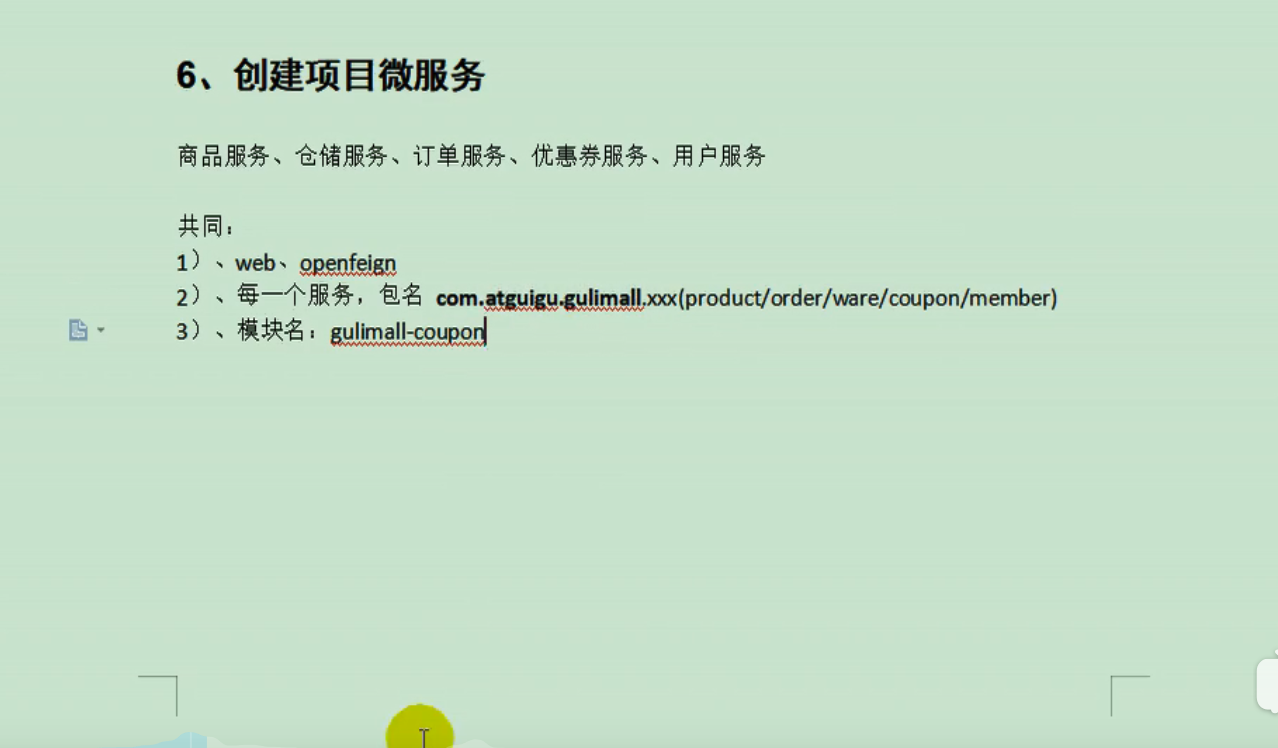
创建其他微服务
导入Spring Web和OpenFeign组件
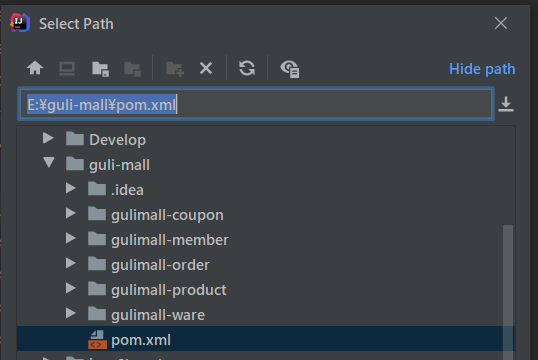
创建好各个微服务之后,随便复制出一个pom.xml
<?xml version="1.0" encoding="UTF-8"?>
<project xmlns="http://maven.apache.org/POM/4.0.0" xmlns:xsi="http://www.w3.org/2001/XMLSchema-instance"
         xsi:schemaLocation="http://maven.apache.org/POM/4.0.0 https://maven.apache.org/xsd/maven-4.0.0.xsd">
    <modelVersion>4.0.0</modelVersion>

    <groupId>com.atguigu.gulimall</groupId>
    <artifactId>gulimall</artifactId>
    <version>0.0.1-SNAPSHOT</version>
    <name>gulimall</name>
    <description>聚合服务</description>
<!--    聚合类型为pom来聚合其他小服务-->
    <packaging>pom</packaging>

    <modules>
        <module>gulimall-coupon</module>
        <module>gulimall-member</module>
        <module>gulimall-order</module>
        <module>gulimall-product</module>
        <module>gulimall-ware</module>
    </modules>


</project>
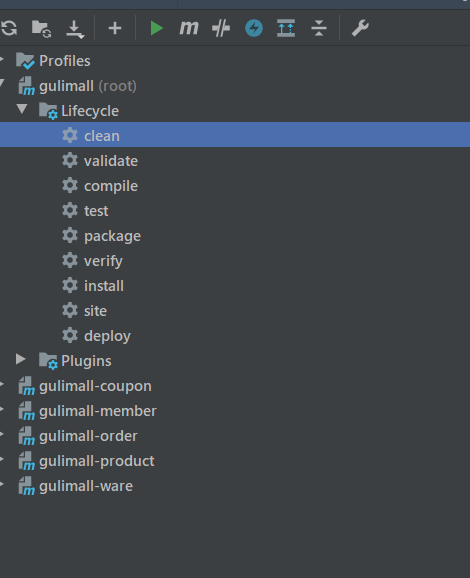
maven导入
点击clean(注意,这里我失败了,是因为我同时开着金山词霸,他们之间有冲突,先关闭金山词霸,再重启idea)
在ingore中填写要刨除版本控制的文件,然后将其余文件添加到版本控制
**/ 代表任意路径
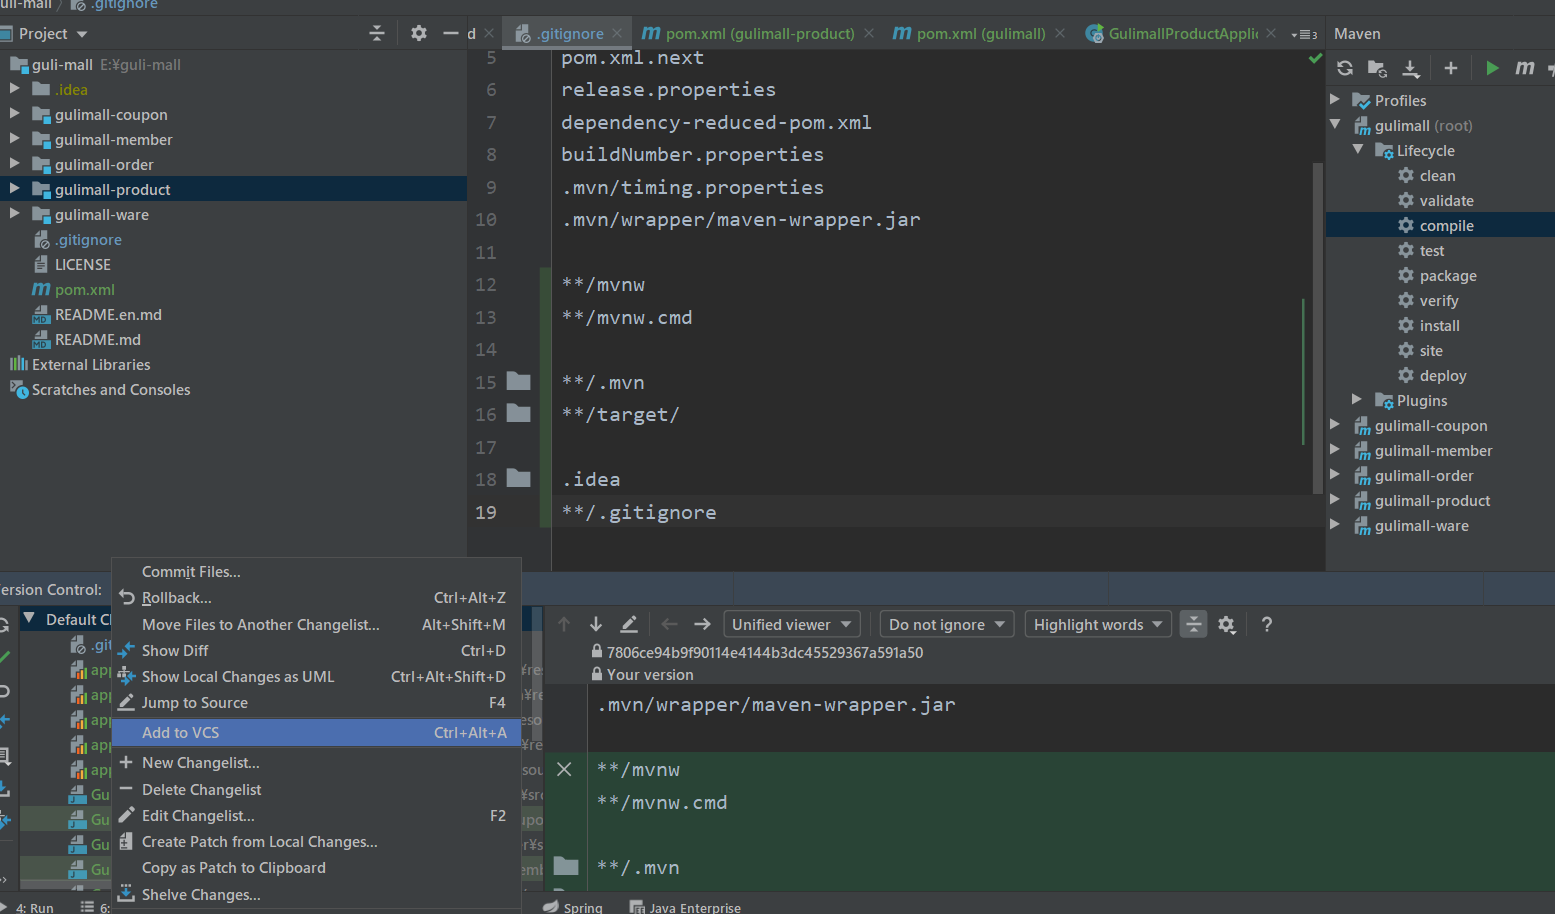
然后安装好gitee的插件 然后Commit Files,并去掉perform 和check
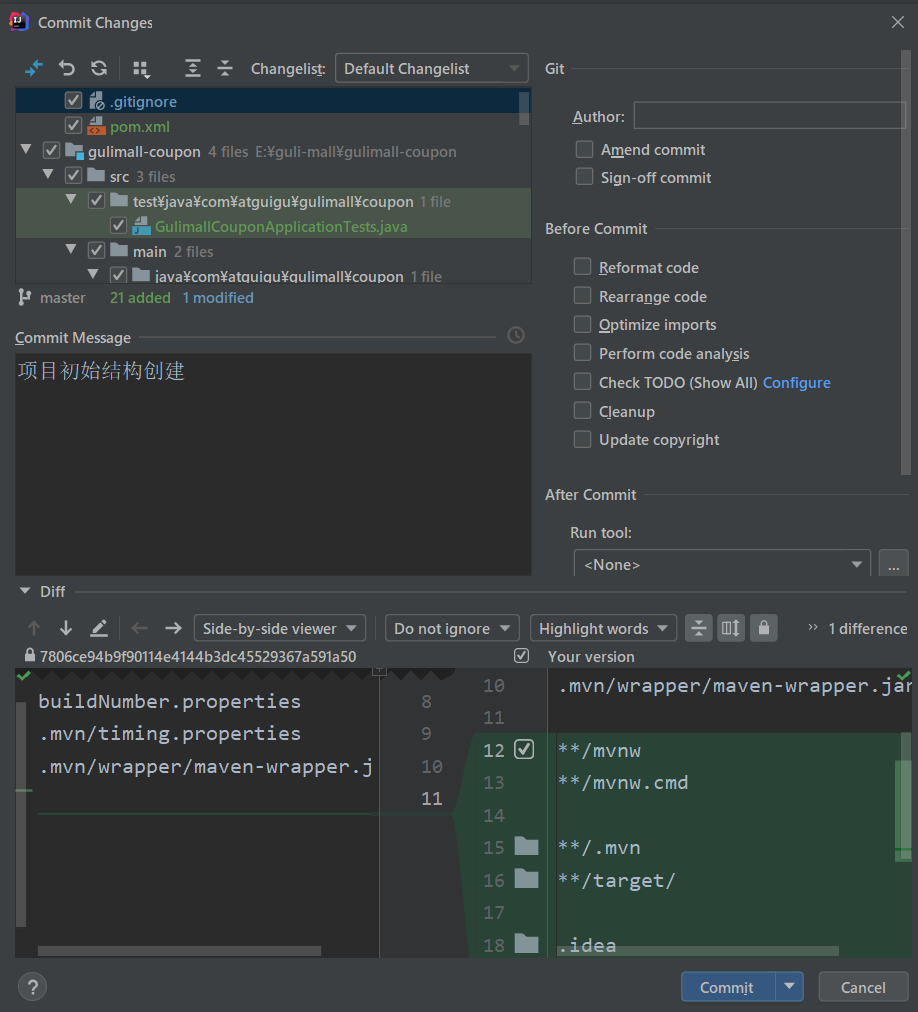
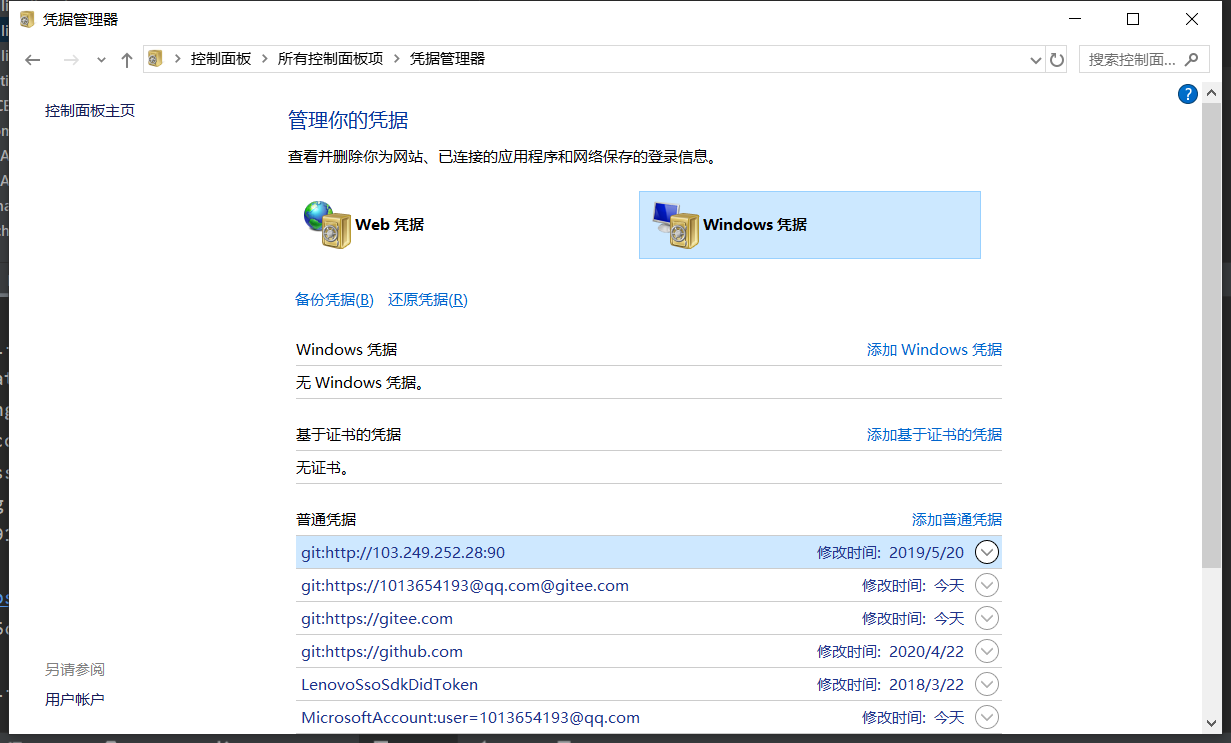
提交时候需要输入账号密码如果输错了 ,就去控制面板里面去改
创建数据库

下载renrenfast 并添加到项目里面
<module>renren-fast</module>
创建数据库gulimall__admin ,sql文件在项目里
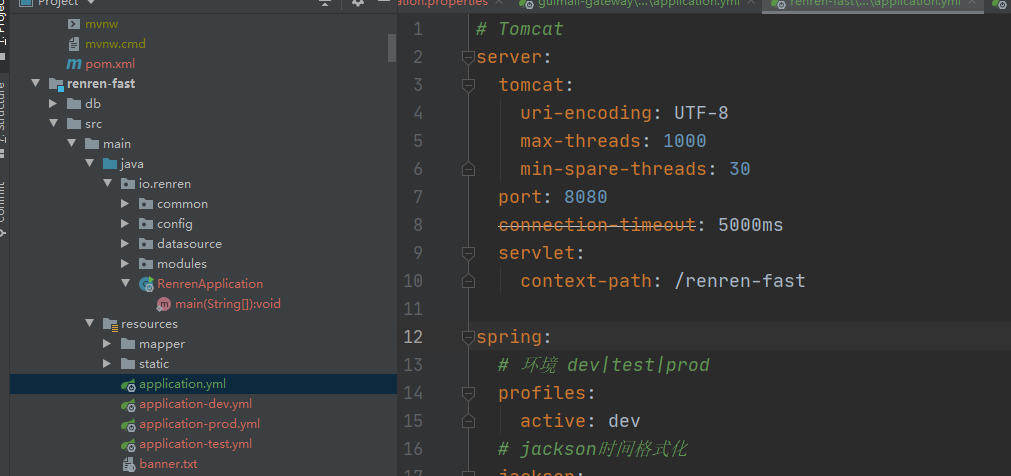
查看application.yml看见
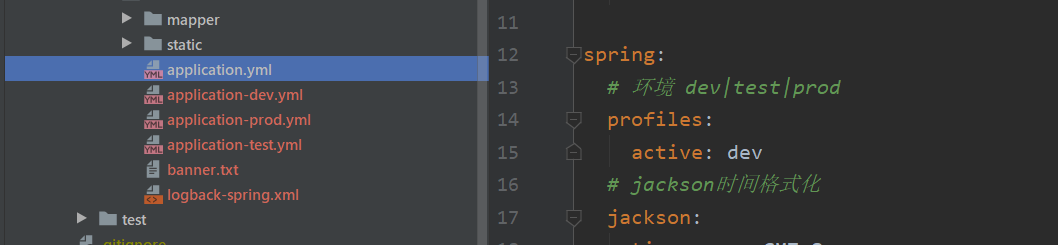
再去看application-dev.yml
配置数据源


启动后访问路径,由于是前后分离,需要前端项目建立连接

安装10.15.1node.js,
之前下载了12版本的导致很多地方失败,老师用的是10.16.3
[外链图片转存失败,源站可能有防盗链机制,建议将图片保存下来直接上传(img-APPMZzeg-1603541570045)(assets/1589470665348.png)]
npm config set registry http://registry.npm.taobao.org/

npm i node-sass --sass_binary_site=https://npm.taobao.org/mirrors/node-sass/

//运行前端项目

npm install

npm run dev
package.json中描述了每一个依赖的需要的版本
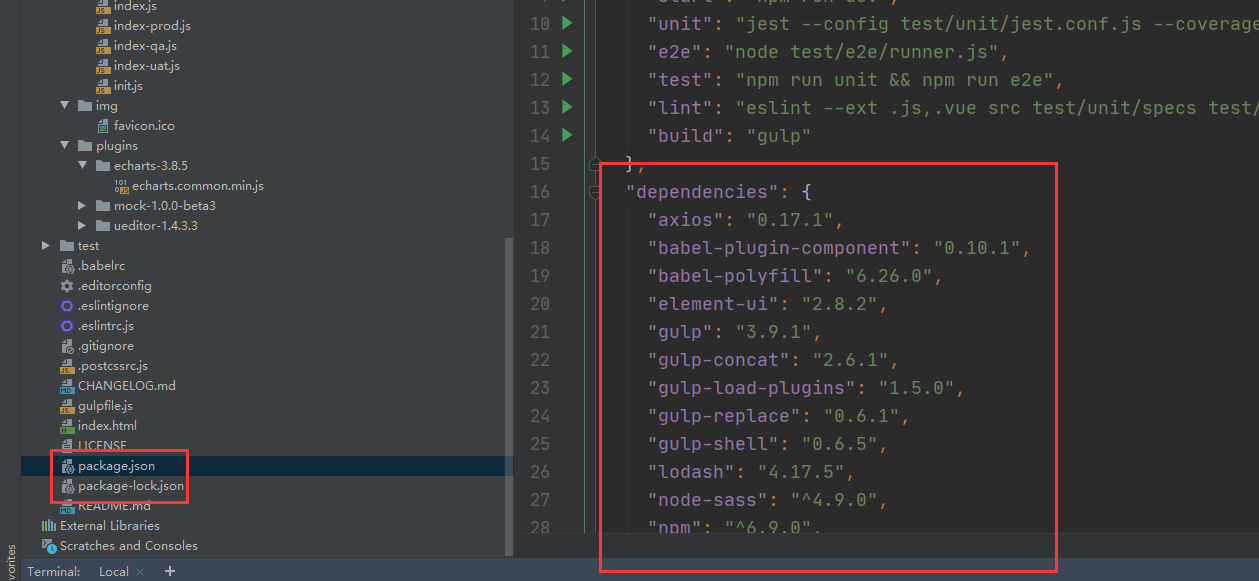
下载完之后会在node_moudle中一一显示
出现了在互相可以ping的到的情况下无法连接到navicat,之前手欠修改了权限且密码输成了123456,实际为root,现在改回来

grant all privileges on *.* to 'root'@'%' identified by 'root'; by后面为自己的数据库root用户的密码
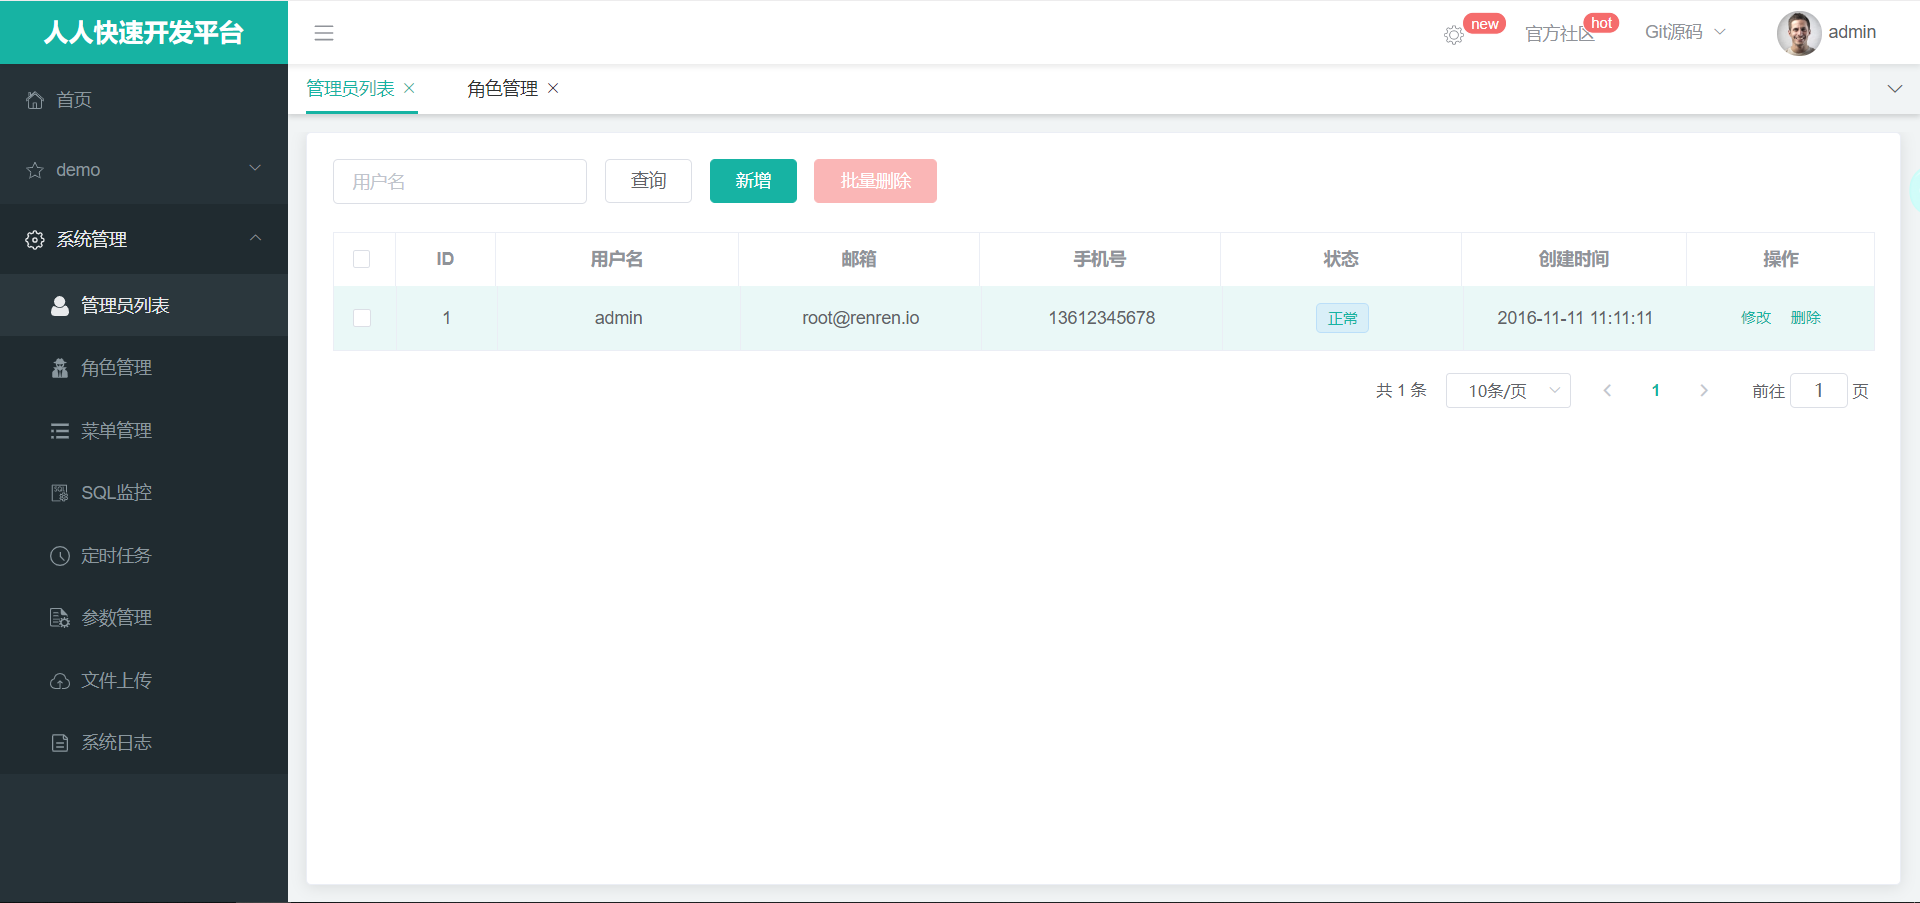
点击验证码:后台会出现相应sql语句
[外链图片转存失败,源站可能有防盗链机制,建议将图片保存下来直接上传(img-7m0v2enF-1603541570046)(assets/1589471247944.png)]
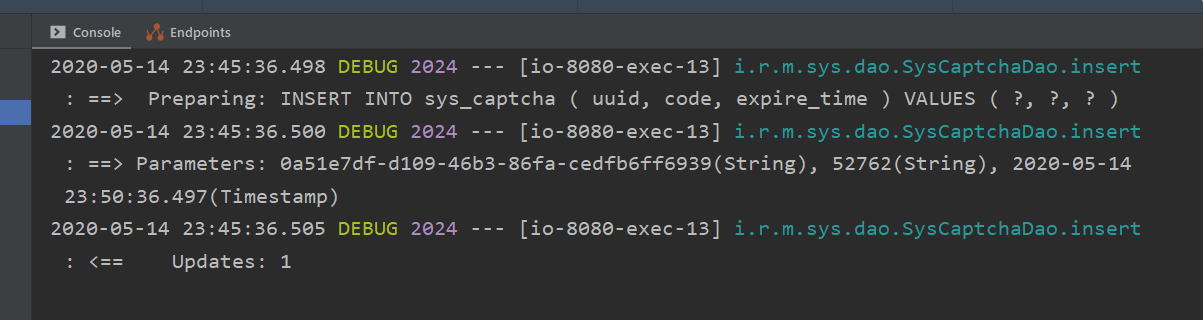
输入账号admin,密码admin 验证码,登录成功
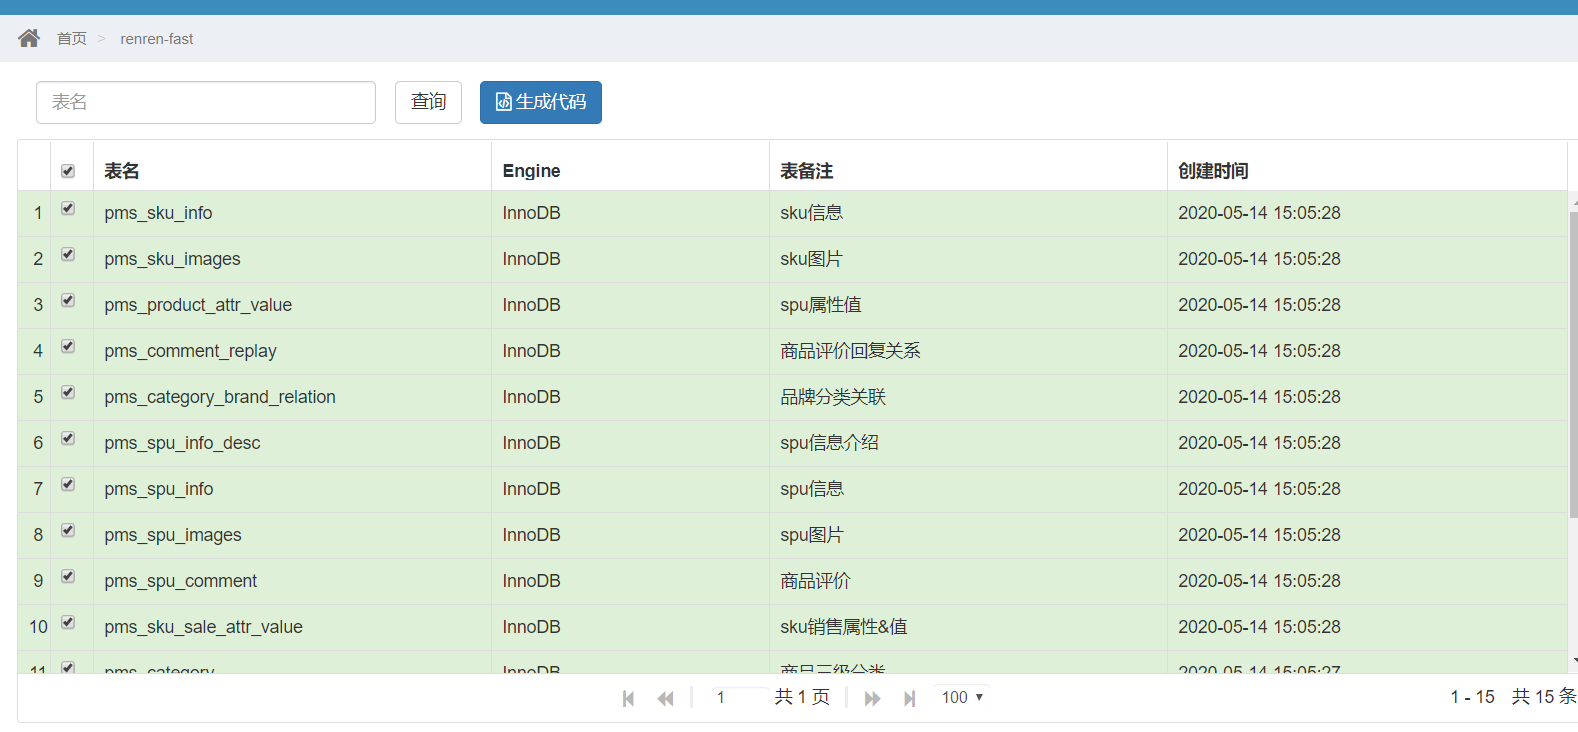
逆向工程
下载代码生成器
<module>renren-generator</module>`
同样修改yml数据源和配置文件,下图是配置文件
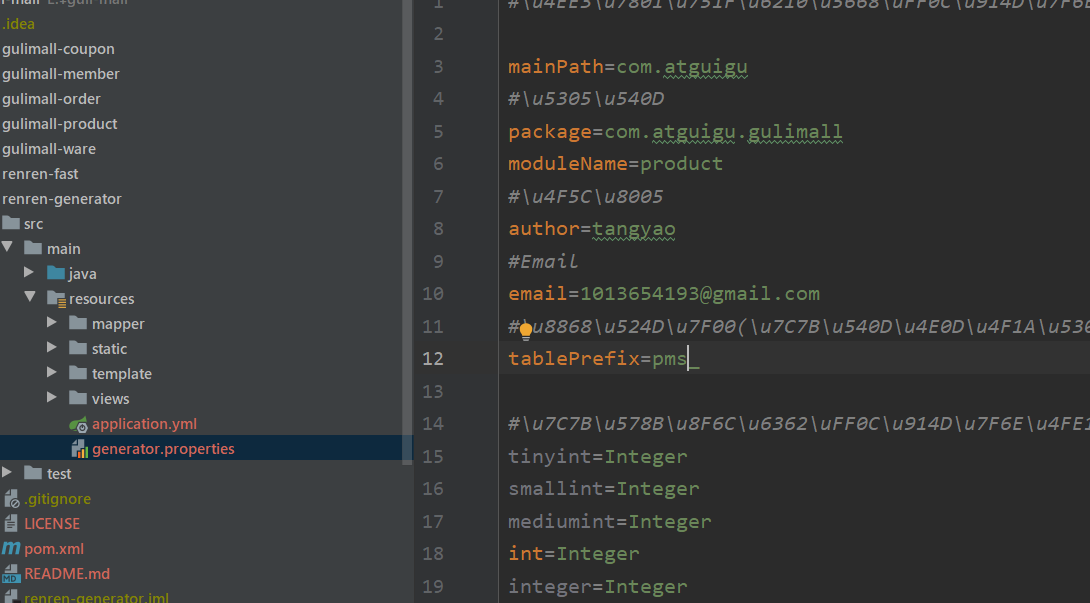
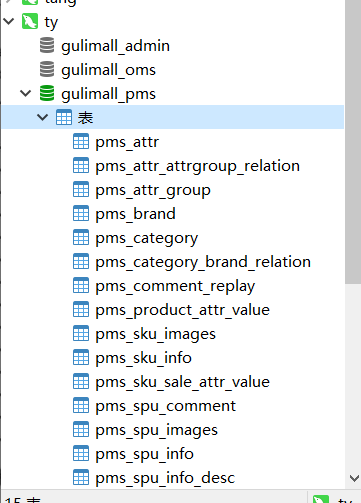
因为表是已pms开头,设定表前缀之后,每张表对应的javabean就不会加上前缀了
启动项目生成代码替换后替换main文件夹
发现有报错,需要再导入一些类
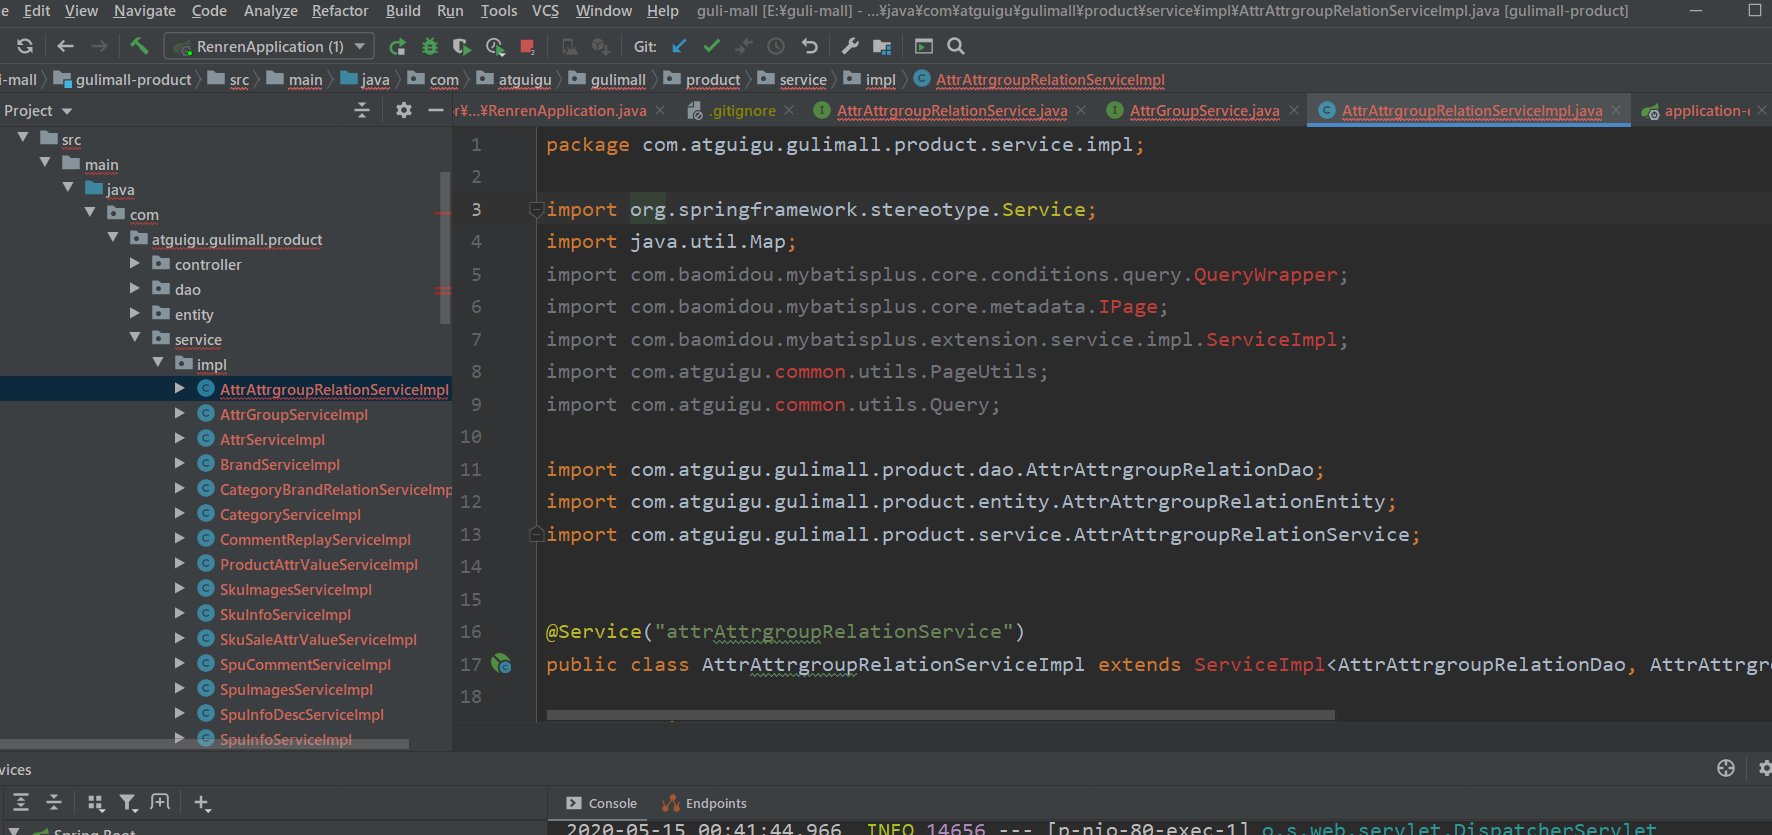
创建一个gulimall-common将以后每一个微服务需要依赖写在这里

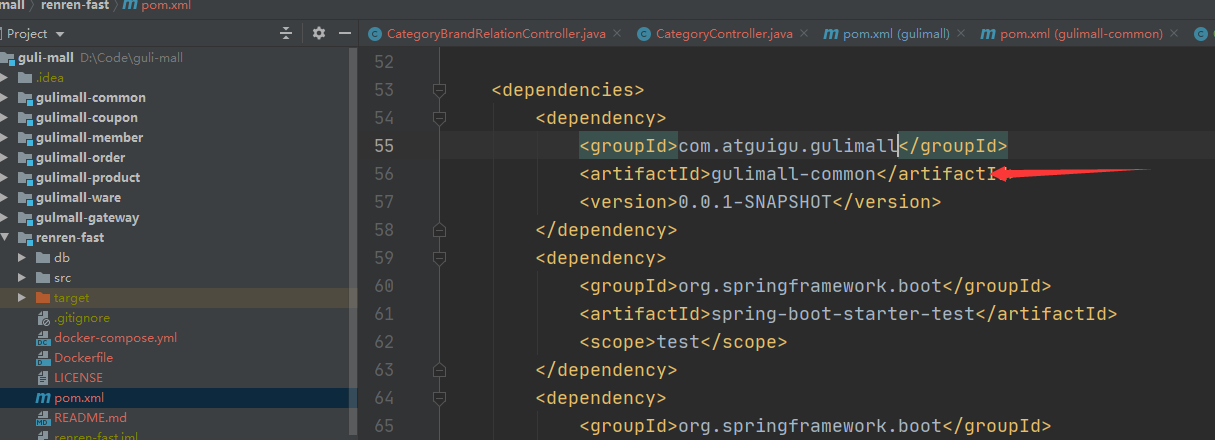
在gulimall-product的pom.xml里面添加
<dependency>
    <groupId>com.atguigu.gulimall</groupId>
    <artifactId>gulimall-common</artifactId>
    <version>0.0.1-SNAPSHOT</version>
</dependency>
在gulimall-common里面
<dependencies>
         <!-- MyBatis-Plus-->
        <dependency>
            <groupId>com.baomidou</groupId>
            <artifactId>mybatis-plus-boot-starter</artifactId>
            <version>3.3.1.tmp</version>
        </dependency>

        <dependency>
            <groupId>org.projectlombok</groupId>
            <artifactId>lombok</artifactId>
            <version>1.18.12</version>
        </dependency>


    </dependencies>
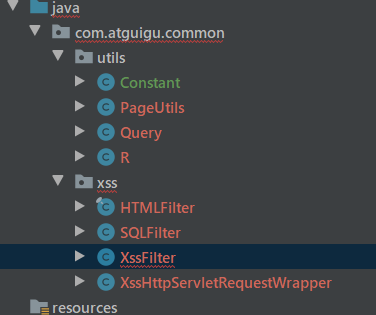
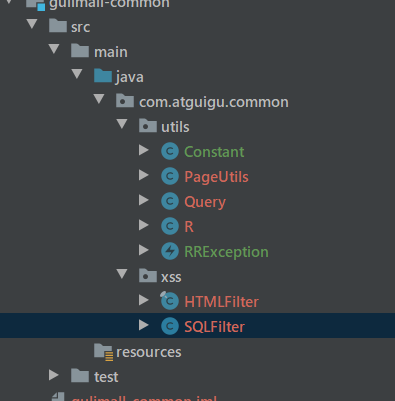
在gulimall-common项目里创建一个包com.atguigu.common.utils
从renrenfast导入这三个工具类
[外链图片转存失败,源站可能有防盗链机制,建议将图片保存下来直接上传(img-G9tE45pB-1603541570049)(assets/1589476816317.png)]
添加相关依赖
<!-- https://mvnrepository.com/artifact/org.apache.httpcomponents/httpcore -->
<dependency>
    <groupId>org.apache.httpcomponents</groupId>
    <artifactId>httpcore</artifactId>
    <version>4.4.12</version>
</dependency>
<dependency>
    <groupId>commons-lang</groupId>
    <artifactId>commons-lang</artifactId>
    <version>2.6</version>
</dependency>
陆续接着引入类
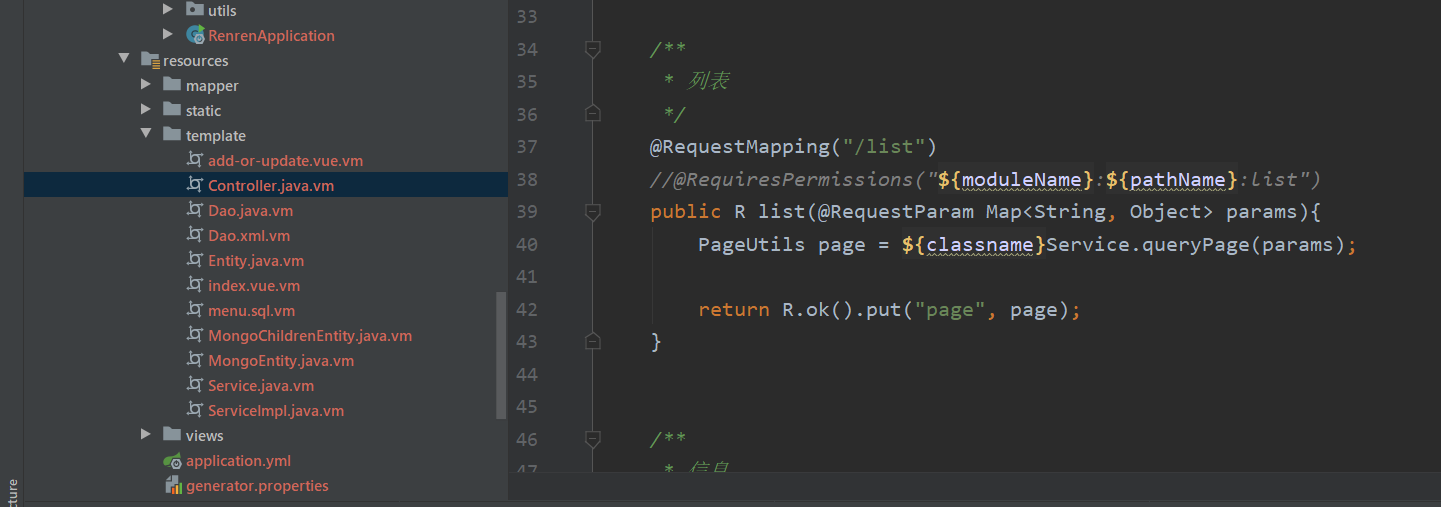
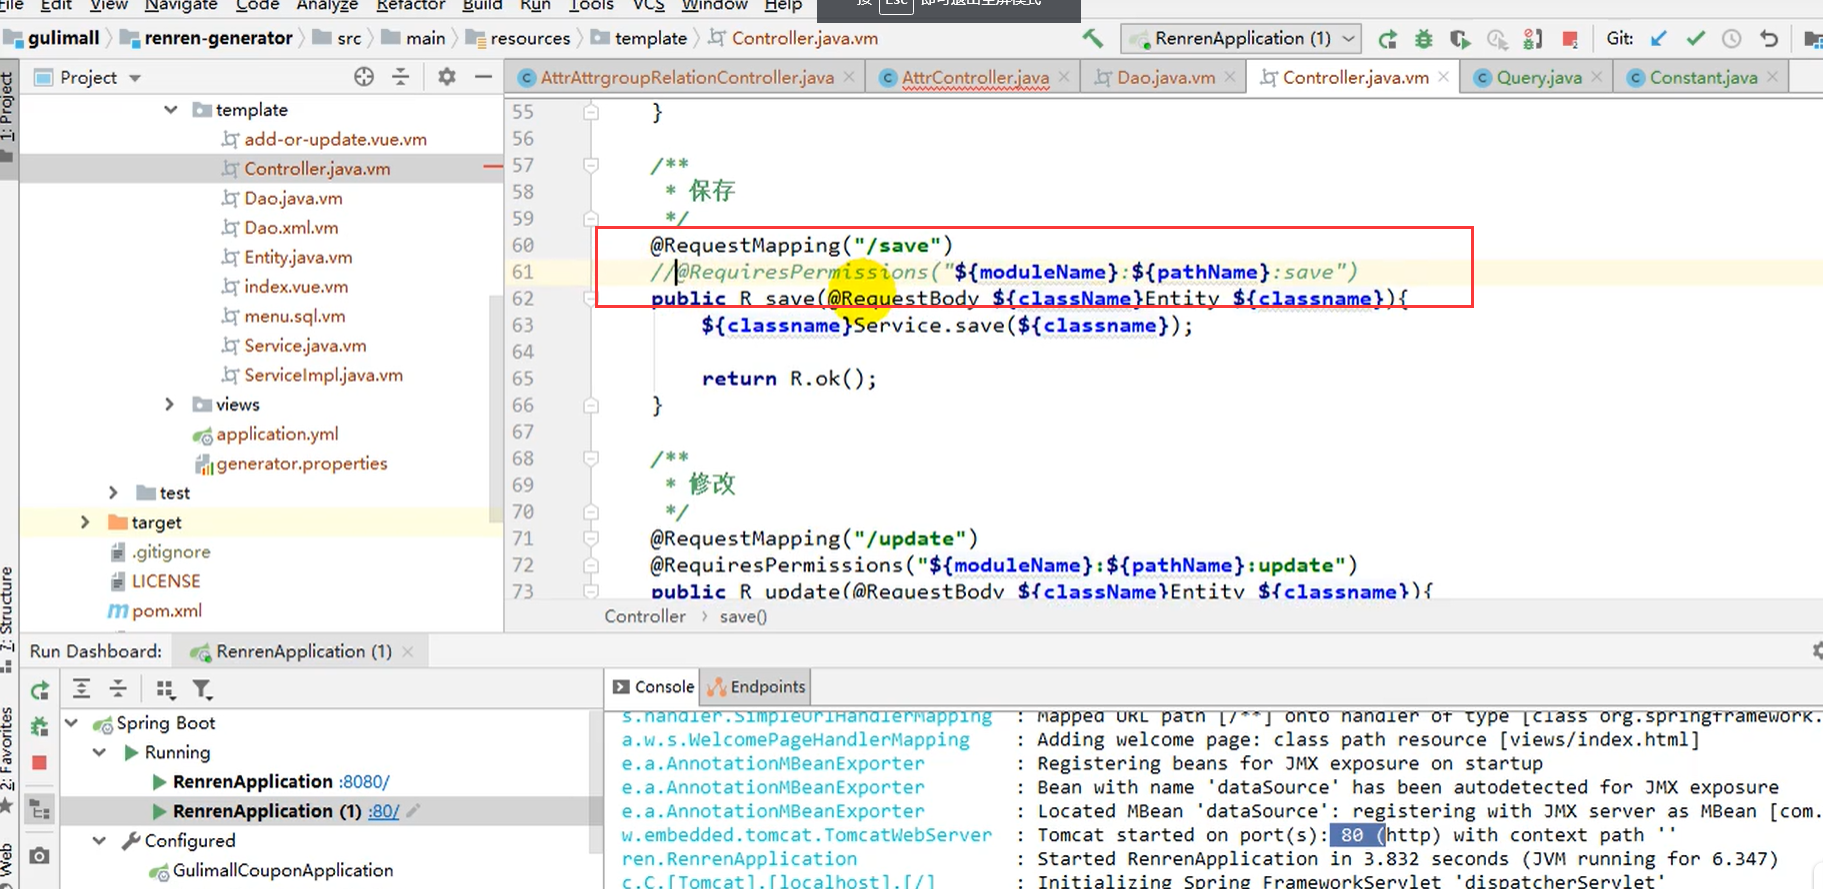
到模板里面注释掉注解信息和删掉import信息,重启项目然后替换掉原来的Controller文件夹
mysql驱动8.0会自动适配5.7版本
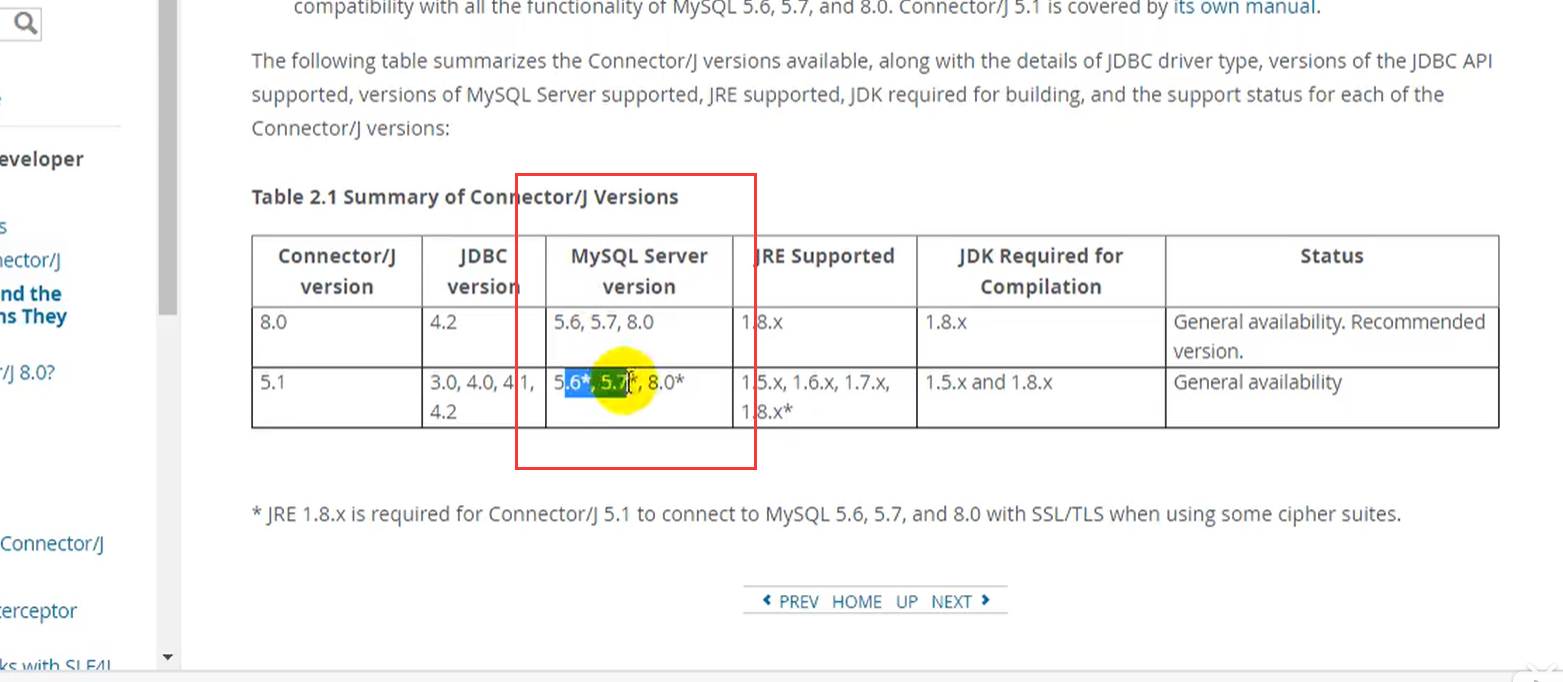
导入mysql驱动
<!-- https://mvnrepository.com/artifact/mysql/mysql-connector-java -->
<dependency>
    <groupId>mysql</groupId>
    <artifactId>mysql-connector-java</artifactId>
    <version>8.0.17</version>
</dependency>
导入servlet依赖,但是设置scope为provided,为目标环境已存在,打包时就不带上啦,因为tomcat自带。
<dependency>
    <groupId>javax.servlet</groupId>
    <artifactId>servlet-api</artifactId>
    <version>2.5</version>
    <scope>provided</scope>
</dependency>
最终效果
在模板中注释掉权限控制
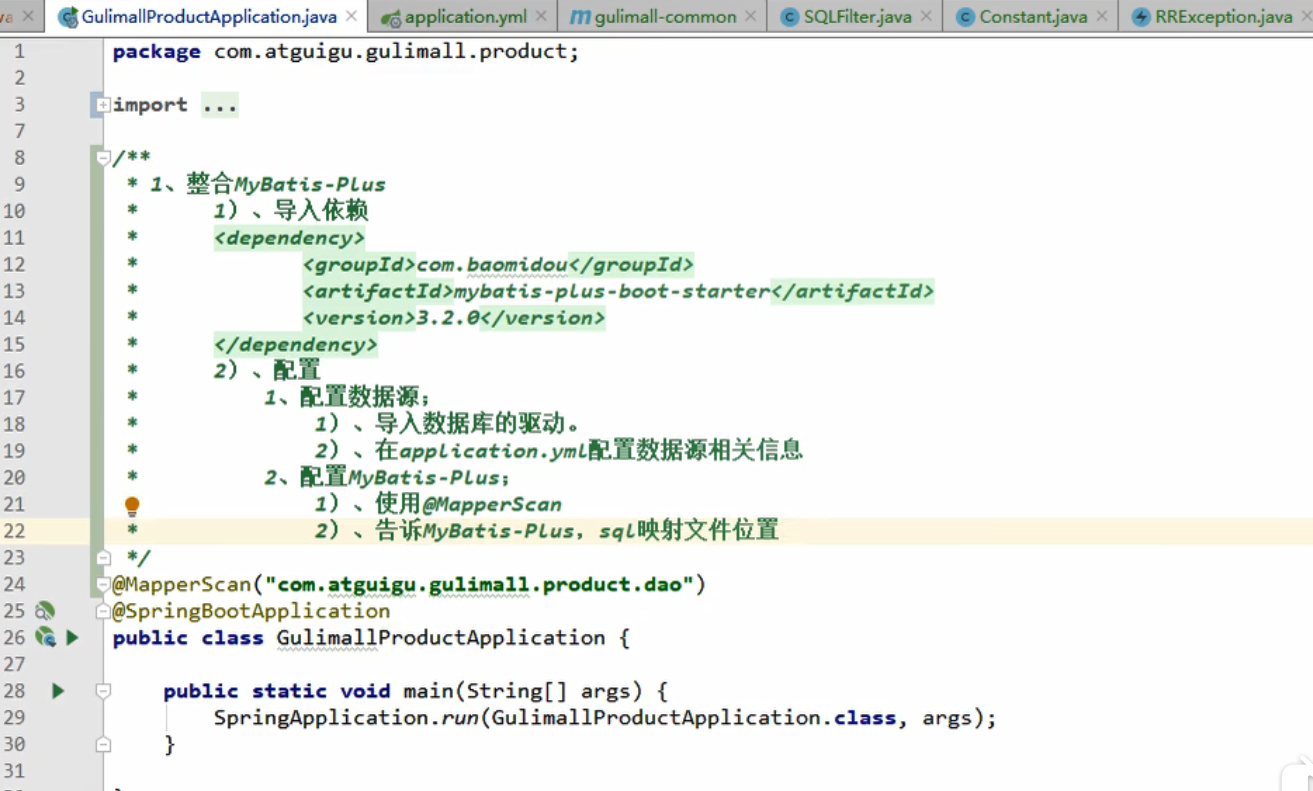
/告诉MyBatisPlusMapper接口都在哪里呢
@MapperScan("com.atguigu.gulimall.product.dao")
@SpringBootApplication
public class GulimallProductApplication {

    public static void main(String[] args) {
        SpringApplication.run(GulimallProductApplication.class, args);
    }

}
Spring:
  datasource:
    username: root
    password: root
    url: jdbc:mysql://192.168.154.131:3306/gulimall_pms
    driver-class-name: com.mysql.cj.jdbc.Driver
mybatis-plus:
  mapper-locations: classpath:/mapper/**/*.xml
  global-config:
    db-config:
      id-type: auto
测试api
@SpringBootTest
class GulimallProductApplicationTests {

    @Autowired
    BrandService brandService;

    @Test
    void contextLoads() {
        BrandEntity entity = new BrandEntity();
//        entity.setName("唐尧");
//        brandService.save(entity);
//        System.out.println("保存成功");

//        entity.setBrandId(1L);
//        entity.setDescript("学习学习");
//        entity.setName("奥特们");
//        brandService.updateById(entity);
//        BrandEntity entity1 = brandService.getOne(new QueryWrapper<BrandEntity>().eq("brand_id", 1));
//        System.out.println(entity1);
	brandService.list(newQueryWrapper<BrandEntity().eq("brand_id",1)).forEach(System.out::println);


    }

}
接下来就导入逆向工程完成其他代码
测试
模块名+表名+功能名
http://localhost:8080/coupon/coupon/list
{"msg":"success","code":0,"page":{"totalCount":0,"pageSize":10,"totalPage":0,"currPage":1,"list":[]}}
http://localhost:8000/member/growthchangehistory/list
{"msg":"success","code":0,"page":{"totalCount":0,"pageSize":10,"totalPage":0,"currPage":1,"list":[]}}
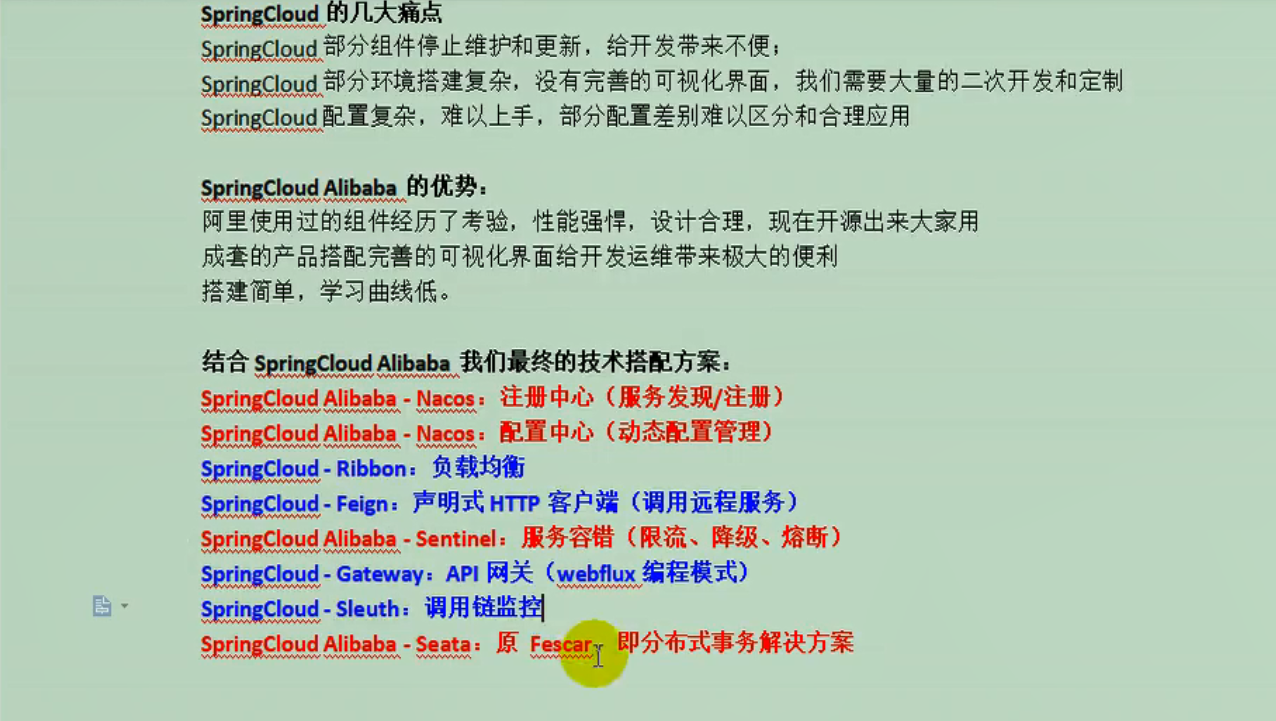
Spring Cloud Alibaba
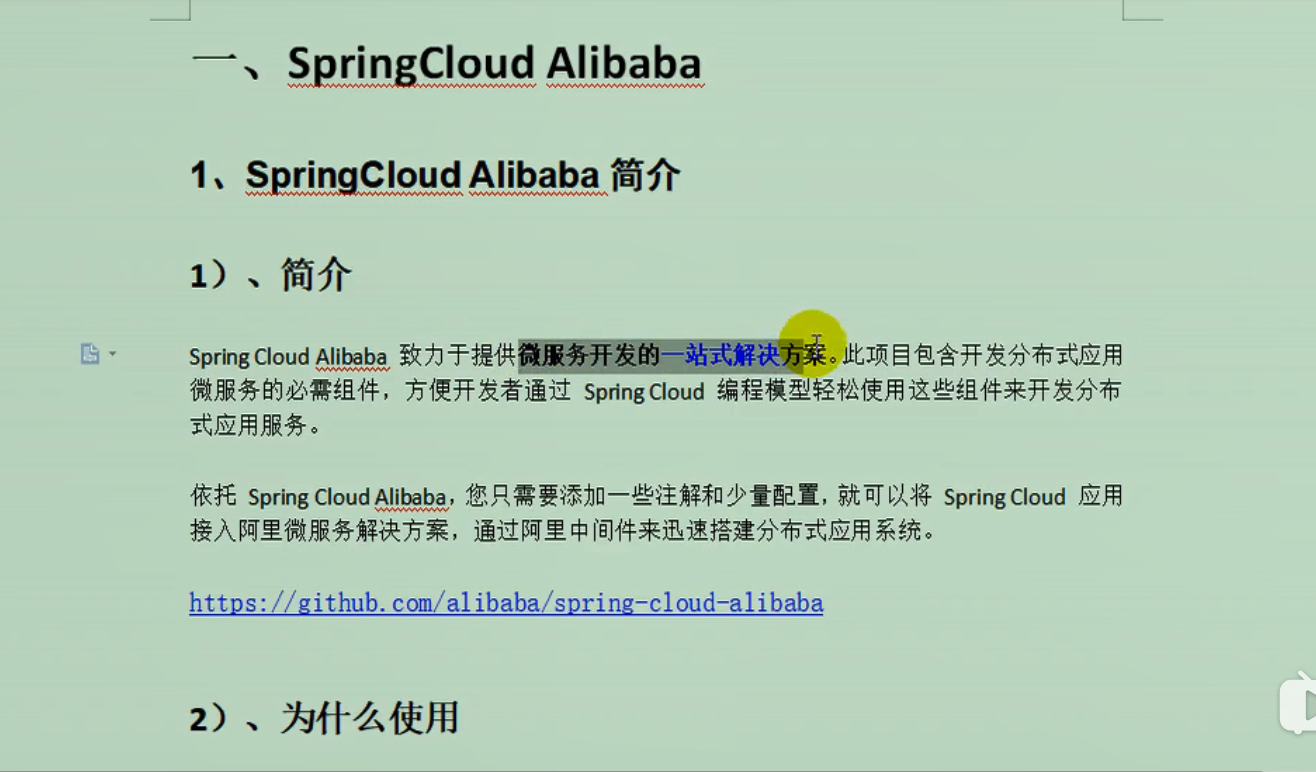
https://github.com/alibaba/spring-cloud-alibaba
//依赖管理,以后再dependencies里面引用Spring Cloud Alibaba就不用写版本号了
<dependencyManagement>
    <dependencies>
        <dependency>
            <groupId>com.alibaba.cloud</groupId>
            <artifactId>spring-cloud-alibaba-dependencies</artifactId>
            <version>2.2.0.RELEASE</version>
            <type>pom</type>
            <scope>import</scope>
        </dependency>
    </dependencies>
</dependencyManagement>
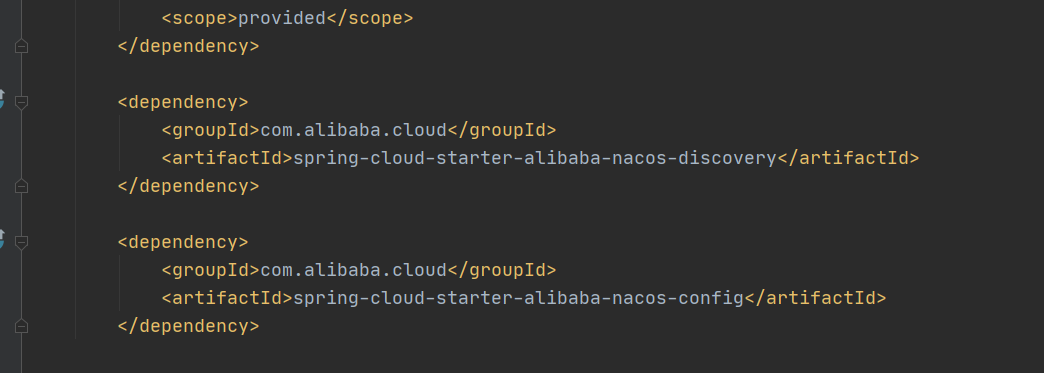
每一个微服务都需要注册中心,所以导入依赖管理到common模块
 <dependency>
     <groupId>com.alibaba.cloud</groupId>
     <artifactId>spring-cloud-starter-alibaba-nacos-discovery</artifactId>
 </dependency>
nacos作为注册中心
下载完nacos要yml里面配置这里以coupon模块举例
Spring:
  datasource:
    username: root
    password: root
    url: jdbc:mysql://192.168.154.131:3306/gulimall_sms
    driver-class-name: com.mysql.cj.jdbc.Driver
  cloud:
    nacos:
      discovery:
        server-addr: 127.0.0.1:8848
  application:
    name: gulimall-coupon

mybatis-plus:
  mapper-locations: classpath:/mapper/**/*.xml
  global-config:
    db-config:
      id-type: auto

server:
  port: 7000
访问http://127.0.0.1:8848/nacos 账号密码都是nacos
对于是否配置@EnableDiscoveryClient,亲测,不写注解也可以注册进去,他的话多暂时信他的。

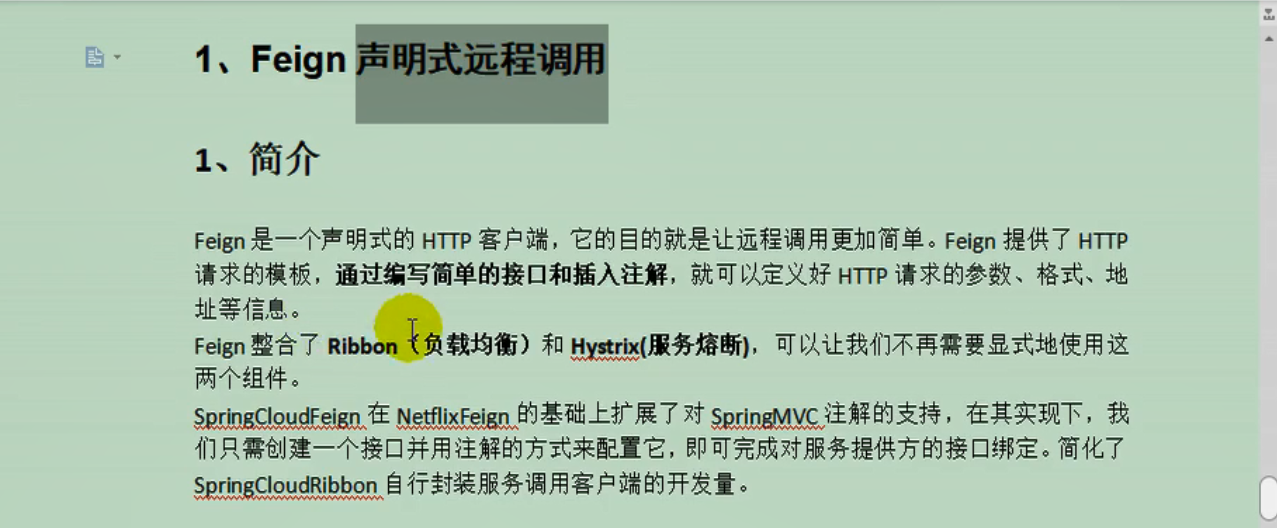
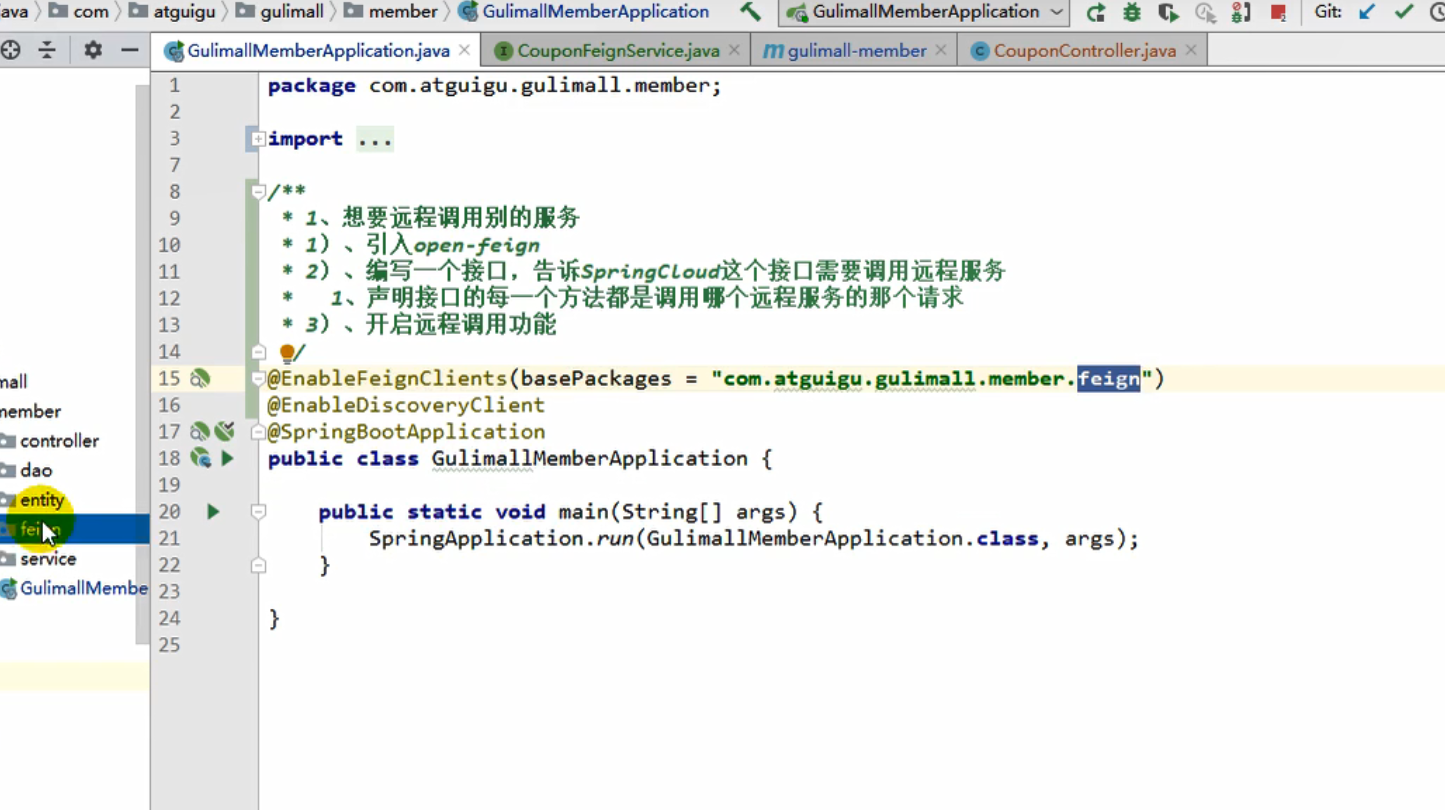
Fegin声明式远程调用
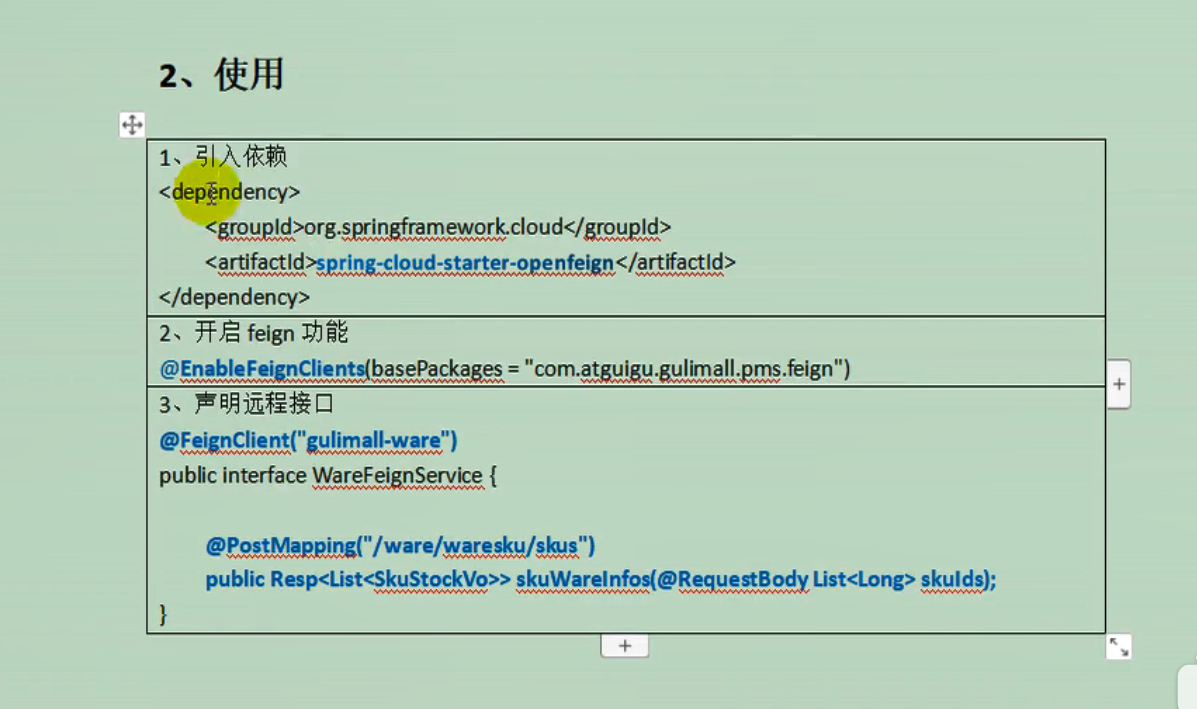
步骤:
在gulimall-coupon的CouponController里面新添加一个memberCoupon方法
@RequestMapping("memberCoupon/list")
public R memberCoupon(){
    CouponEntity couponEntity = new CouponEntity();
    couponEntity.setCouponName("满十减一");
    return R.ok().put("memberCoupon",Arrays.asList(couponEntity));
}
在gulimall-member下com.atguigu.gulimall.member下新创建一个包fegin并编写一个新的接口添加@FeignClient注解为要远程调用的模块名,赋值要调用的方法签名,注意请求路径要写全
package com.atguigu.gulimall.member.feign;

import com.atguigu.common.utils.R;
import org.springframework.cloud.openfeign.FeignClient;
import org.springframework.web.bind.annotation.RequestMapping;

@FeignClient("gulimall-coupon")
public interface CouponFeignService {

    @RequestMapping("coupon/coupon/memberCoupon/list")
    public R memberCoupon();
}
在gulimall-member下的MemberController新增一个方法,通过接口中的方法实行远程调用,
@Autowired
private CouponFeignService couponFeignService;

@RequestMapping("coupon/list")
public R couponlist(){

    MemberEntity memberEntity = new MemberEntity();
    memberEntity.setNickname("帅哥");
    R memberCoupon = couponFeignService.memberCoupon();
    return R.ok().put("member",memberEntity).
        put("memberCoupon",memberCoupon.get("memberCoupon"));
}
最后增加注解@EnableFeignClients开启远程调用功能,把feign的全包名复制进去,只要服务启动,就会扫描这个包下所有含@FeignClient的接口
@EnableFeignClients(basePackages = "com.atguigu.gulimall.member.feign")
@SpringBootApplication
public class GulimallMemberApplication {

    public static void main(String[] args) {
        SpringApplication.run(GulimallMemberApplication.class, args);
    }

}
浏览器输入访问路径:http://localhost:8000/member/member/coupon/list

出现以下结果表示成功
{"msg":"success","code":0,"member":{"id":null,"levelId":null,"username":null,"password":null,"nickname":"帅哥","mobile":null,"email":null,"header":null,"gender":null,"birth":null,"city":null,"job":null,"sign":null,"sourceType":null,"integration":null,"growth":null,"status":null,"createTime":null},"memberCoupon":[{"id":null,"couponType":null,"couponImg":null,"couponName":"满十减一","num":null,"amount":null,"perLimit":null,"minPoint":null,"startTime":null,"endTime":null,"useType":null,"note":null,"publishCount":null,"useCount":null,"receiveCount":null,"enableStartTime":null,"enableEndTime":null,"code":null,"memberLevel":null,"publish":null}]}
如果服务掉线会显示连接超时

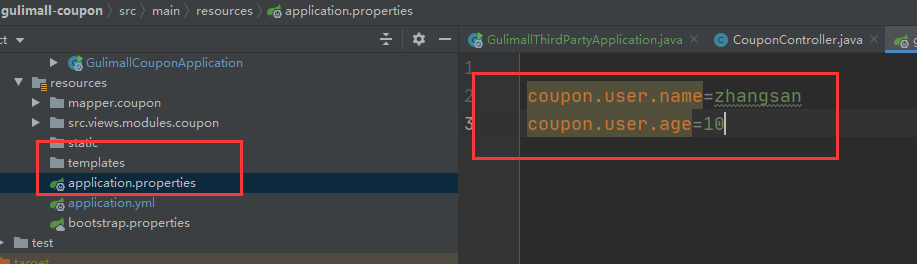
如何使用nacos作为配置中心统一管理配置
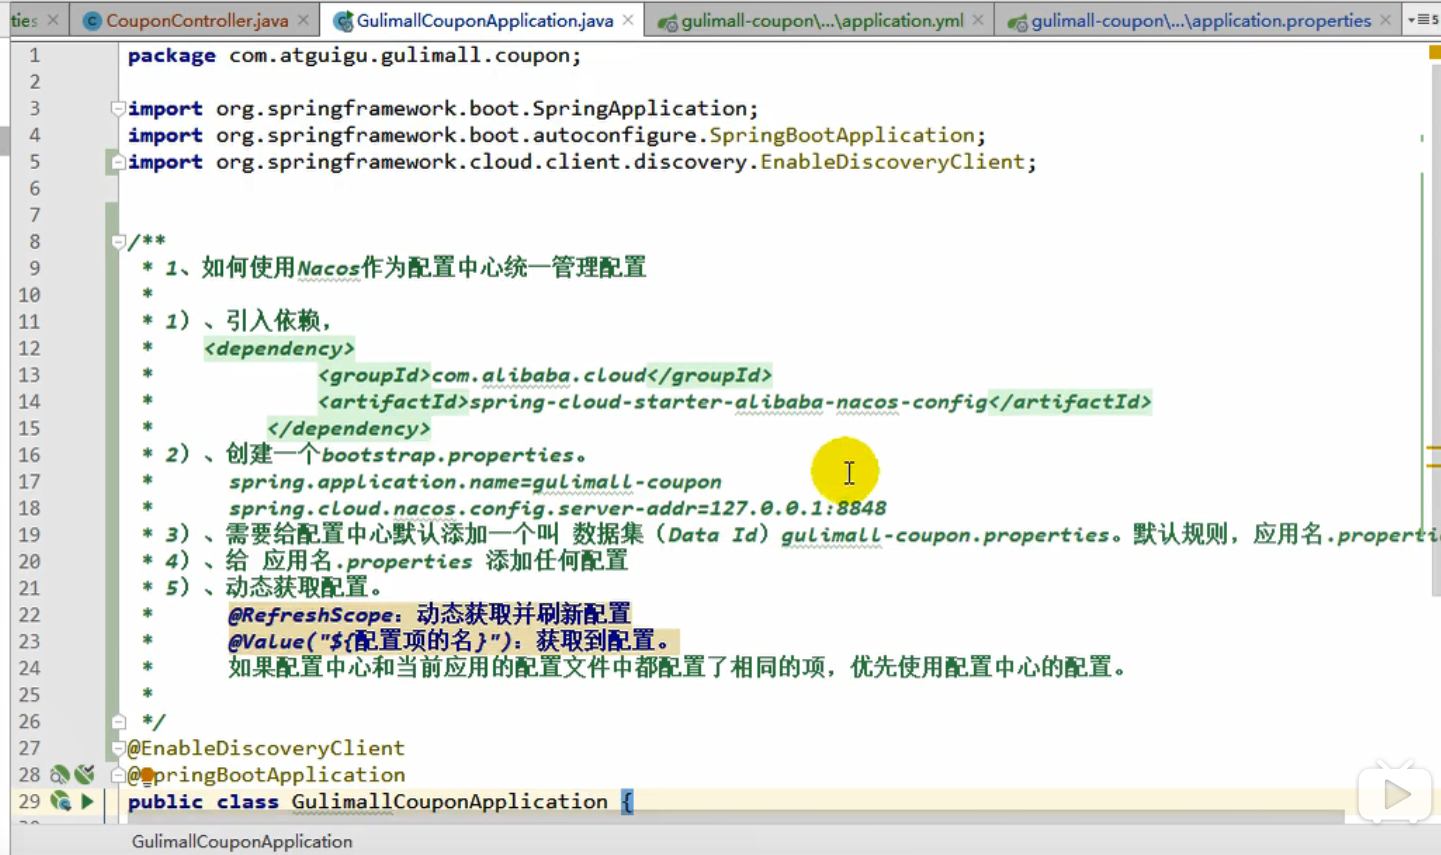
<dependency>
    <groupId>com.alibaba.cloud</groupId>
    <artifactId>spring-cloud-starter-alibaba-nacos-config</artifactId>
</dependency>
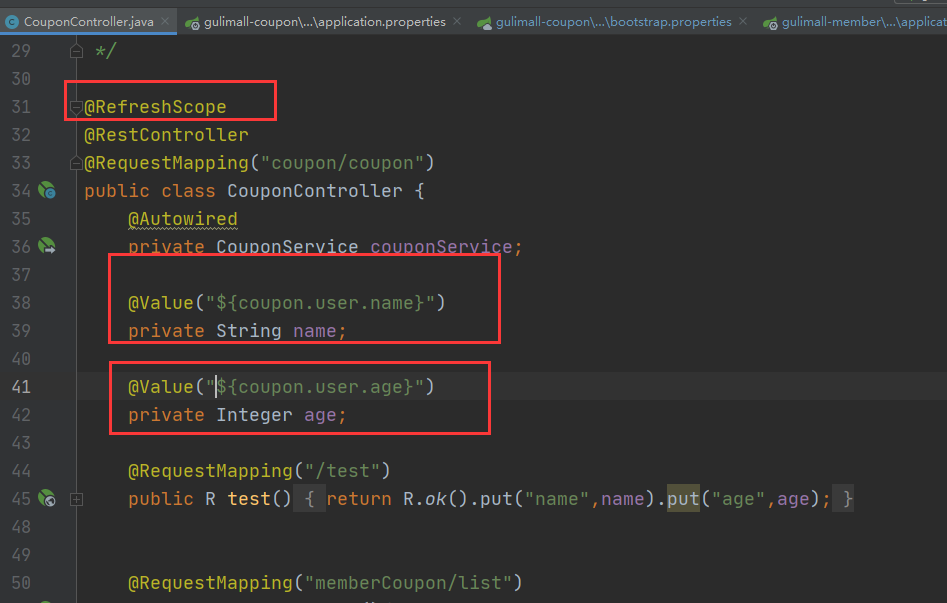
spring.application.name=gulimall-coupon
spring.cloud.nacos.config.server-addr=127.0.0.1:8848
RefreshScope实时刷新,从配置中心实时获取,不需要为微服务打包重新发布到服务器中
nacos核心
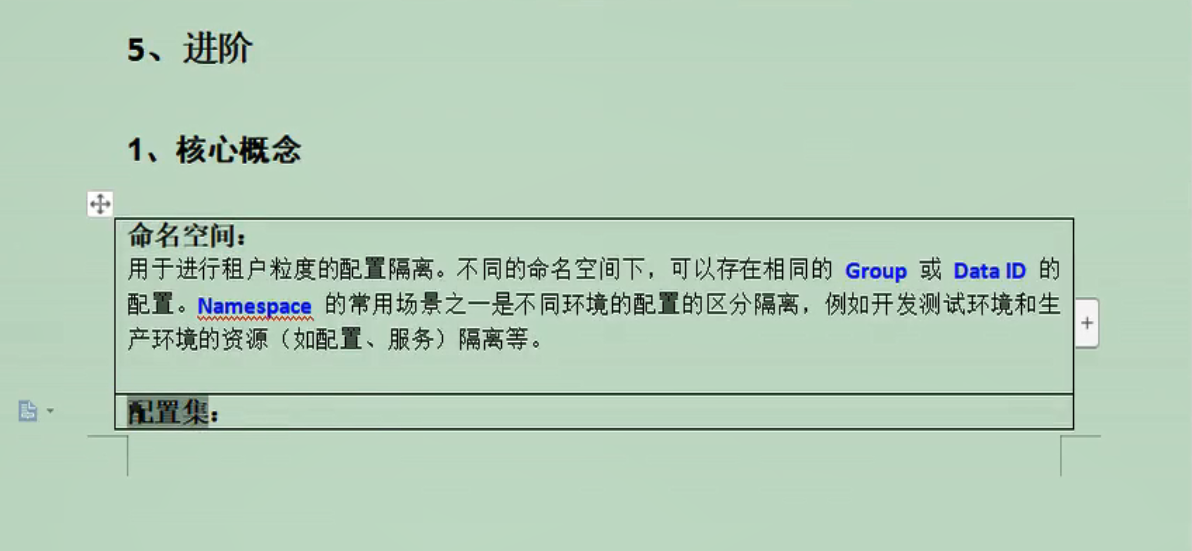

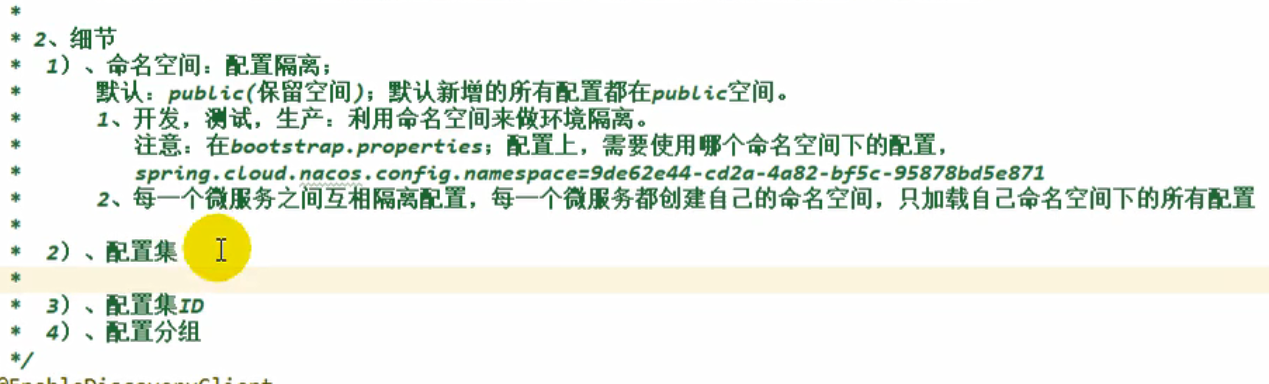

增加prod命名空间,
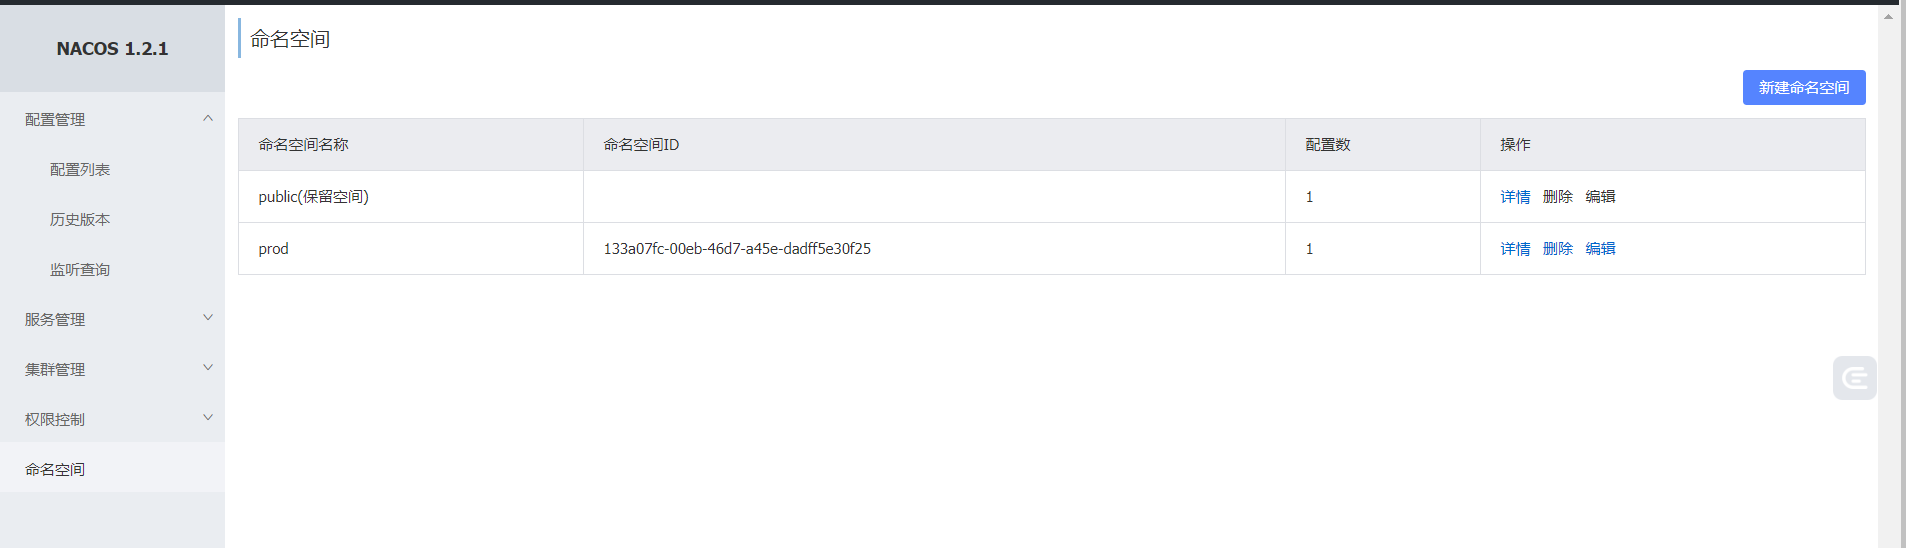
spring.application.name=gulimall-coupon
spring.cloud.nacos.config.server-addr=127.0.0.1:8848
spring.cloud.nacos.config.namespace=133a07fc-00eb-46d7-a45e-dadff5e30f25
spring.cloud.nacos.config.group=1111
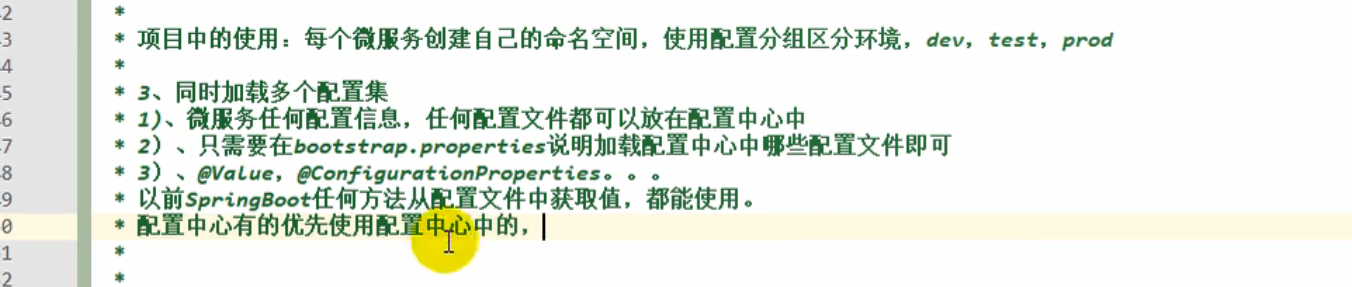
加载多配置集
bootstrap.properties
spring.application.name=gulimall-coupon
spring.cloud.nacos.config.server-addr=127.0.0.1:8848
spring.cloud.nacos.config.namespace=7bab8bfb-d5df-47a1-b3c0-88bcd09f5256
#spring.cloud.nacos.config.group=dev

spring.cloud.nacos.config.extension-configs[0].data-id=datasource.yml
spring.cloud.nacos.config.extension-configs[0].group=dev
spring.cloud.nacos.config.extension-configs[0].refresh=true

spring.cloud.nacos.config.extension-configs[1].data-id=mybatis.yml
spring.cloud.nacos.config.extension-configs[1].group=dev
spring.cloud.nacos.config.extension-configs[1].refresh=true

spring.cloud.nacos.config.extension-configs[2].data-id=other.yml
spring.cloud.nacos.config.extension-configs[2].group=dev
spring.cloud.nacos.config.extension-configs[2].refresh=true
结果为
{"msg":"success","code":0,"name":"zhangsan","age":10}
因为f默认加载的是DEFAULT_GROUP,而环境中没有这个分组(已经删除),读取为application.properties里面的内容。

想要读取dev分组里面的内容,所以指定分组为dev,改后结果为:
{"msg":"success","code":0,"name":"dev","age":18}
微服务只需要保留bootstrap.properties,然后让他一启动去配置中心中获取内容即可。
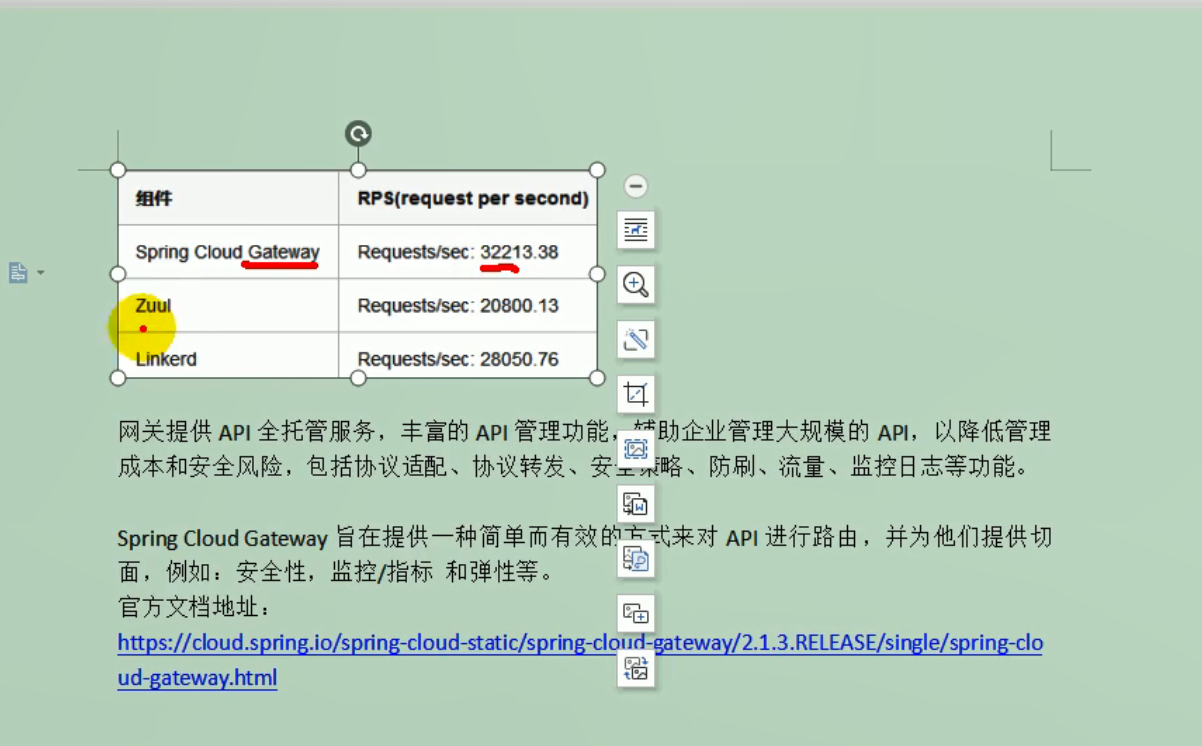
GateWay网关
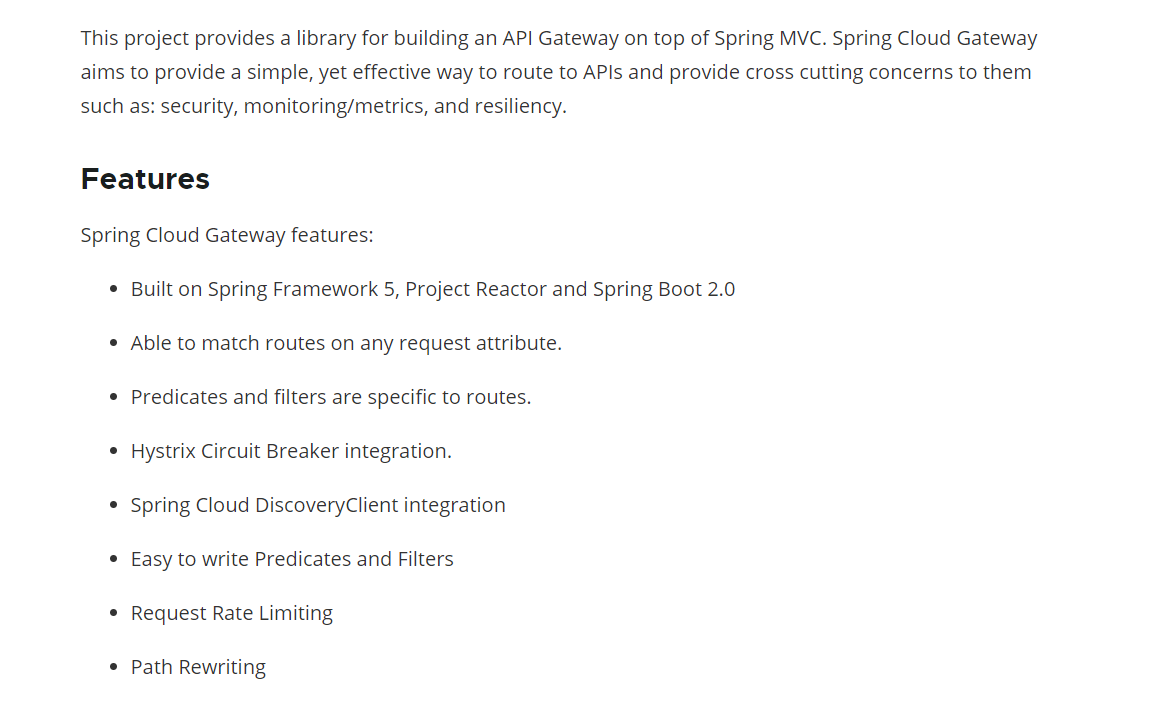
https://cloud.spring.io/spring-cloud-static/spring-cloud-gateway/2.1.5.RELEASE/single/spring-cloud-gateway.html#_glossary

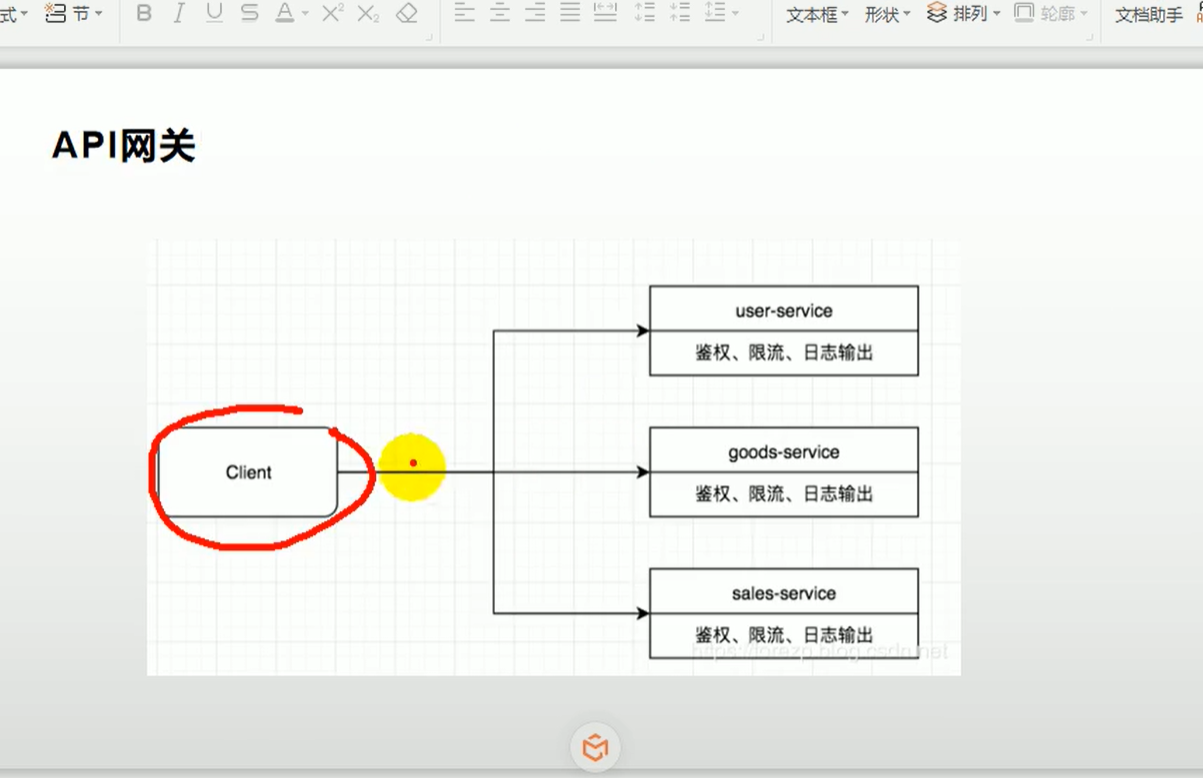
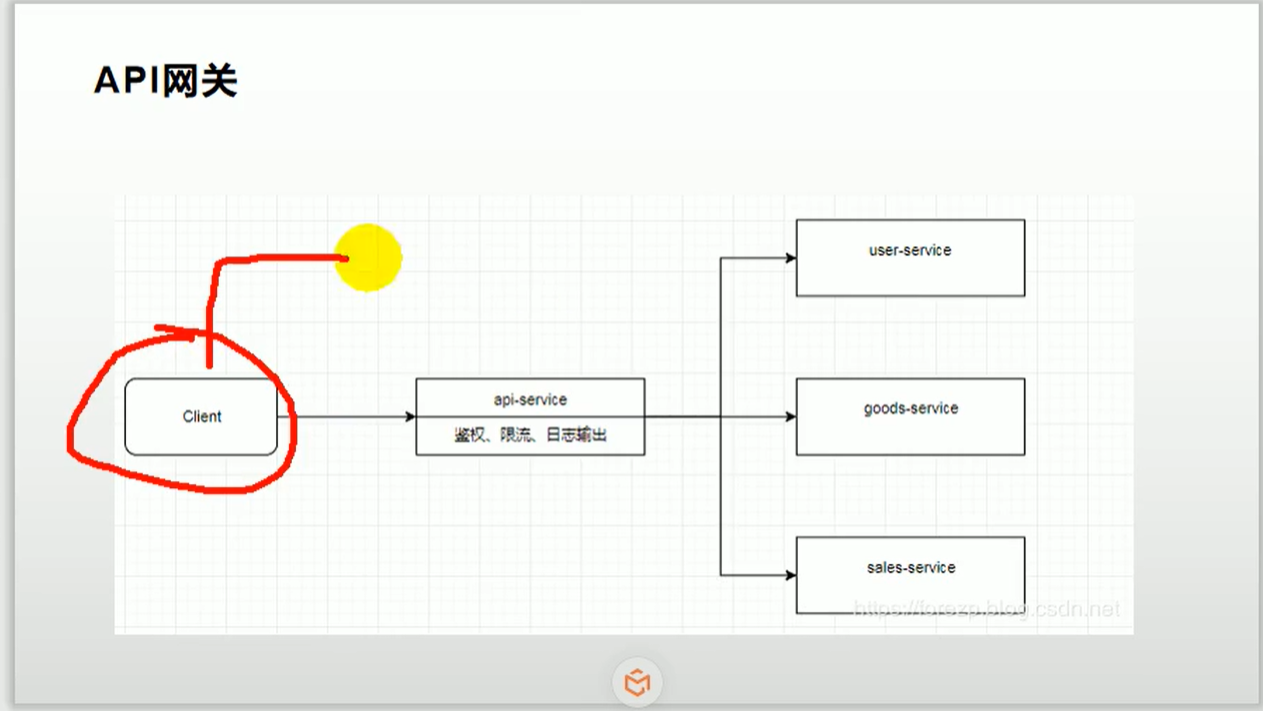
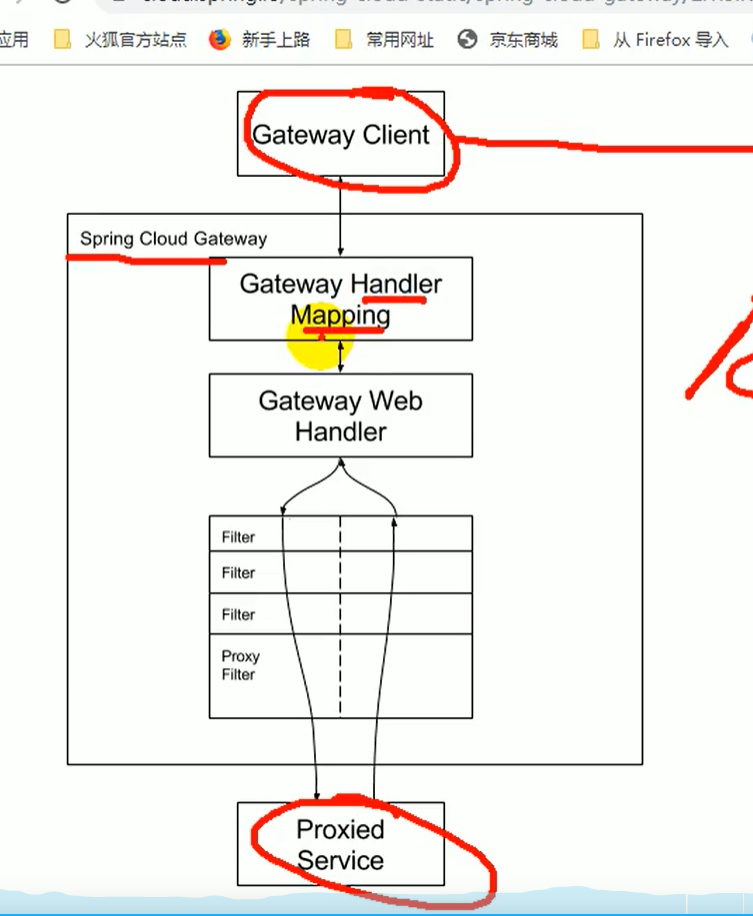
客户端想要发请求给目标服务,中间加了一层API网关,为gateway,客户端先将请求发给APi网关,通过handlermapping映射信息,看一下当前请求能否被请求或者被处理,如果能被处理就交给handler处理器,处理器要处理这些请求,就要经过一系列filter,处理器处理结束以后, 就会把请求路由给指定的服务,指定服务处理完了,还是要经过一系列filter,再返回过来,最终返回给客户端,
总结一句话,当请求到达网关,网关先利用断言,来判定这一次请求是不是符合,某个路由规则,如果符合了,就按照路由规则路由给指定地方,但要去指定地方就要经过一系列filter,进行过滤,
创建gateway模块

引入依赖
开启服务注册发现@EnableDiscoveryClient
在application.properties中配置nacos注册中心地址
spring.cloud.nacos.discovery.server-addr=127.0.0.1:8848
spring.cloud.nacos.discovery.namespace=gulimall-gateway
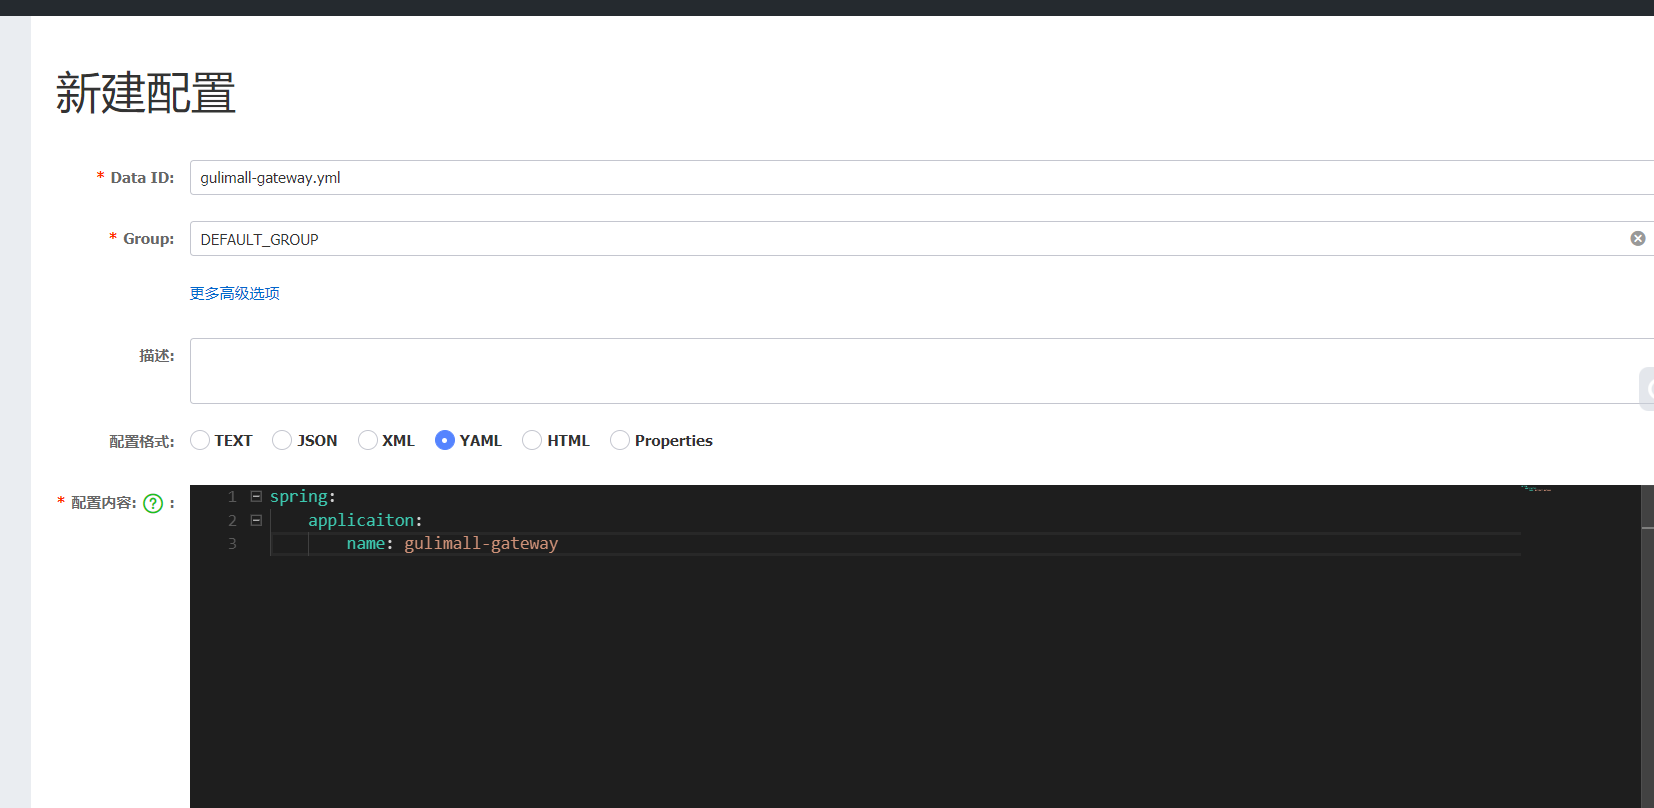
创建网关名称空间
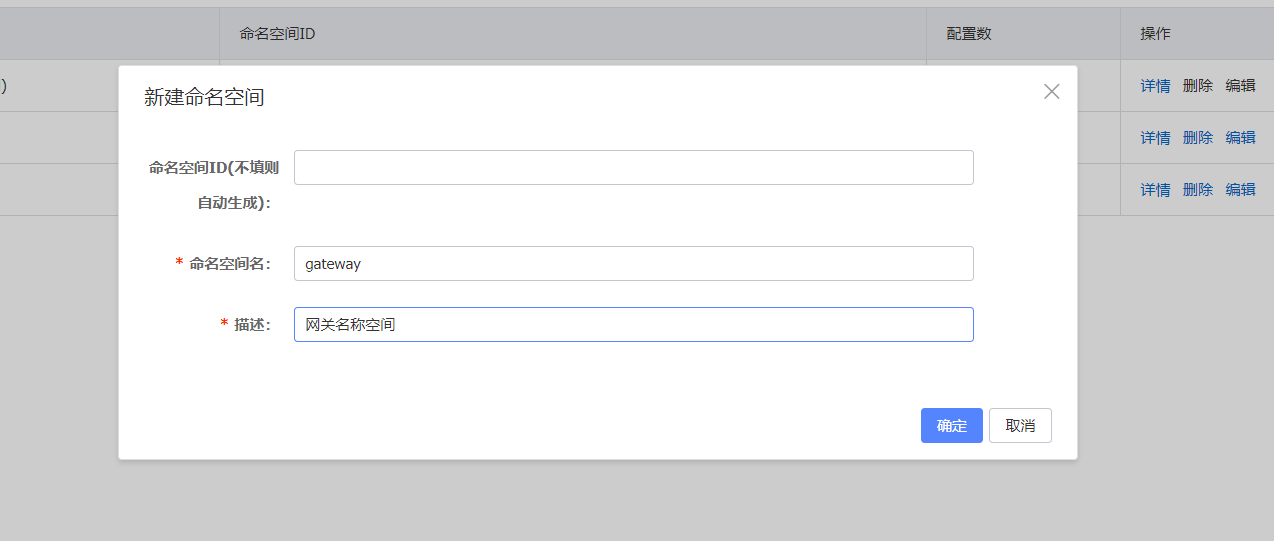
在bootstrap.properties中配置中心地址和命名空间
spring.application.name=gulimall-gateway
spring.cloud.nacos.config.server-addr=127.0.0.1:8848
spring.cloud.nacos.config.namespace=7f2f36e9-aea6-445a-9d71-3aa9eaddad77
跑起来出错,
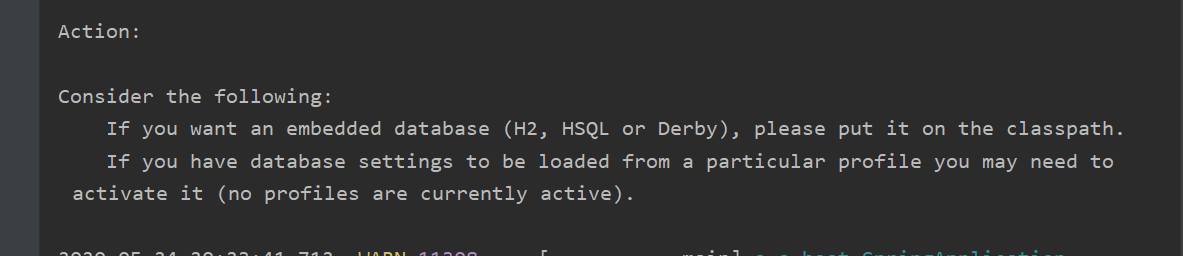
因为依赖gulimall-common,引入了MyBaties相关操作,有了数据源之间的相关配置,解决方法 如下
@SpringBootApplication(exclude = {DataSourceAutoConfiguration.class})
新建一个application.yml
spring:
  cloud:
    gateway:
      routes:
        - id: test_route
          uri: https://www.baidu.com
          predicates:
            - Query=url,baidu

        - id: qq_route
          uri: https://www.qq.com
            - Query=url,gateway
前端基础
创将一个文件夹,和html文件,shift+!快捷键生成html代码

Vue
新建一个vue的文件夹,初始化项目
npm init -y

安装vue依赖
npm install vue

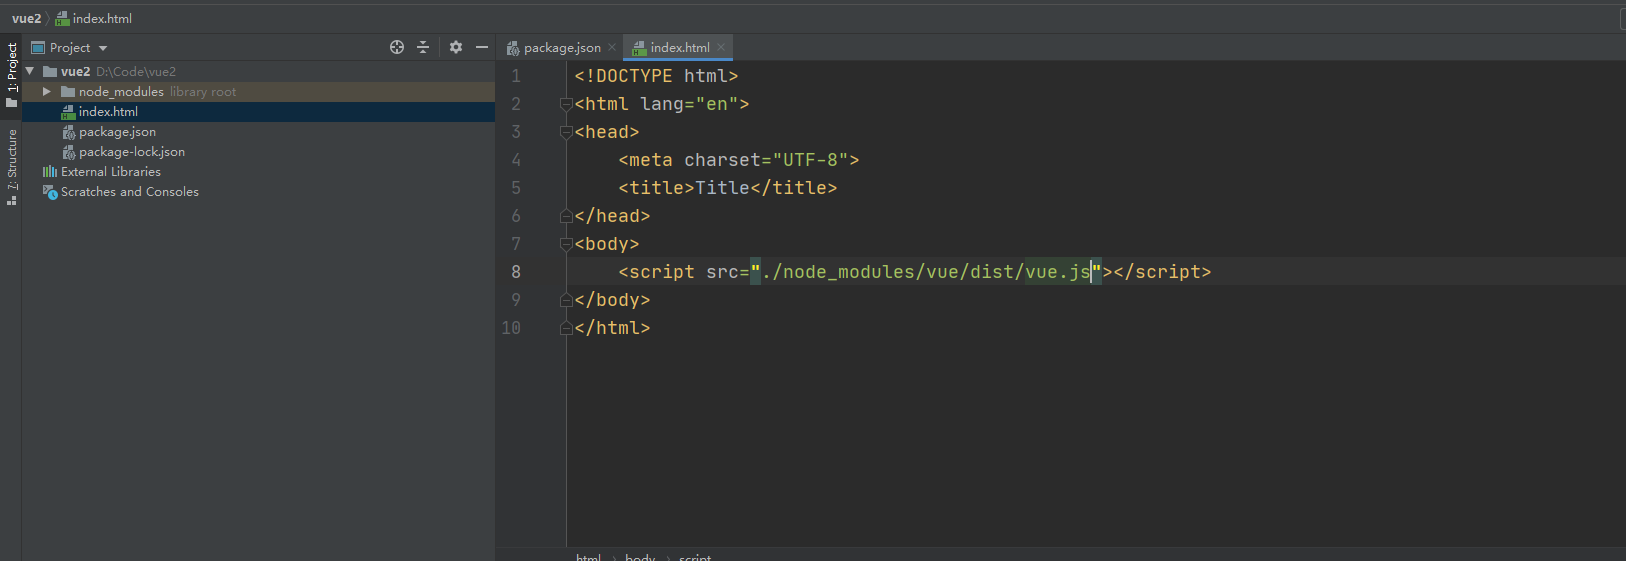
引入vue.js
<script src="./node_modules/vue/dist/vue.js"></script>
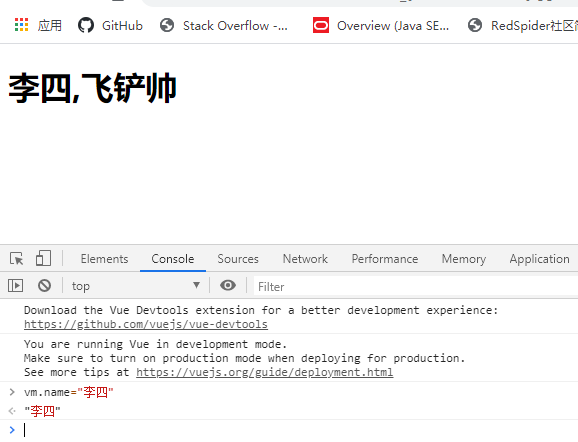
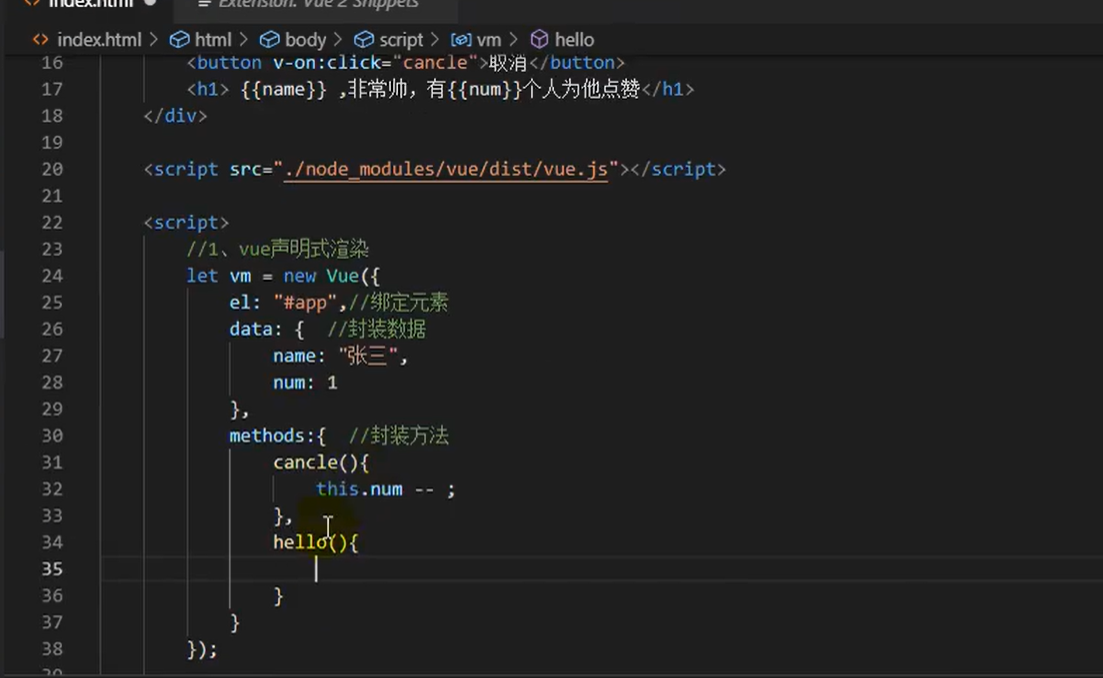
<div id="app">
    <h1>{{name}},飞铲帅</h1>
</div>
<script src="./node_modules/vue/dist/vue.js"></script>


<script>
    let vm = new Vue({
        el:"#app",
        data:{
            name:"张三"
        }
    })
</script>
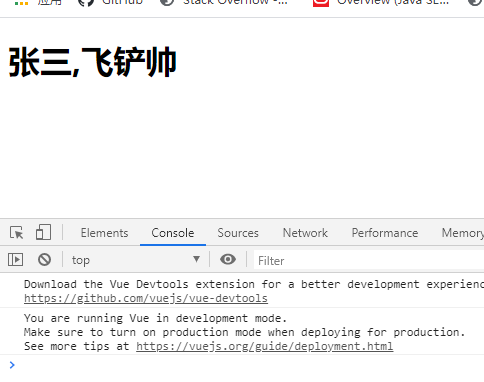
数据变化,页面也变化

vue模块化开发

需要去搜索vue.cmd 配置好环境,vue -V 来检查
npm install webpack -g
npm install -g @vue/cli-init
vue init webpack vue-demo

cd vue-demo
npm run dev
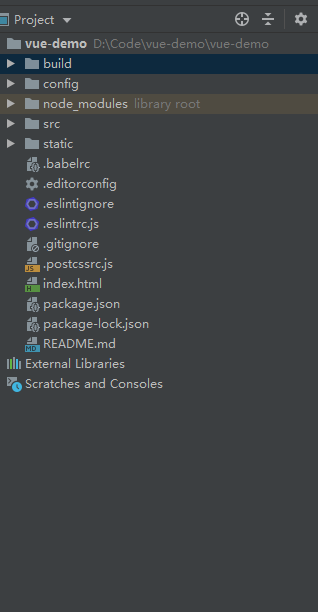
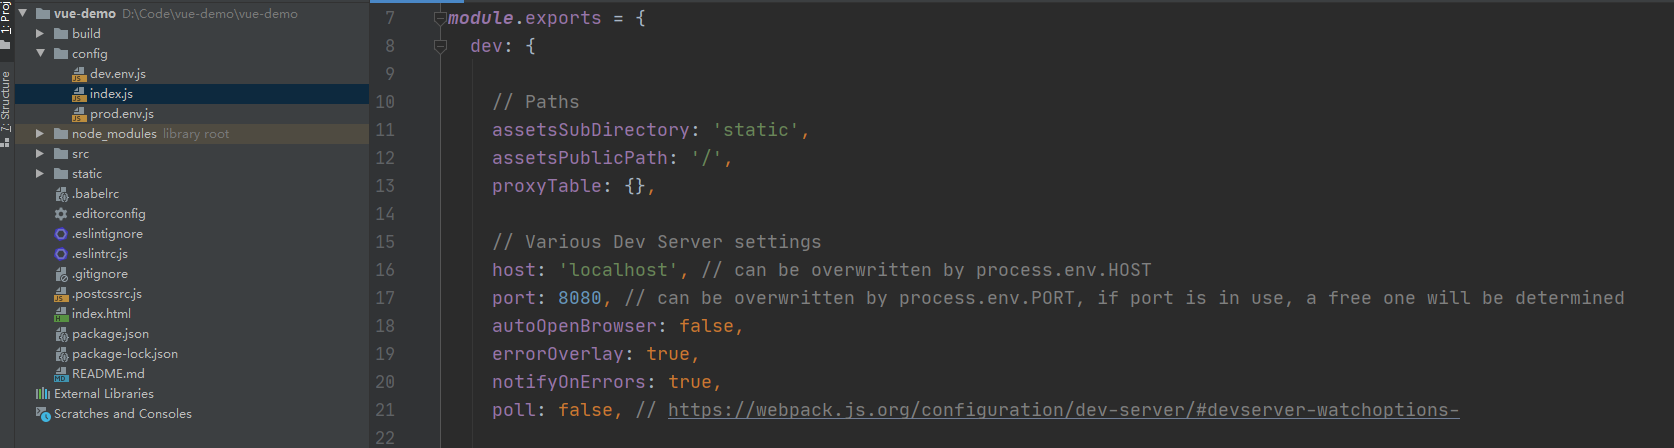
build
是和打包工具webpack相关,config 配置信息,主要有端口配置
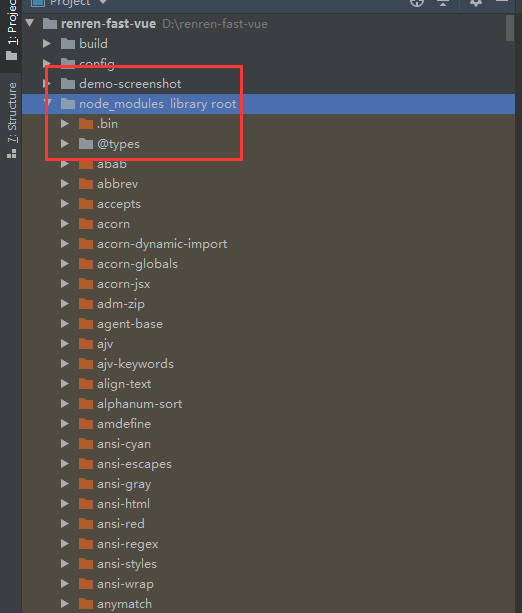
nodemoudles 是npm install 安装的所有依赖
.babelrc语法转义相关配置
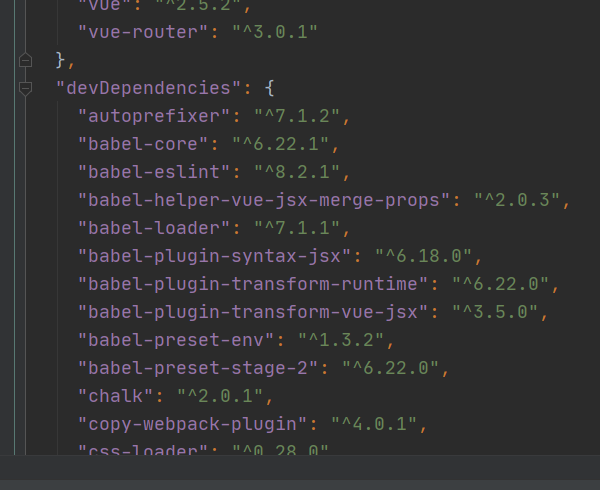
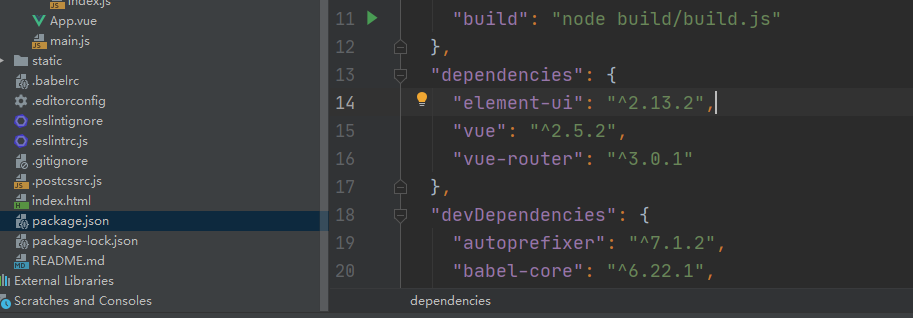
package.json npm依赖包相关信息 每安装一个依赖都有相关的dependencis
package-lock.json 类似 里面有去哪里下载,版本号多少等信息

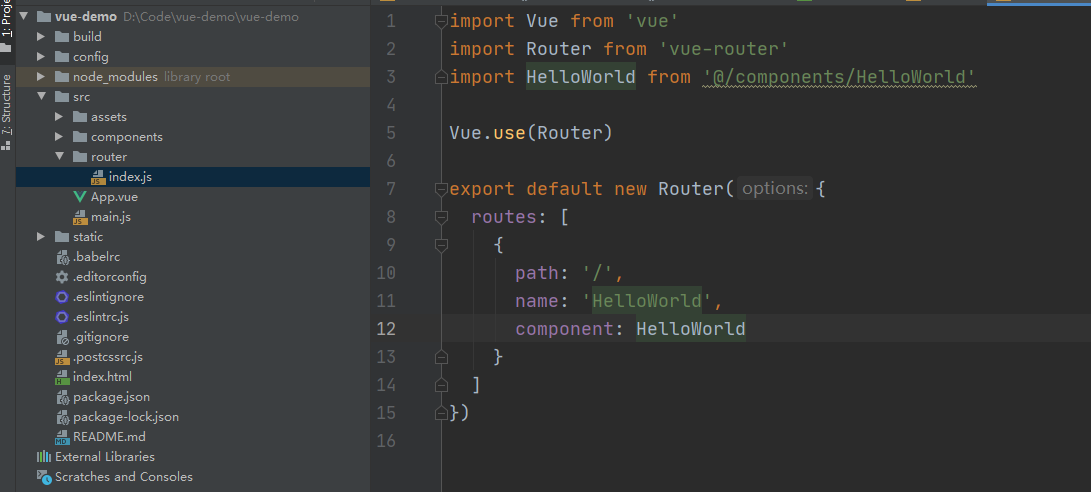
main.js里面的主程序创建vue实例来挂载 index.html里面主元素
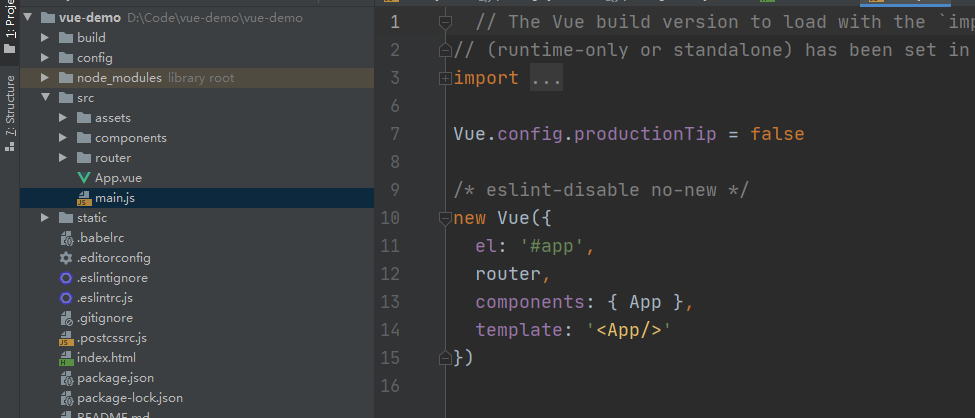
import Vue from 'vue'
import App from './App'
import router from './router'

Vue.config.productionTip = false

new Vue({
  el: '#app',
  //这是简写实际上是 router:router,是从上面导入的路由配置
  router,
  //App:App 也是简写,属性名和属性值变量名一样时,可以简写 导入的是App.vue 是vue的单文件组件
  components: { App },
  //vue最终渲染方式为template指定的模板 相当于使用了App组件 App组件长什么样,最终index.html app元素就长什么样
  template: '<App/>'
})
ES 6的特性 导入导出组件,导出的时候没起名字,所以这里起个名字为router
标准的vue单文件组件
<template>
  <div id="app">
    <img src="./assets/logo.png">
      <!--路由视图-->
    <router-view/>
  </div>
</template>

<script>
export default {
  name: 'App'
}
</script>

<style>
#app {
  font-family: 'Avenir', Helvetica, Arial, sans-serif;
  -webkit-font-smoothing: antialiased;
  -moz-osx-font-smoothing: grayscale;
  text-align: center;
  color: #2c3e50;
  margin-top: 60px;
}
</style>
<template>
  <div id="app">
    <img src="./assets/logo.png">
    <router-link to="/hello">去hello</router-link>
    <router-link to="/">去主页</router-link>
    <router-view/>
  </div>
</template>

<script>
export default {
  name: 'App'
}
</script>

<style>
#app {
  font-family: 'Avenir', Helvetica, Arial, sans-serif;
  -webkit-font-smoothing: antialiased;
  -moz-osx-font-smoothing: grayscale;
  text-align: center;
  color: #2c3e50;
  margin-top: 60px;
}
</style>
index.js
import Vue from 'vue'
import Router from 'vue-router'
import HelloWorld from '../components/HelloWorld'
import Hello from "../components/Hello";

Vue.use(Router)

export default new Router({
  routes: [
    {
      path: '/',
      name: 'HelloWorld',
      component: HelloWorld
    },
    {
      path: '/hello',
      name: "Happy",
      component: Hello
    }
  ]
})
Hello .vue
<template>
  <div>
    <h1>你好,Hello,{{name}}</h1>
  </div>
</template>

<script>
  export default {
    data(){
      return {
        name:"张三"
      }
    }
  }
</script>

<style >

</style>
安装element-ui
npm i element-ui
在这里会出现
https://element.eleme.cn/#/zh-CN/component/quickstart
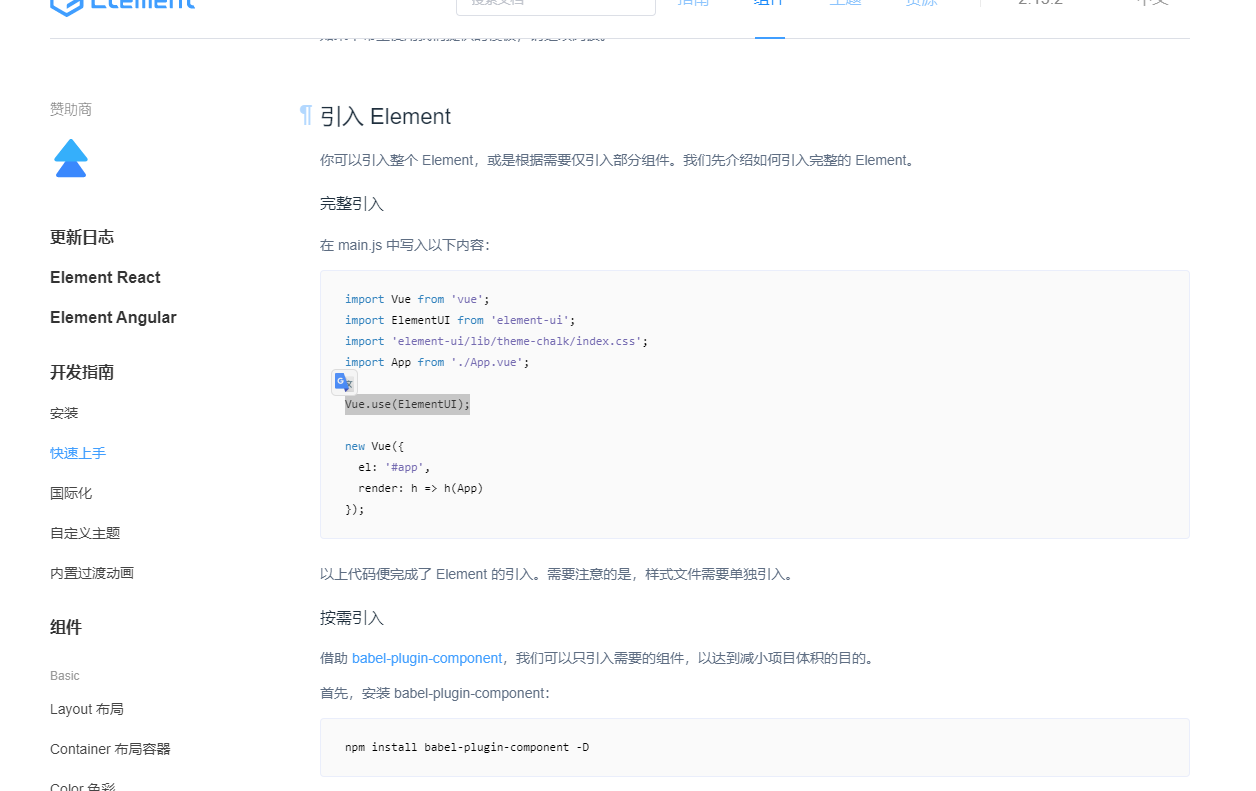
倒入ElementUI相关组件 ,导入其他组件库也是类似的,导入main.js
import Vue from 'vue'
import App from './App'
import router from './router'
import ElementUI from 'element-ui'
import 'element-ui/lib/theme-chalk/index.css';

Vue.use(ElementUI);
Vue.config.productionTip = false

/* eslint-disable no-new */
new Vue({
  el: '#app',
  router,
  components: {App},
  template: '<App/>'
})
三级分类开发
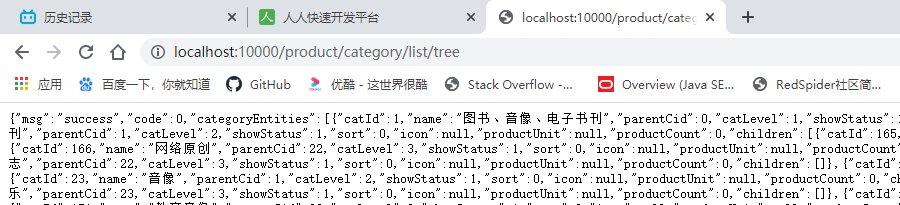
接口描述:一次性查出所有分类及其子分类,并把他们以父子方式的结构组装起来,
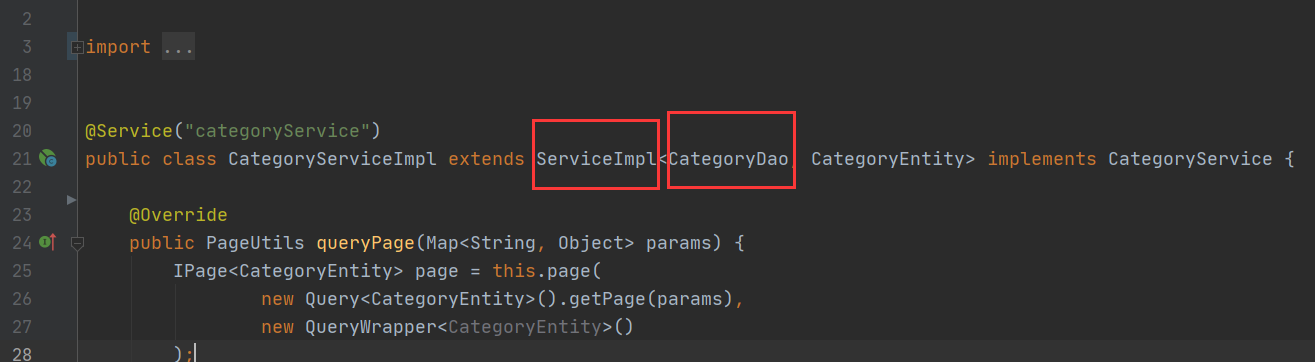
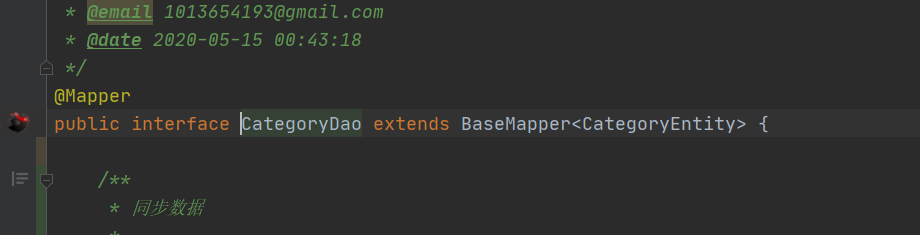
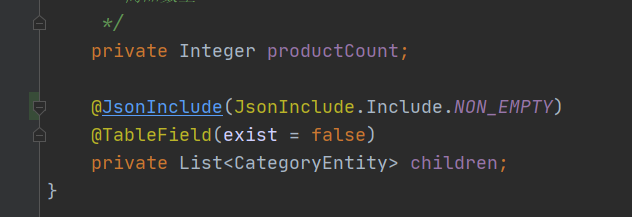
递归查询三级分类并绑定好 CategoryEntity 里面添加一个字段用来保存子分类
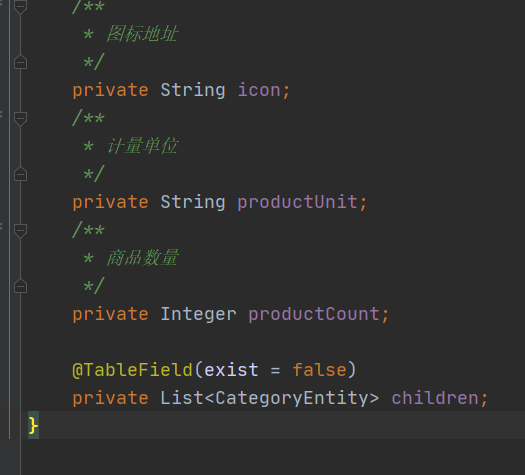
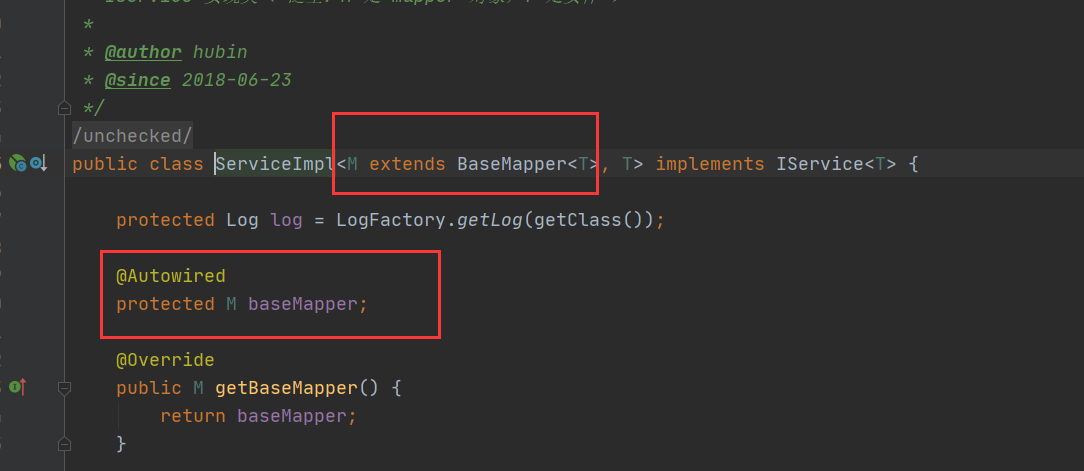
CategoryServiceImpl继承了ServiceImpl,ServiceImpl里面加入了泛型Dao的实现,baseMapper就是泛型指定的Mapper。
sort条件可以这么写
.sorted(Comparator.comparingInt(item -> (item.getSort() == null ? 0 : item.getSort())))
.sorted(Comparator.comparingInt(
     item->Optional.ofNullable(item.getSort()).orElse(0)))
/**
 * 列表
 */
@RequestMapping("/list/tree")
public R listWithTree(){
    List<CategoryEntity>  categoryEntities= categoryService.listWithTree();
    return R.ok().put("categoryEntities", categoryEntities);
}
@Override
public List<CategoryEntity> listWithTree() {
    List<CategoryEntity> entityList = baseMapper.selectList(null);
    List<CategoryEntity> entities = entityList.stream()
            .filter(categoryEntity -> categoryEntity.getCatLevel() == 1)
            .map(menu -> {
                menu.setChildren(getChildens(menu, entityList));
                return menu;
            })
            .sorted(Comparator.comparingInt(item -> (item.getSort() == null ? 0 : item.getSort())))
            .collect(Collectors.toList());
    return entities;
}
/**
 * 查找所有菜单的子菜单
 * @param root
 * @param all
 * @return
 */
private List<CategoryEntity> getChildens(CategoryEntity root, List<CategoryEntity> all) {
    List<CategoryEntity> childList = all.stream()
            .filter(item -> item.getParentCid().equals(root.getCatId()))
            .map(menu -> {
                menu.setChildren(getChildens(menu, all));
                return menu;
            })
            .sorted(Comparator.comparingInt(item -> (item.getSort() == null ? 0 : item.getSort())))
            .collect(Collectors.toList());
    return childList;
}
配置网关路由与位置重写
这里是对应关系
路由规则前面的/会被替换成-
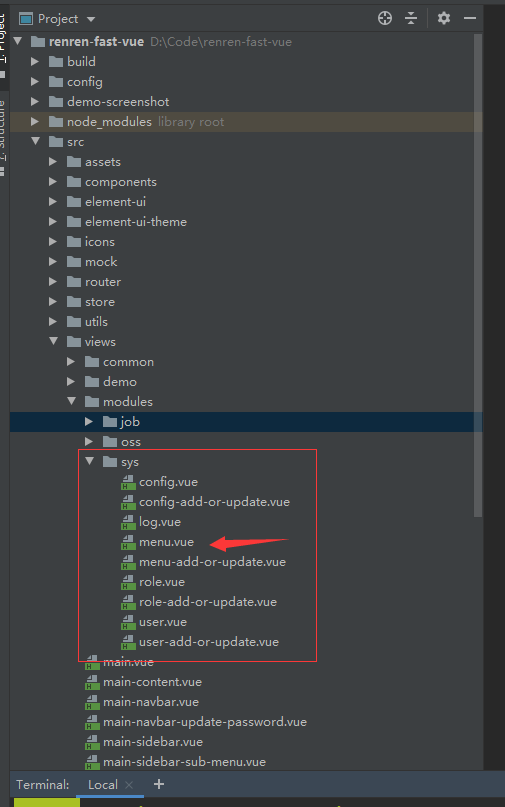
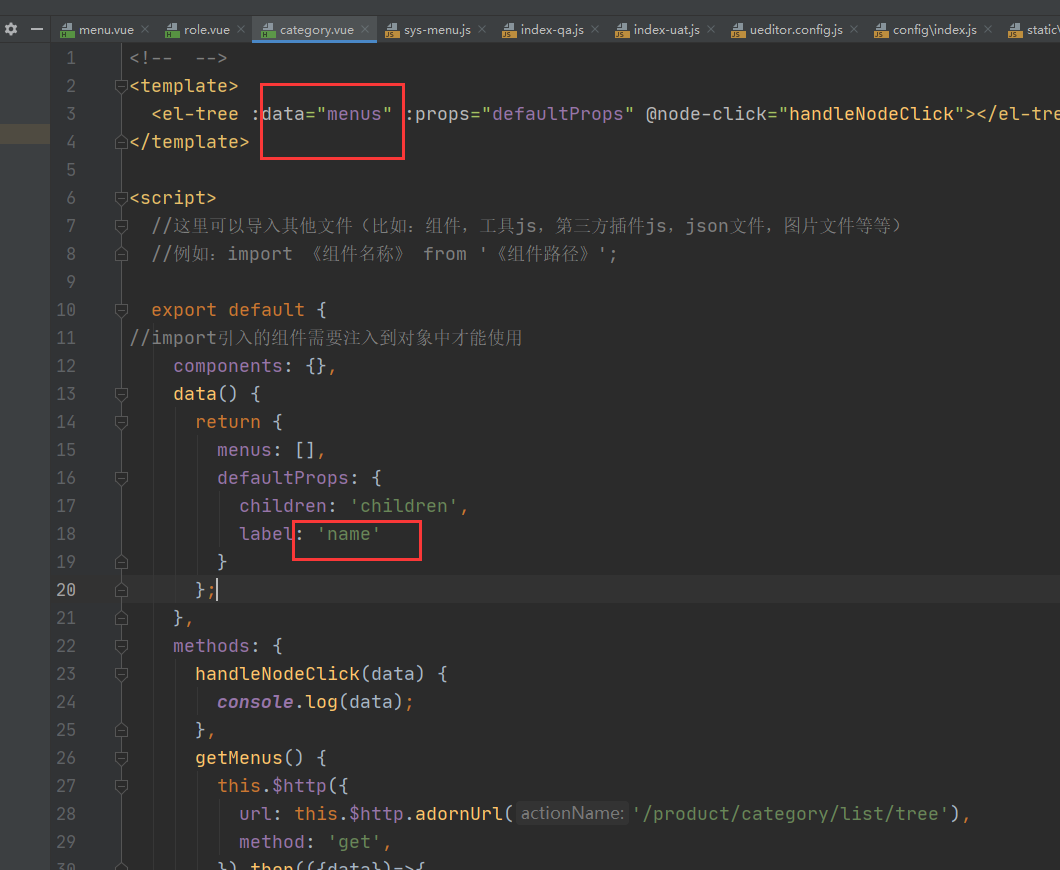
创建在moudules 下创建product包下的 category.vue
<!-- -->
<template>
<el-tree :data="data" :props="defaultProps" @node-click="handleNodeClick"></el-tree>
</template>
<script>
//这里可以导入其他文件(比如:组件,工具js,第三方插件js,json文件,图片文件等等)
//例如:import 《组件名称》 from '《组件路径》';
export default {
//import引入的组件需要注入到对象中才能使用
components: {},
data() {
return {
data: [],
defaultProps: {
children: 'children',
label: 'label'
}
};
},
methods: {
handleNodeClick(data) {
console.log(data);
},
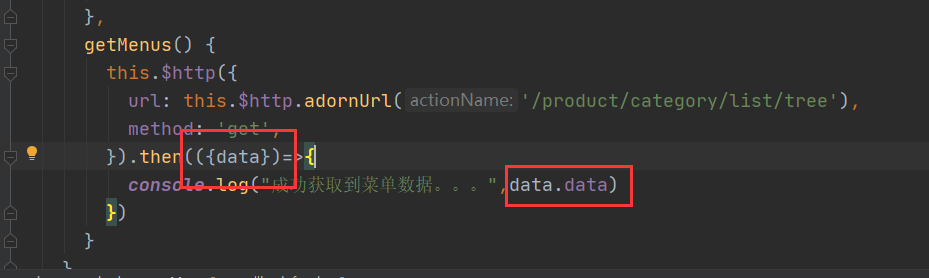
getMenus() {
this.$http({
url: this.$http.adornUrl('/product/category/list/tree'),
method: 'get',
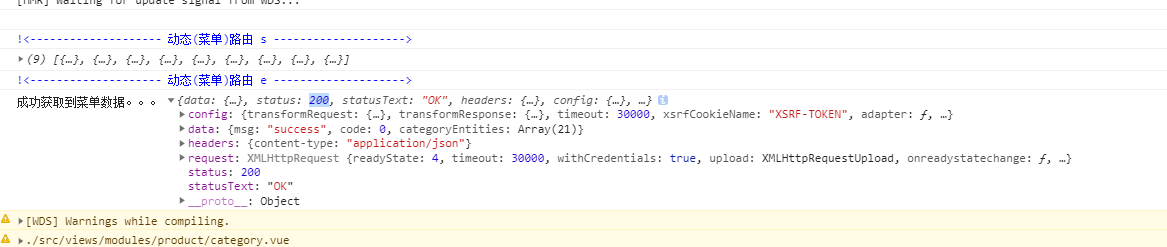
}).then(data=>{
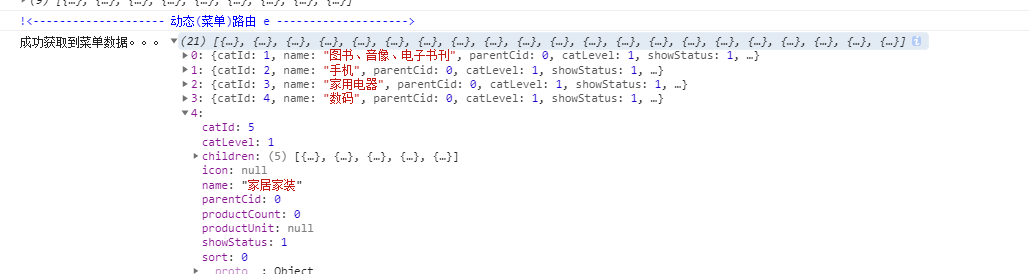
console.log("成功获取到菜单数据。。。")
})
}
}
,
//监听属性 类似于data概念
computed: {
}
,
//监控data中的数据变化
watch: {}
,
//方法集合
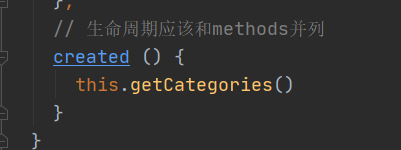
//生命周期 - 创建完成(可以访问当前this实例)
created() {
this.getMenus();
}
,
//生命周期 - 挂载完成(可以访问DOM元素)
mounted() {
}
,
beforeCreate() {
}
, //生命周期 - 创建之前
beforeMount() {
}
, //生命周期 - 挂载之前
beforeUpdate() {
}
, //生命周期 - 更新之前
updated() {
}
, //生命周期 - 更新之后
beforeDestroy() {
}
, //生命周期 - 销毁之前
destroyed() {
}
, //生命周期 - 销毁完成
activated() {
}
, //如果页面有keep-alive缓存功能,这个函数会触发
}
</script>
<style scoped>
</style>
测试一下 请求失败,是给localhost:8080/renren-fast发起的请求,应该是给
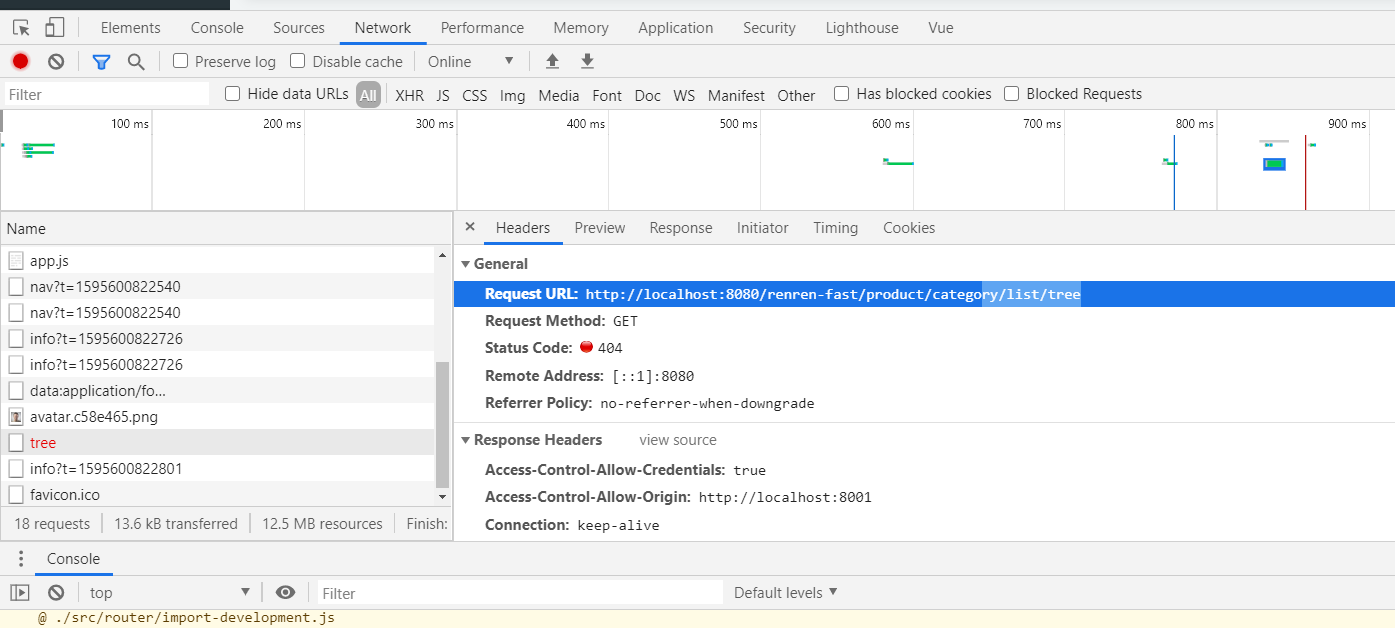
应该是给10000发起请求,
- 如果基准路径改成10000,如果给其他服务发请求,又要改地址
- 商品服务还有其他端口如11000,12000如果不能用啦,改为其他的,难道每次都要改基准路径吗
ctrl +shift+F 全局搜索基准路径

打开index.js 为了同一地址,给网关发请求给我们路由到指定地方 修改为

再次运行会报错 不显示验证码 因为直接给网关发请求,但是验证码来源于renrenfast
让网关默认把请求转给renrenfast,要转之前就要发现这个服务,这个服务首先要注册到注册中心,先依赖gulimall-common工程
因为里面引入了nacos 注册和配置中心
在renrenfast application.yml配置 nacos注册中心
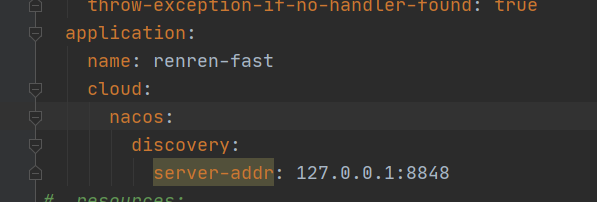
spring:
cloud:
gateway:
routes:
- id: test_route
uri: https://www.baidu.com
predicates:
- Query=url,baidu
## 增加路由配置 lb代表loadbalance负载均衡 断言表示哪种情况下需要路由给它
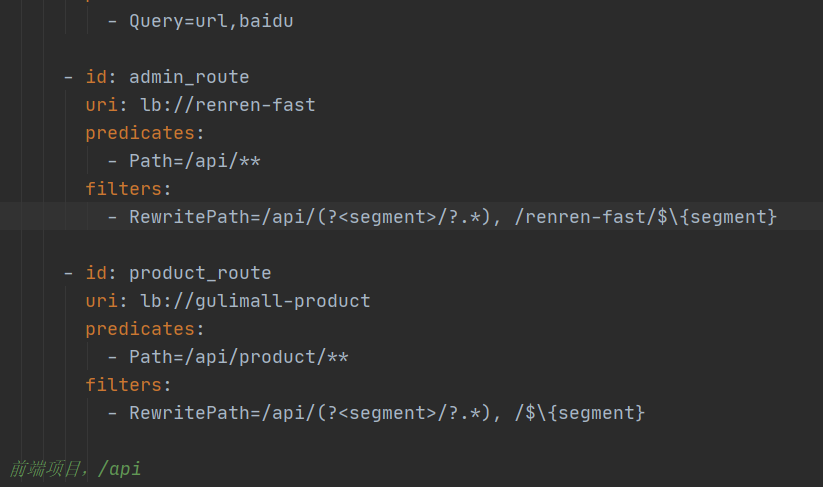
- id: admin_route
uri: lb://renren-fast
predicates:
- Path:/api/**
## 前端项目,/api
https://cloud.spring.io/spring-cloud-static/spring-cloud-gateway/2.2.3.RELEASE/reference/html/#the-method-route-predicate-factory
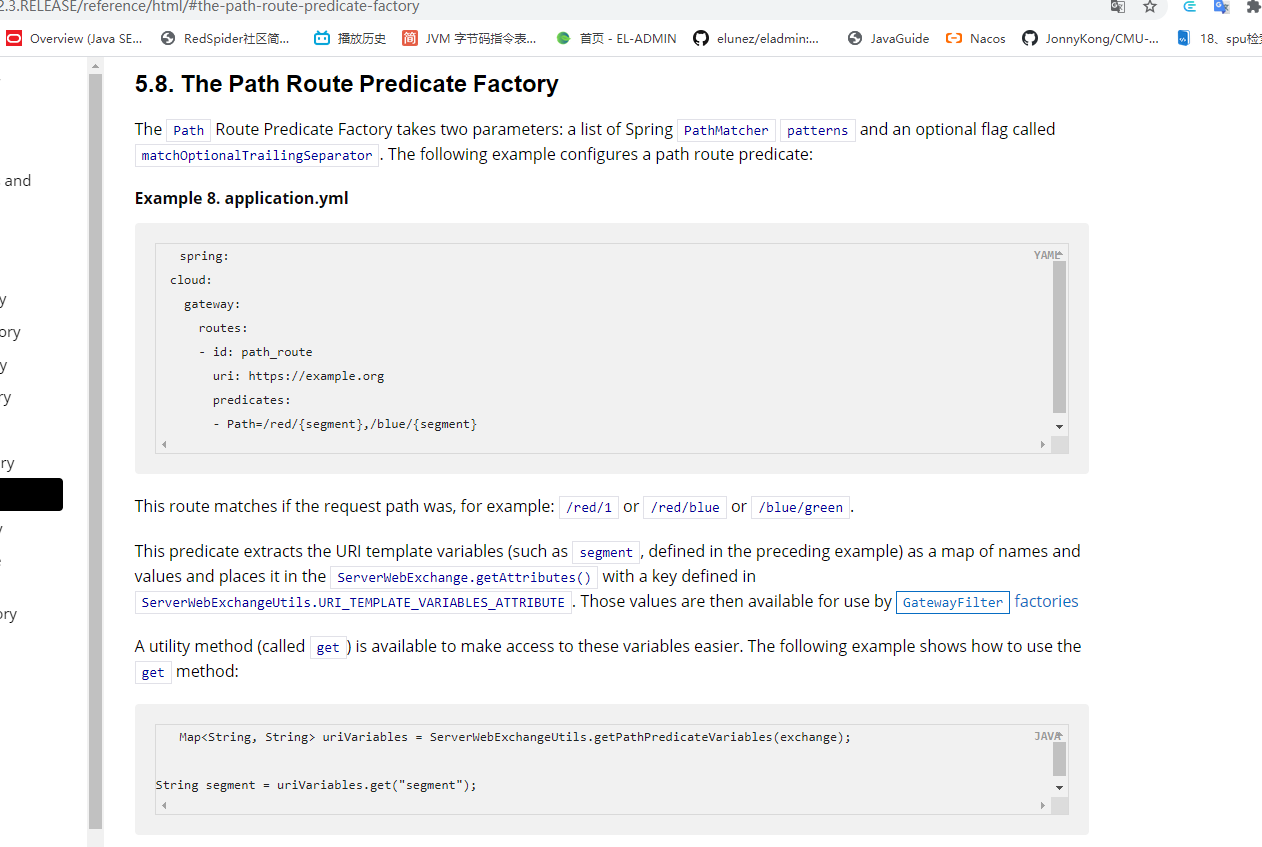
修改配置后重新启动renren-fast gulimall-gateway 发现依然404

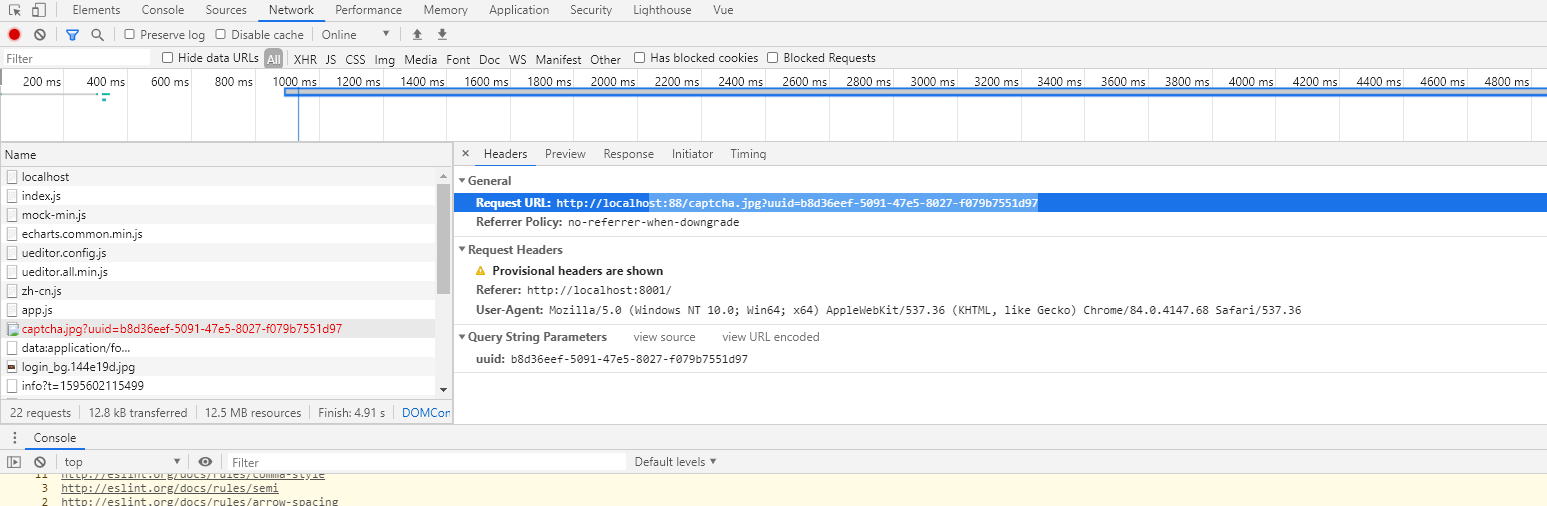
发请求从http://localhost:88/api/captcha.jpg ==>
http://renrenfast:8080/api/captcha.jpg

原因是 实际路由url为http://localhost:88/api/captcha.jpg?uuid=844c3fc1-84d3-45c9-83d4-e96558de9836
但是从renren-fast配置文件来看 我们想要的是:
http://localhost:8080/renren-fast/captcha.jpg?uuid=844c3fc1-84d3-45c9-83d4-e96558de9836
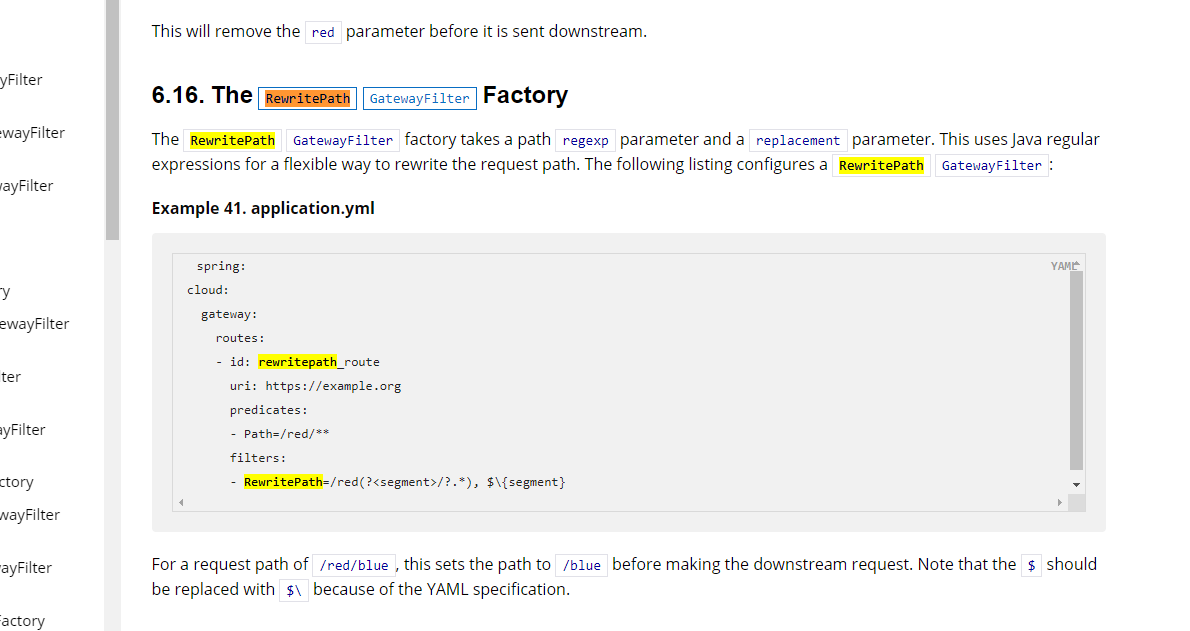
https://cloud.spring.io/spring-cloud-static/spring-cloud-gateway/2.2.3.RELEASE/reference/html/#the-rewritepath-gatewayfilter-factory
在这里我遇见了503的问题,没找到问题所在,就是在nacos注册服务中心,gateway一直注册不上去,最后只好删除重建了gateway,注册成功了。
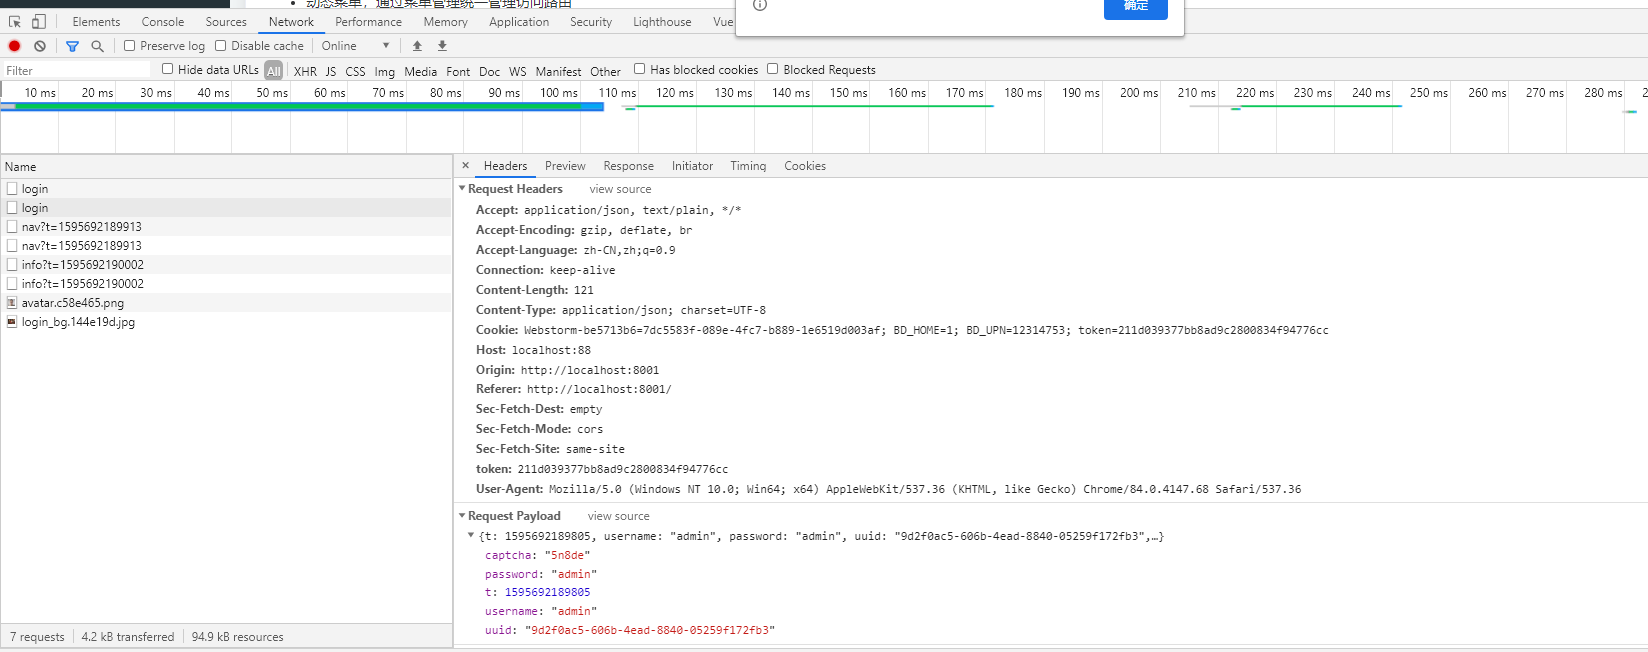
现在验证码显示啦,点击登陆
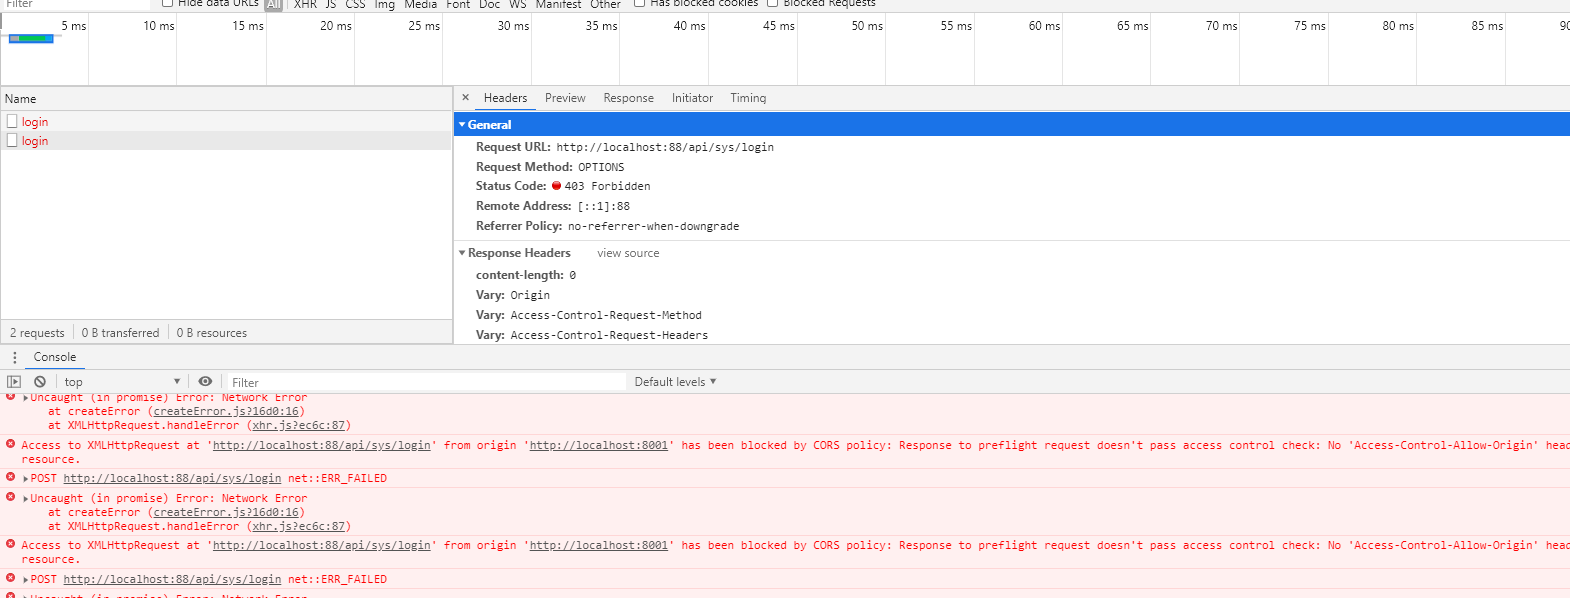
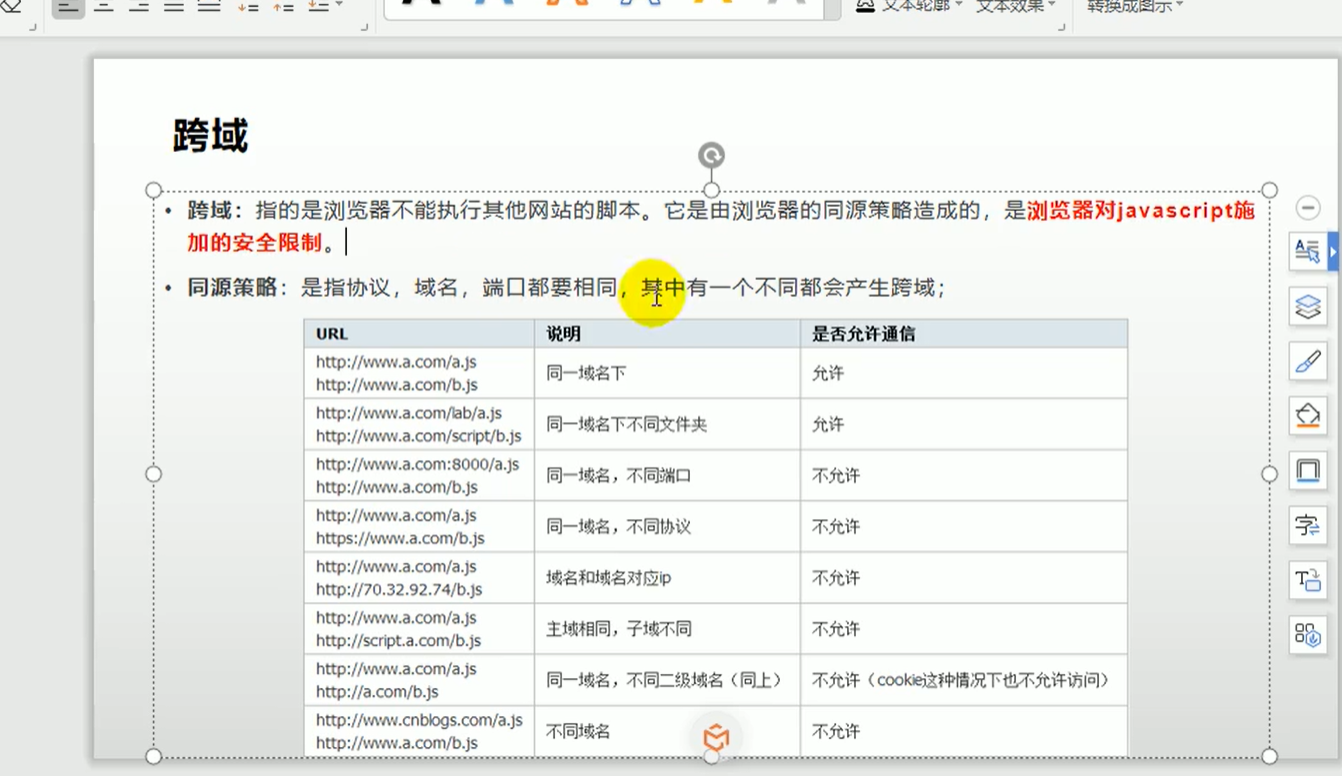
cors,跨域,浏览器为了安全,默认拒绝跨域请求
配置跨域
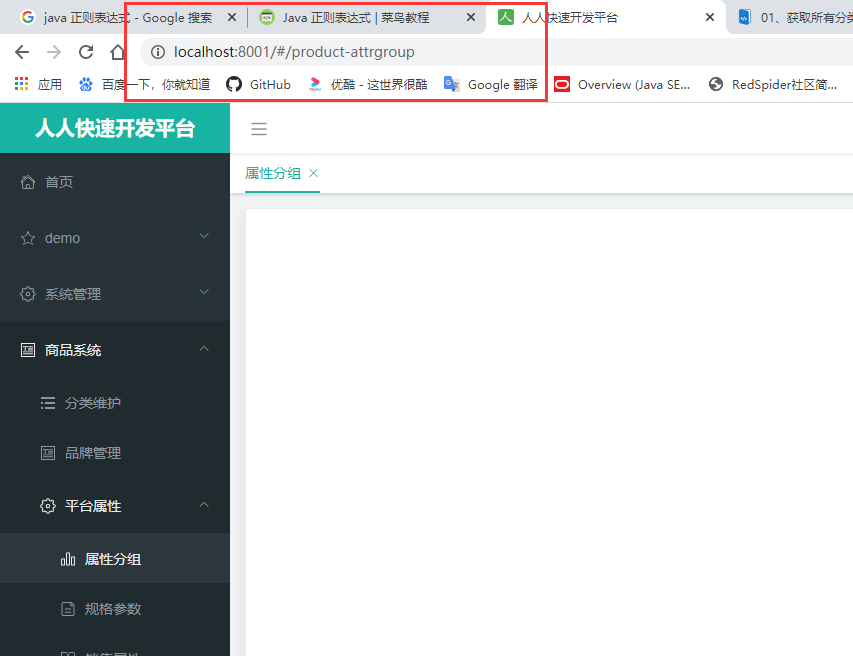
js要获取数据,要发ajax请求,使用xmlHttpRequest对象,这个对象想要从本网站,如端口号8001到88发送请求。默认不允许,是用同源策略来限制
https://developer.mozilla.org/zh-CN/docs/Web/HTTP/Access_control_CORS
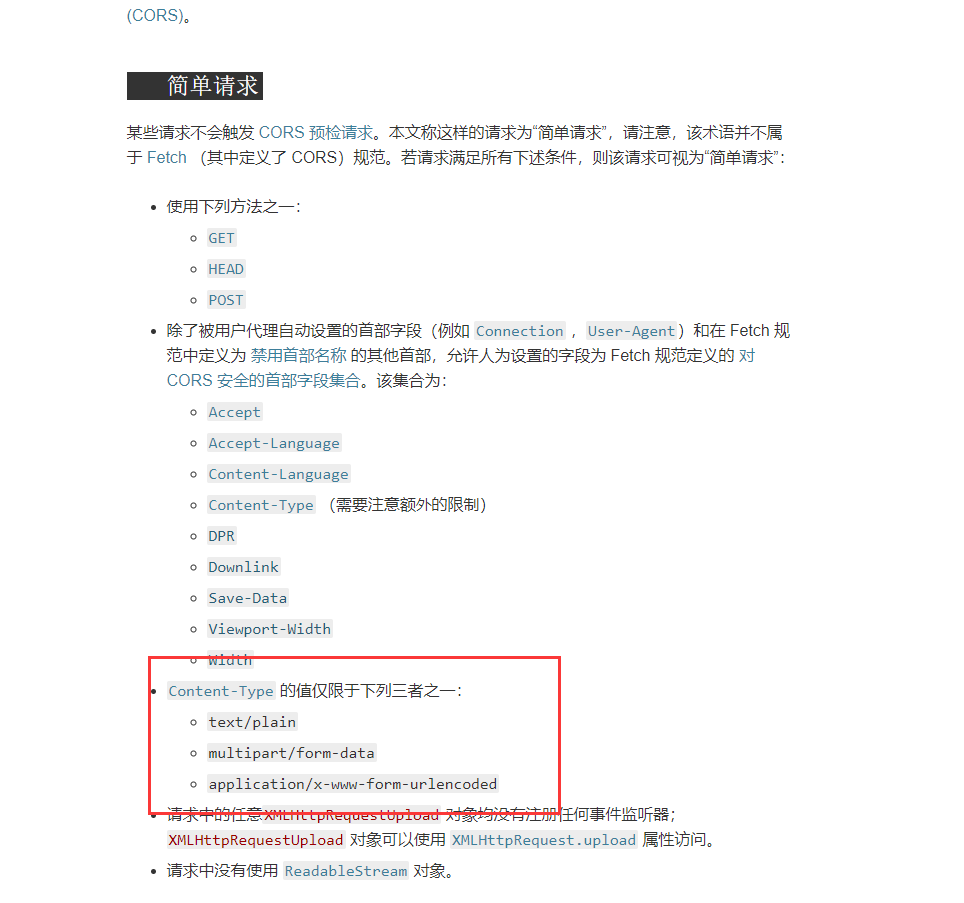
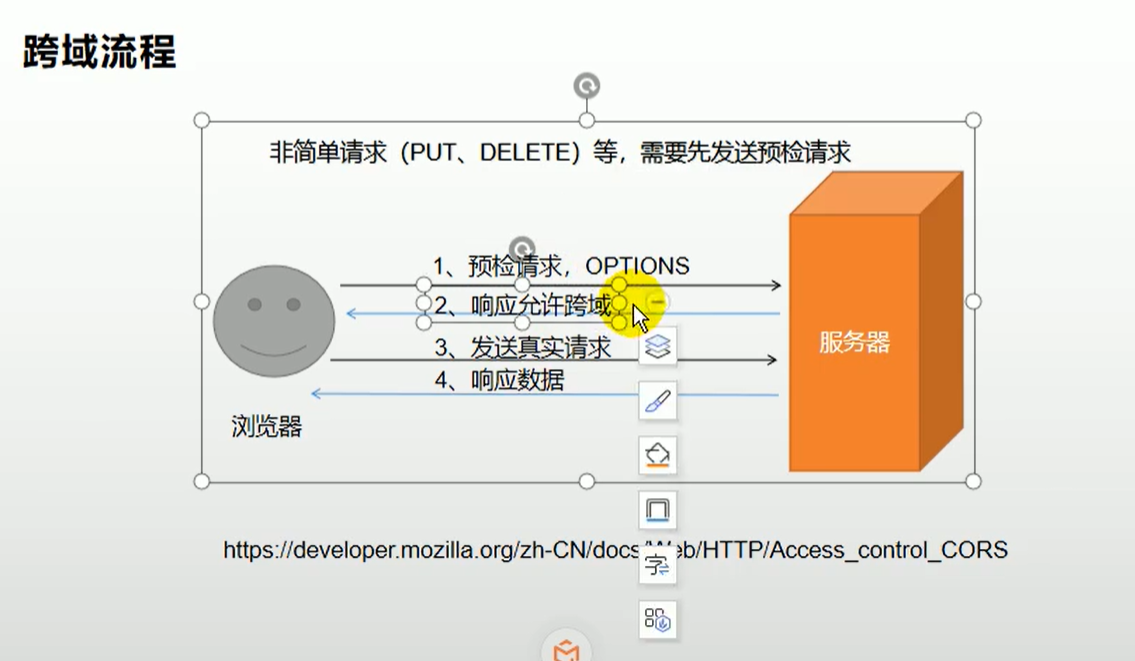
虽然是post请求,但是Content-Type 是application/json 所以会触发CORS,不是简单请求
跨域的根本原因是目标网站和发送请求网站不在同一个域
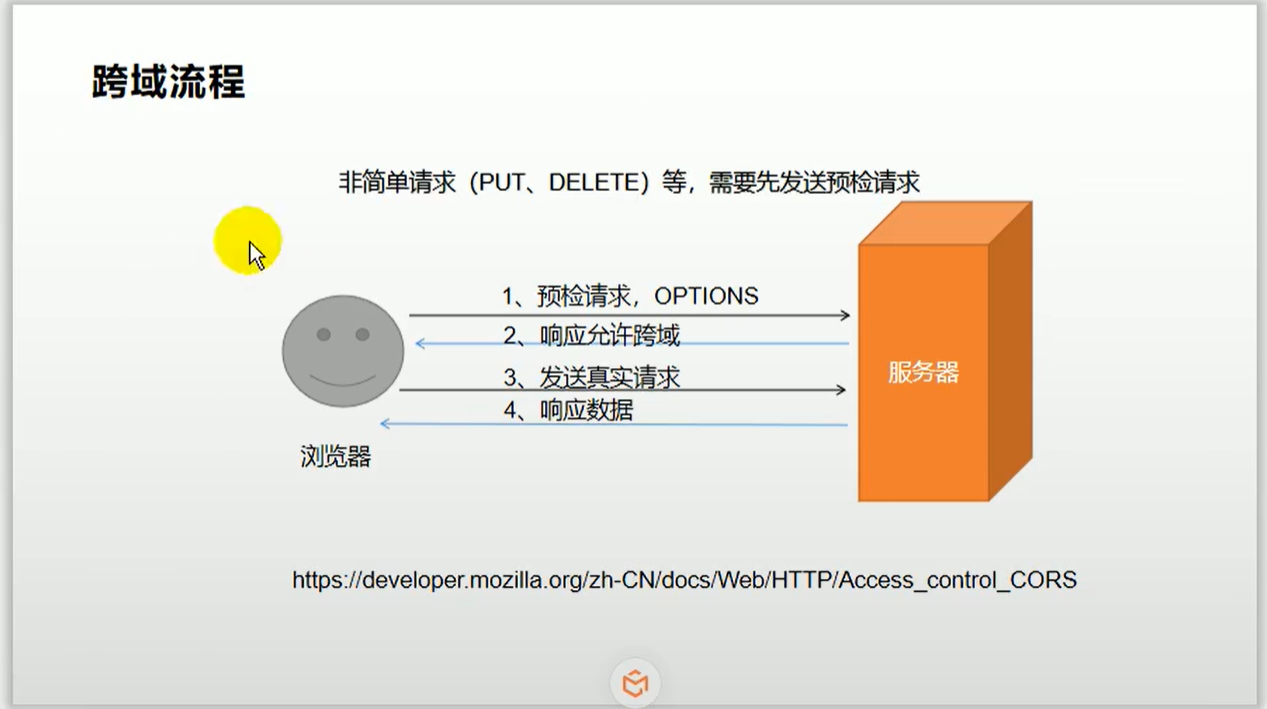
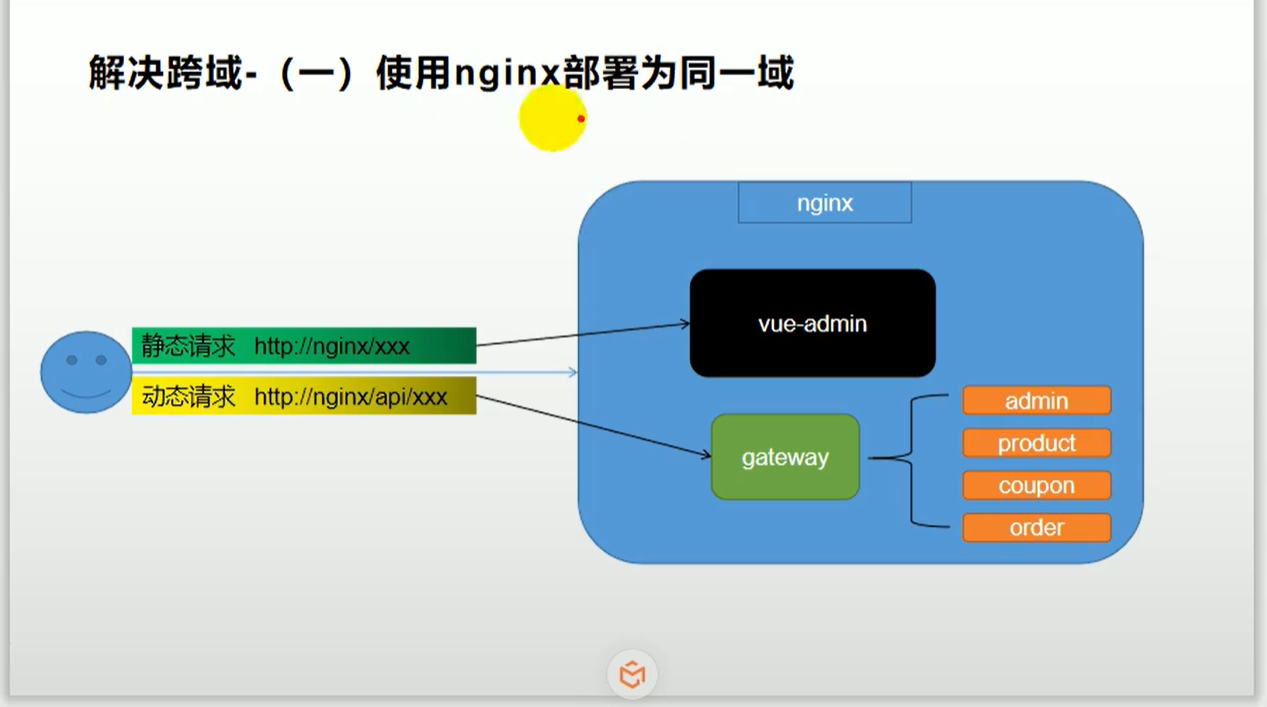
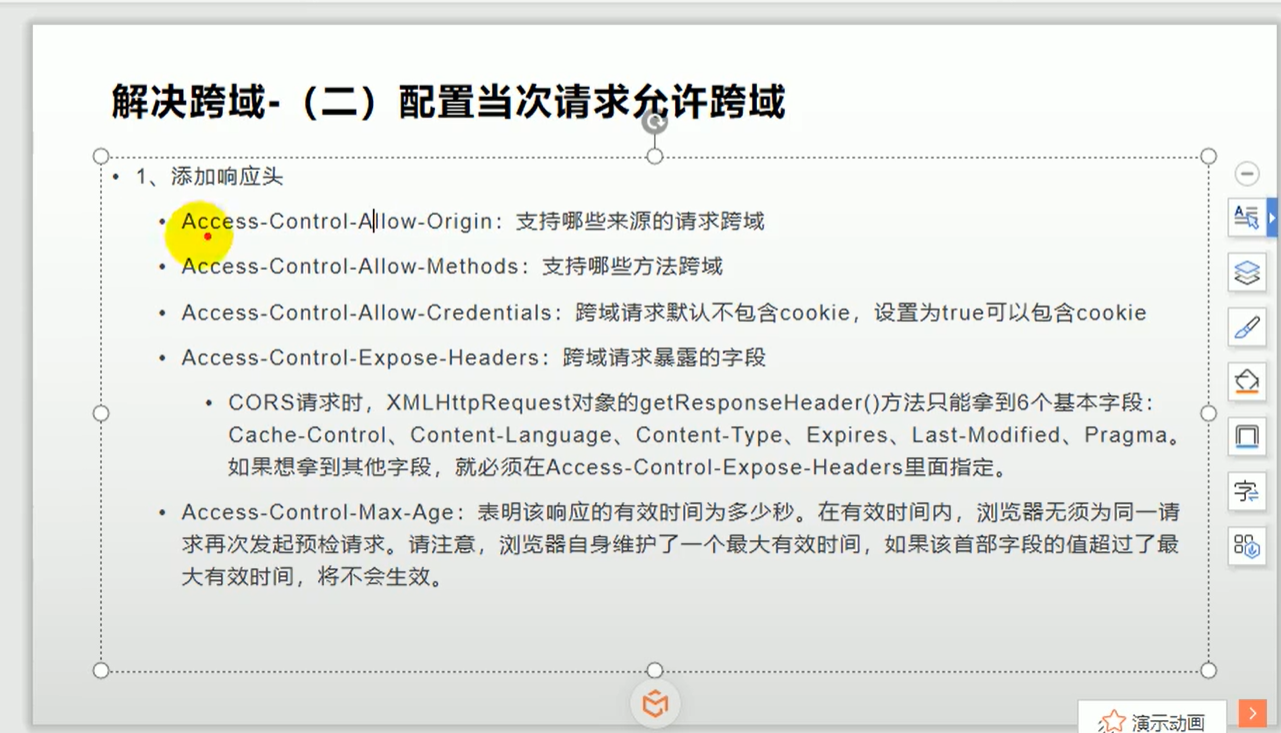
这里有一台nginx服务器,将前端项目部署到里面,将后台网关也让nginx代理过来,以后浏览器想要访问前端项目,就不访问前端项目的地址了,访问nginx地址,只要是静态请求,就默认代理给前端项目,动态请求都会加上api,遇见动态请求,还是发给nginx,nginx反向代理给网关,网关再给转到其他服务。从头到尾访问路径都是nignx的服务地址,nignx配置好反向代理的相关内容,把他们转化为同一个域他们就不跨域了,但是开发期间就比较麻烦,所以采用第二种方法,既然跨域首先发一个预检请求,去问服务器能不能跨域,服务器告诉他能跨域就完事了。给预检请求一个响应告诉他能跨,主要配置相关响应头,列举如下几个字段
但是每一个请求,现在是登录syslogin,请求结束后,手动给他们添加这几个响应字段,太麻烦了,因为好多请求都要跨域,最快的方式是写一个filter
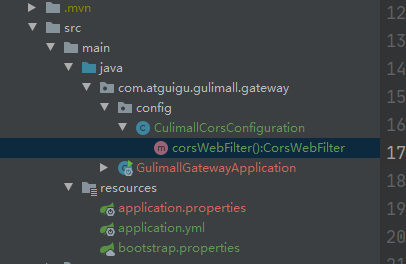
写一个filter ,所有的请求进来放行,再返回给浏览器之前,添加相应字段 ,filter不用写在每一个服务里面,而是写在网关里面,因为网关代理其他服务,统一配置跨域
Springboot跨域的官方文档
https://docs.spring.io/spring-boot/docs/current/reference/html/spring-boot-features.html#boot-features-cors
查找接口的实现类:
IDEA 风格 ctrl + alt +B
查看类或接口的继承关系:
ctrl + h
在config包下编写配置类
package com.atguigu.gulimall.gateway.config;

import org.springframework.context.annotation.Bean;
import org.springframework.context.annotation.Configuration;
import org.springframework.web.cors.CorsConfiguration;
import org.springframework.web.cors.reactive.CorsWebFilter;
import org.springframework.web.cors.reactive.UrlBasedCorsConfigurationSource;

@Configuration
public class CulimallCorsConfiguration {
    @Bean
    public CorsWebFilter corsWebFilter(){
         //选用org.springframework.web.cors.reactive包下的,网关是webflux编程,响应式编程,
        UrlBasedCorsConfigurationSource source = new UrlBasedCorsConfigurationSource();

        CorsConfiguration corsConfiguration=new CorsConfiguration();

        //1.配置跨域
        corsConfiguration.addAllowedHeader("*");
        corsConfiguration.addAllowedMethod("*");
        corsConfiguration.addAllowedOrigin("*");
        //允许携带cooike
        corsConfiguration.setAllowCredentials(true);

        //path:"/**":任意路径都要配置,
        source.registerCorsConfiguration("/**",corsConfiguration);
        return new CorsWebFilter(source);
    }
}
发起了两个请求
response多了这些字段
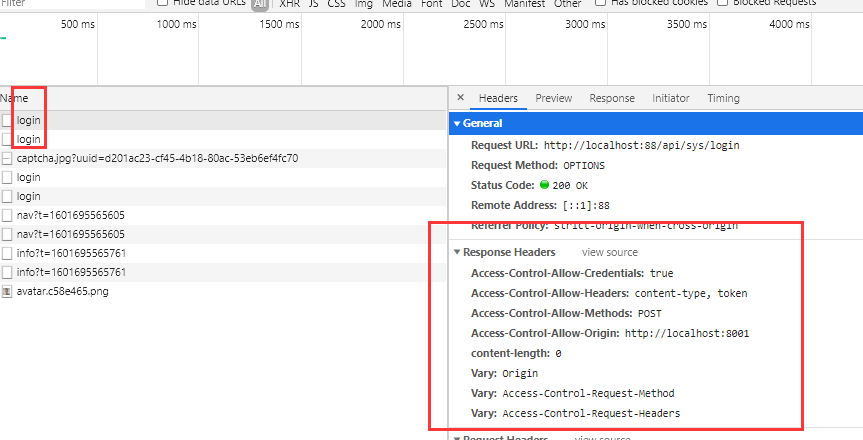
真实请求携带了真正的请求数据
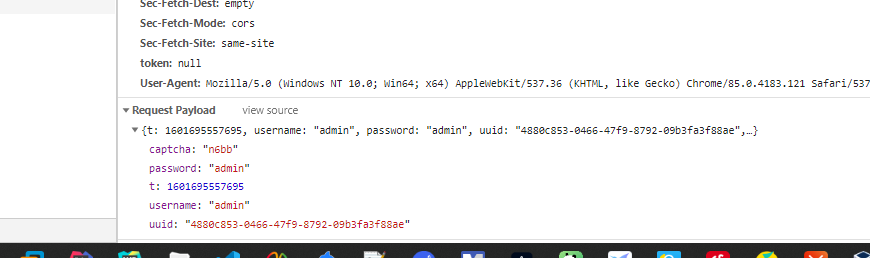
但是出现了重复,
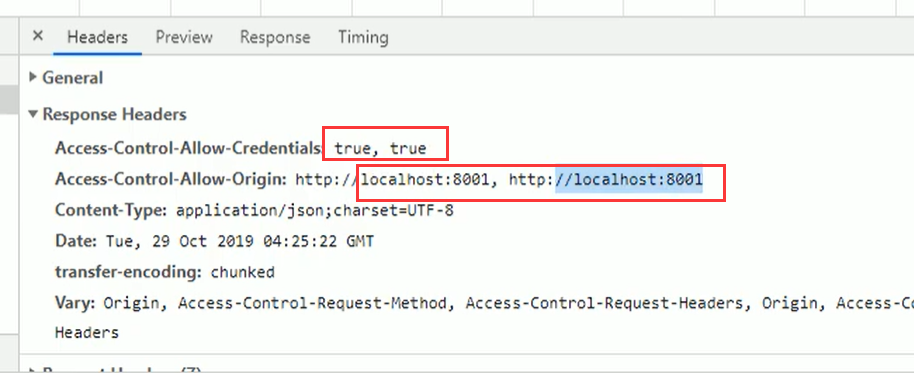
因为http://localhost:8001/renren已拦截跨源请求:同源策略禁止读取位于 http://localhost:88/api/sys/login 的远程资源。(原因:不允许有多个 ‘Access-Control-Allow-Origin’ CORS 头)
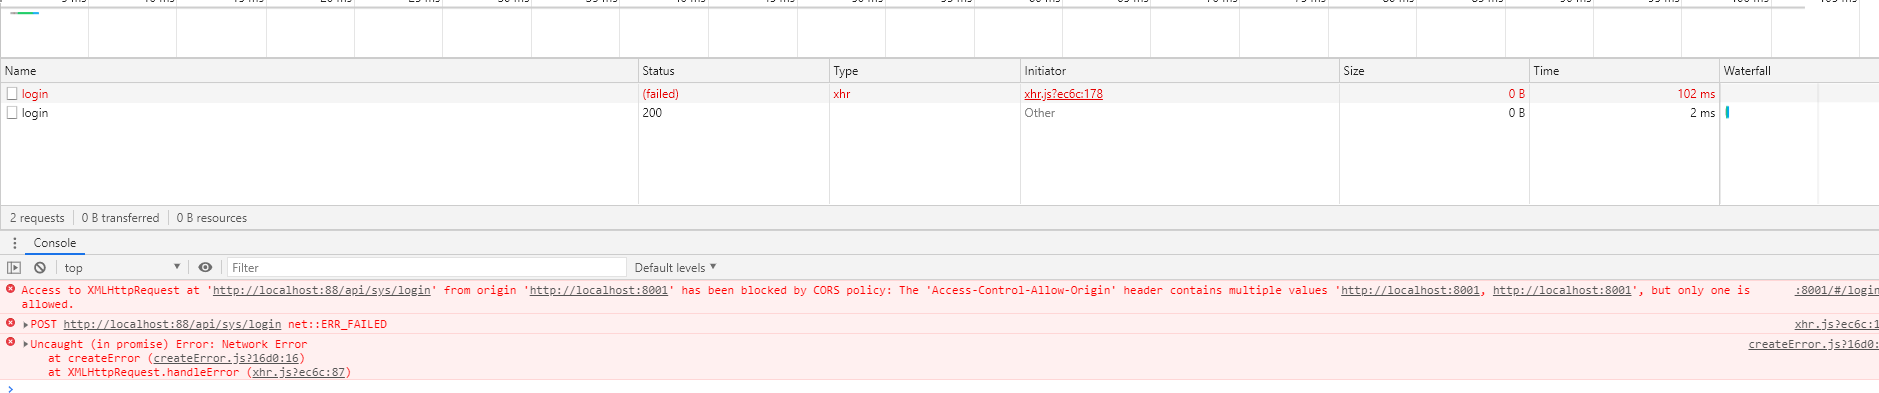
解决方式:注释掉renren-fast的CORS配置类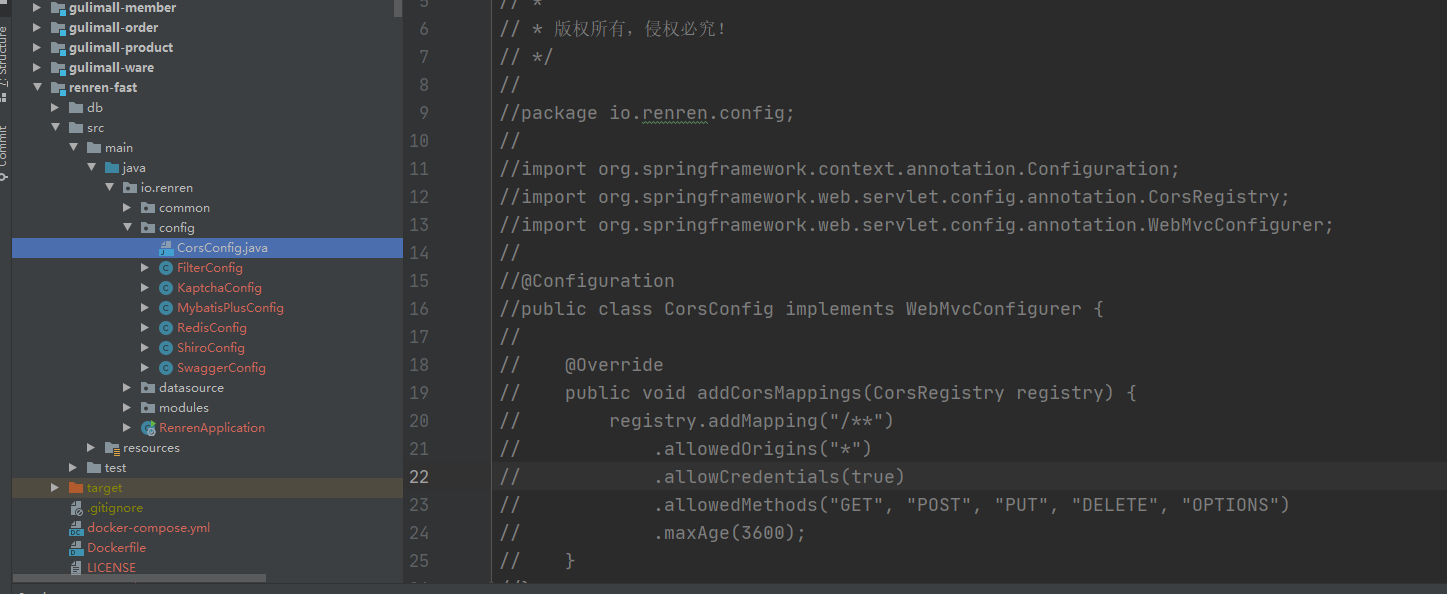
第一个是预检请求,第二个才是真实请求
第一次响应头多了这些字段,允许这些跨域
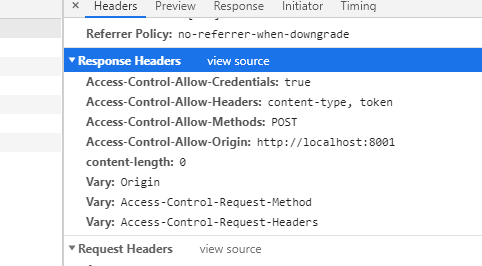
真实请求携带了真正的请求数据

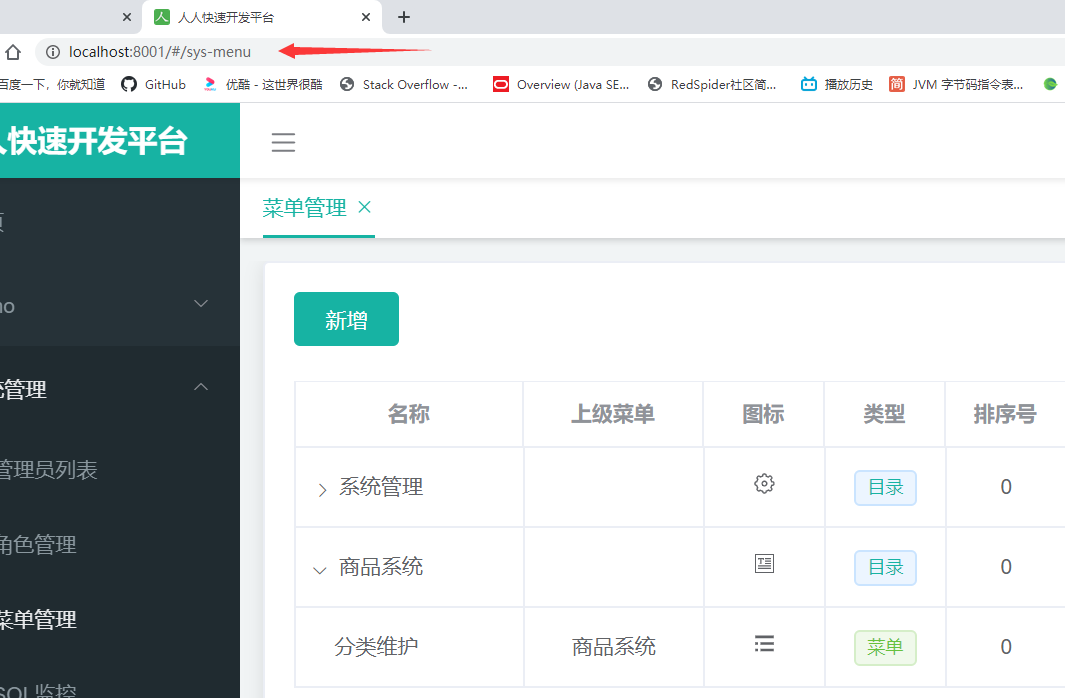
树形展示三级分类数据
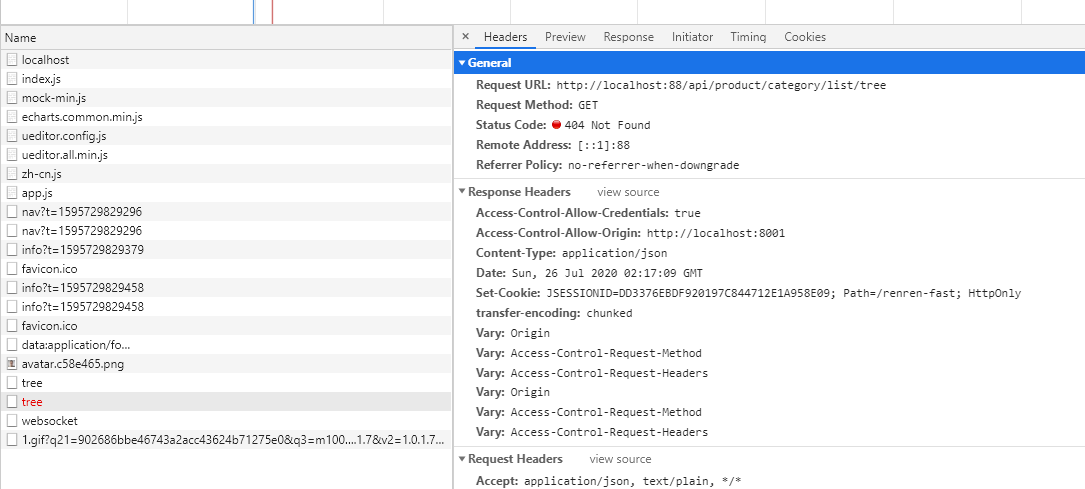
分类维护显示404,解决方案:先配置路由,再将product配置到注册中心
在gateway中配置好路由
再配置好nacos注册中心和配置中心
直接访问
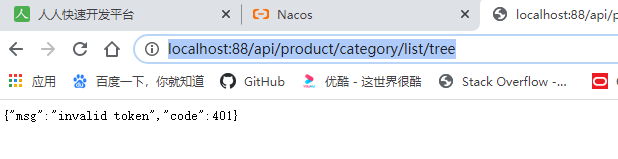
原因是后台登录没有带令牌导致的,说明新配置的路由没有生效,请求是被负载均衡到renren-fast,转到后台管理系统,上面的断言提前生效,解决方法是调整一下路由顺序,将精确地路由放在高优先级,模糊路由放低优先级,会优先适配上面的断言、
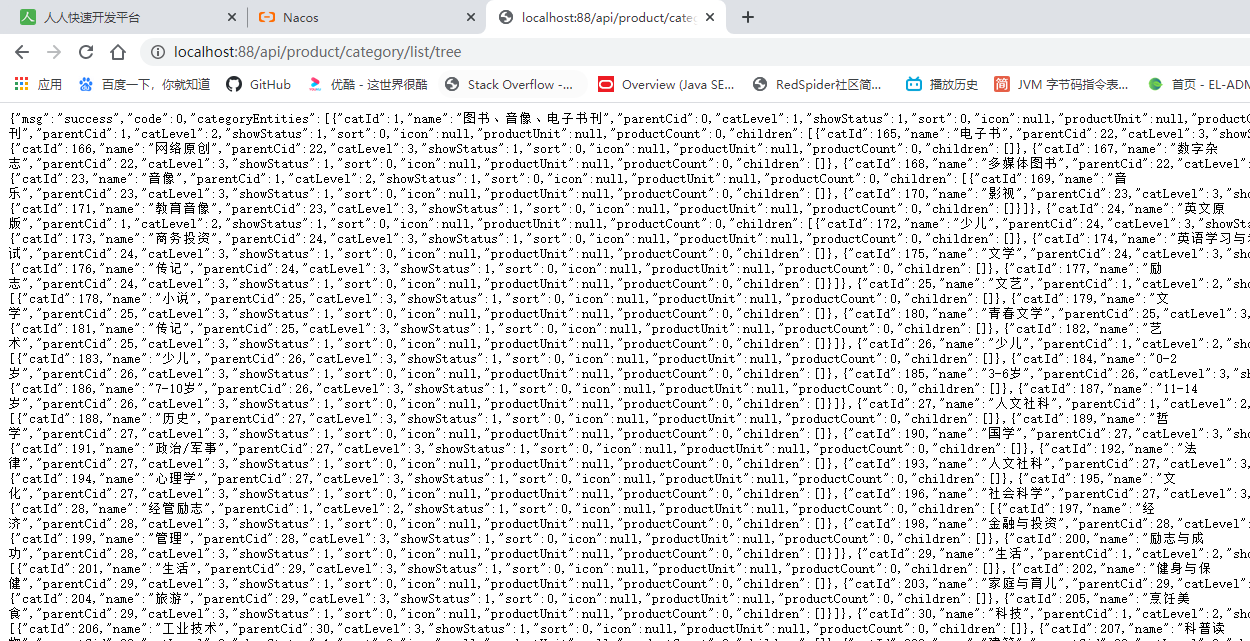
修改后效果
解构对象获取到data
修改一下避免混淆,
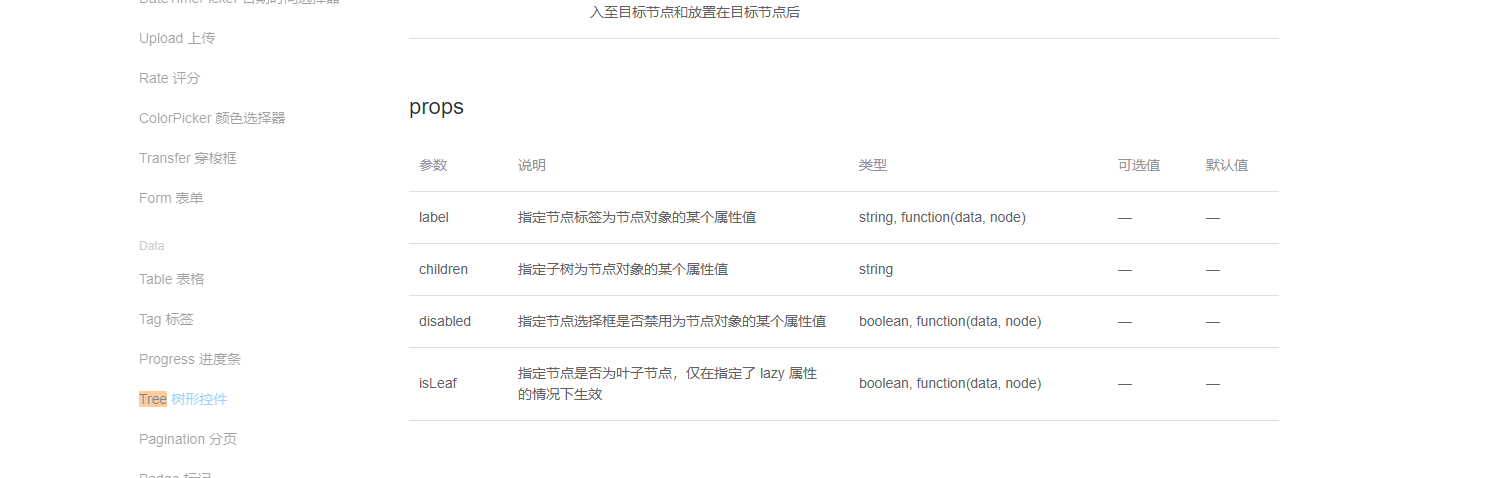
label: 指定节点标签为节点对象的某个属性值
children:指定子树为节点对象的某个属性值
(参考开发文档https://element.eleme.cn/#/zh-CN/component/tree)
根据文档添加新增和删除按钮,和对应的methods
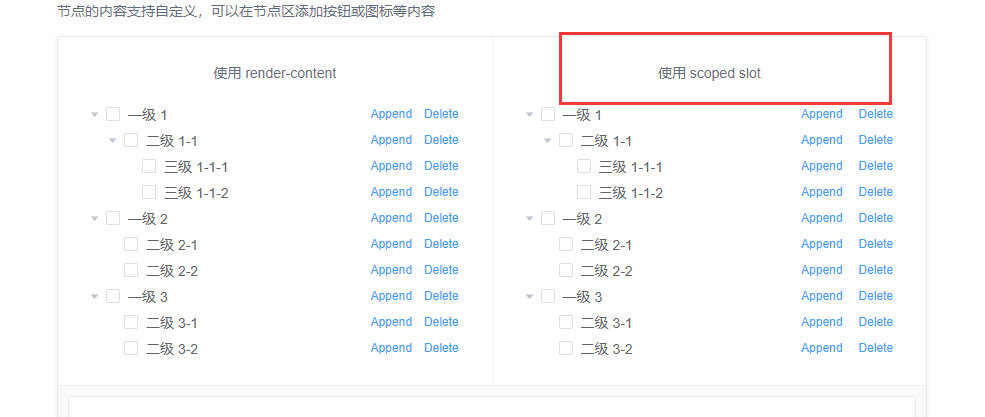
<!--  -->
<template>
  <el-tree :data="menus" :props="defaultProps" :expand-on-click-node="false" show-checkbox>
     <span class="custom-tree-node" slot-scope="{ node, data }">
        <span>{{ node.label }}</span>
        <span>
<!--          只有一级和二级分类有添加,三级或者没有子节点的分类有删除-->
          <el-button v-if="node.level<=2" type="text" size="mini" @click="() => append(data)">Append</el-button>
          <el-button v-if="node.childNodes.length==0" type="text" size="mini" @click="() => remove(node, data)">Delete</el-button>
        </span>
      </span>
  </el-tree>
</template>

<script>
  //这里可以导入其他文件(比如:组件,工具js,第三方插件js,json文件,图片文件等等)
  //例如:import 《组件名称》 from '《组件路径》';

  export default {
//import引入的组件需要注入到对象中才能使用
    components: {},
    data() {
      return {
        menus: [],
        defaultProps: {
          children: 'children',
          label: 'name'
        }
      };
    },
    methods: {
      getMenus() {
        this.$http({
          url: this.$http.adornUrl('/product/category/list/tree'),
          method: 'get',
        }).then(({data}) => {
          console.log("成功获取到菜单数据。。。", data.data)
          this.menus = data.data;
        })
      },
      append(data) {
       console.log("append",data)
      },

      remove(node, data) {
        console.log("remove",node,data)
      }
    }
    ,
    //监听属性 类似于data概念
    computed: {}
    ,
    //监控data中的数据变化
    watch: {}
    ,
    //方法集合

    //生命周期 - 创建完成(可以访问当前this实例)
    created() {
      this.getMenus();
    }
    ,
    //生命周期 - 挂载完成(可以访问DOM元素)
    mounted() {

    }
    ,
    beforeCreate() {
    }
    , //生命周期 - 创建之前
    beforeMount() {
    }
    , //生命周期 - 挂载之前
    beforeUpdate() {
    }
    , //生命周期 - 更新之前
    updated() {
    }
    , //生命周期 - 更新之后
    beforeDestroy() {
    }
    , //生命周期 - 销毁之前
    destroyed() {
    }
    , //生命周期 - 销毁完成
    activated() {
    }
    , //如果页面有keep-alive缓存功能,这个函数会触发
  }
</script>
<style scoped>
</style>
逻辑删除
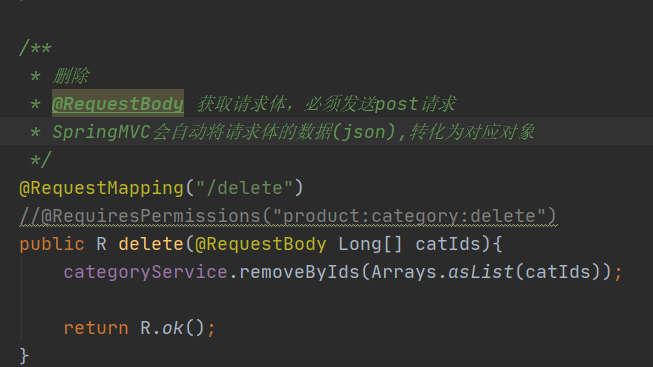
  /**
     * 删除
     * @RequestBody 获取请求体,必须发送post请求
     * SpringMVC会自动将请求体的数据(json),转化为对应对象
     */
    @RequestMapping("/delete")
    //@RequiresPermissions("product:category:delete")
    public R delete(@RequestBody Long[] catIds){
//        categoryService.removeByIds(Arrays.asList(catIds));
        categoryService.removeMenuByIds(Arrays.asList(catIds));
        return R.ok();
    }
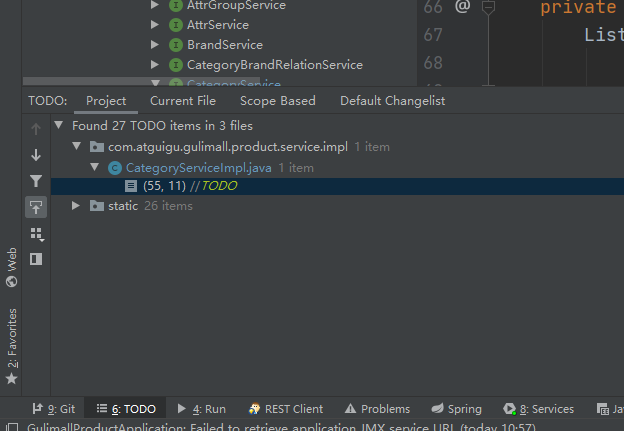
@Override
public void removeMenuByIds(List<Long> asList) {
    //TODO
    //1.检查当前删除菜单是否被别的地方引用
    baseMapper.deleteBatchIds(asList);
}
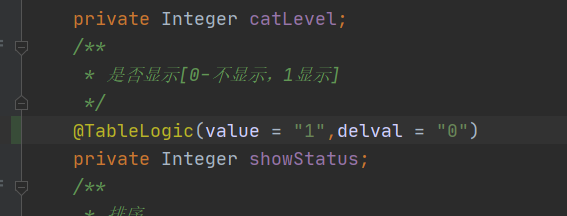
配置mybatis plus逻辑删除
https://mp.baomidou.com/guide/logic-delete.html
mybatis-plus:
  global-config:
    db-config:
      logic-delete-field: flag  # 全局逻辑删除的实体字段名(since 3.3.0,配置后可以忽略不配置步骤2)
      logic-delete-value: 1 # 逻辑已删除值(默认为 1)
      logic-not-delete-value: 0 # 逻辑未删除值(默认为 0)
配置逻辑删除规则,如果与全局配置相反,按照这个来确定,如果不写,默认全局配置为准,
在gulimall-product下设置日志级别可以看到具体的sql语句
logging:
  level:
    com.atguigu.gulimall: debug

httpRequest.js 定义了一个http对象,http对象定义了请求拦截,在发每一个请求之前,会从cookie里面获取到后台登录系统里面的token,
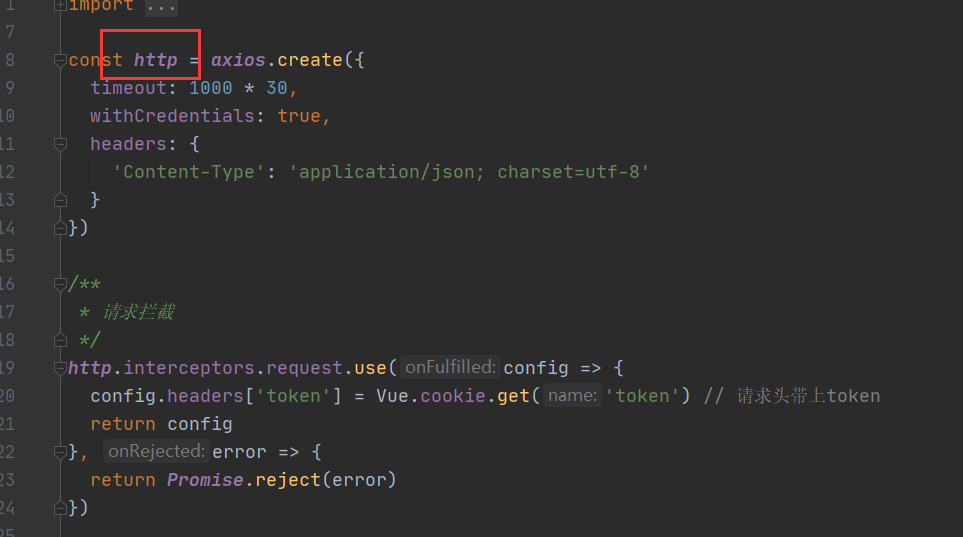
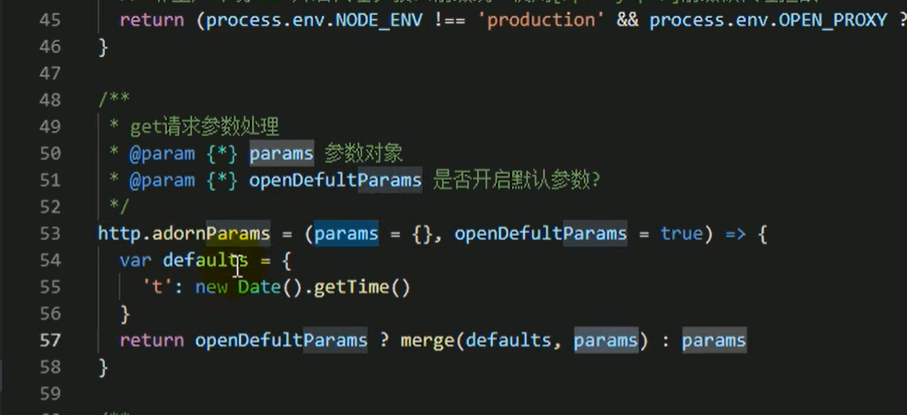
ajax的get请求会被缓存,有可能第一次发数据,就会被缓存,再发请求就不会向服务器获取到新的数据了,为了不缓存,随便在请求路径新增一个参数,这个参数不一样,随机数比如当前时间戳,请求就不会被缓存,每次的请求就会实时的访问服务器,。
发送post请求删除,成功后调用getMenus会返回新数据,为menus赋值
<!--  -->
<template>
  <el-tree
    :data="menus"
    :props="defaultProps"
    :expand-on-click-node="false"
    show-checkbox
    node-key="catId"
    :default-expanded-keys="expandedKey"
  >
     <span class="custom-tree-node" slot-scope="{ node, data }">
        <span>{{ node.label }}</span>
        <span>
<!--          只有一级和二级分类有添加,三级或者没有子节点的分类有删除-->
          <el-button v-if="node.level<=2" type="text" size="mini" @click="() => append(data)">Append</el-button>
          <el-button v-if="node.childNodes.length==0" type="text" size="mini"
                     @click="() => remove(node, data)">Delete</el-button>
        </span>
      </span>
  </el-tree>
</template>

<script>
  //这里可以导入其他文件(比如:组件,工具js,第三方插件js,json文件,图片文件等等)
  //例如:import 《组件名称》 from '《组件路径》';

  export default {
//import引入的组件需要注入到对象中才能使用
    components: {},
    data() {
      return {
        menus: [],
        expandedKey:[],
        defaultProps: {
          children: 'children',
          label: 'name'
        }
      };
    },
    methods: {
      getMenus() {
        this.$http({
          url: this.$http.adornUrl('/product/category/list/tree'),
          method: 'get',
        }).then(({data}) => {
          console.log("成功获取到菜单数据。。。", data.data)
          this.menus = data.data;
        })
      },
      append(data) {
        console.log("append", data)
      },

      remove(node, data) {
        let ids = [data.catId];
        this.$confirm(`是否删除【${data.name}】菜单, 是否继续?`, '提示', {
          confirmButtonText: '确定',
          cancelButtonText: '取消',
          type: 'warning'
        }).then(() => {
          this.$message({
            message: '菜单删除成功',
            type: 'success'
          });
          this.$http({
            url: this.$http.adornUrl('/product/category/delete'),
            method: 'post',
            data: this.$http.adornData(ids, false),

          }).then(({data}) => {
            console.log("删除成功", data);
            //刷新出新的菜单
            this.getMenus();
            //默认要展示的菜单
            this.expandedKey=[node.parent.data.catId];
          })
        }).catch(()=>{

        })

        console.log("remove", node, data);
      }
    }
    ,
    //监听属性 类似于data概念
    computed: {}
    ,
    //监控data中的数据变化
    watch: {}
    ,
    //方法集合

    //生命周期 - 创建完成(可以访问当前this实例)
    created() {
      this.getMenus();
    }
    ,
    //生命周期 - 挂载完成(可以访问DOM元素)
    mounted() {

    }
    ,
    beforeCreate() {
    }
    , //生命周期 - 创建之前
    beforeMount() {
    }
    , //生命周期 - 挂载之前
    beforeUpdate() {
    }
    , //生命周期 - 更新之前
    updated() {
    }
    , //生命周期 - 更新之后
    beforeDestroy() {
    }
    , //生命周期 - 销毁之前
    destroyed() {
    }
    , //生命周期 - 销毁完成
    activated() {
    }
    , //如果页面有keep-alive缓存功能,这个函数会触发
  }
</script>
<style scoped>
</style>
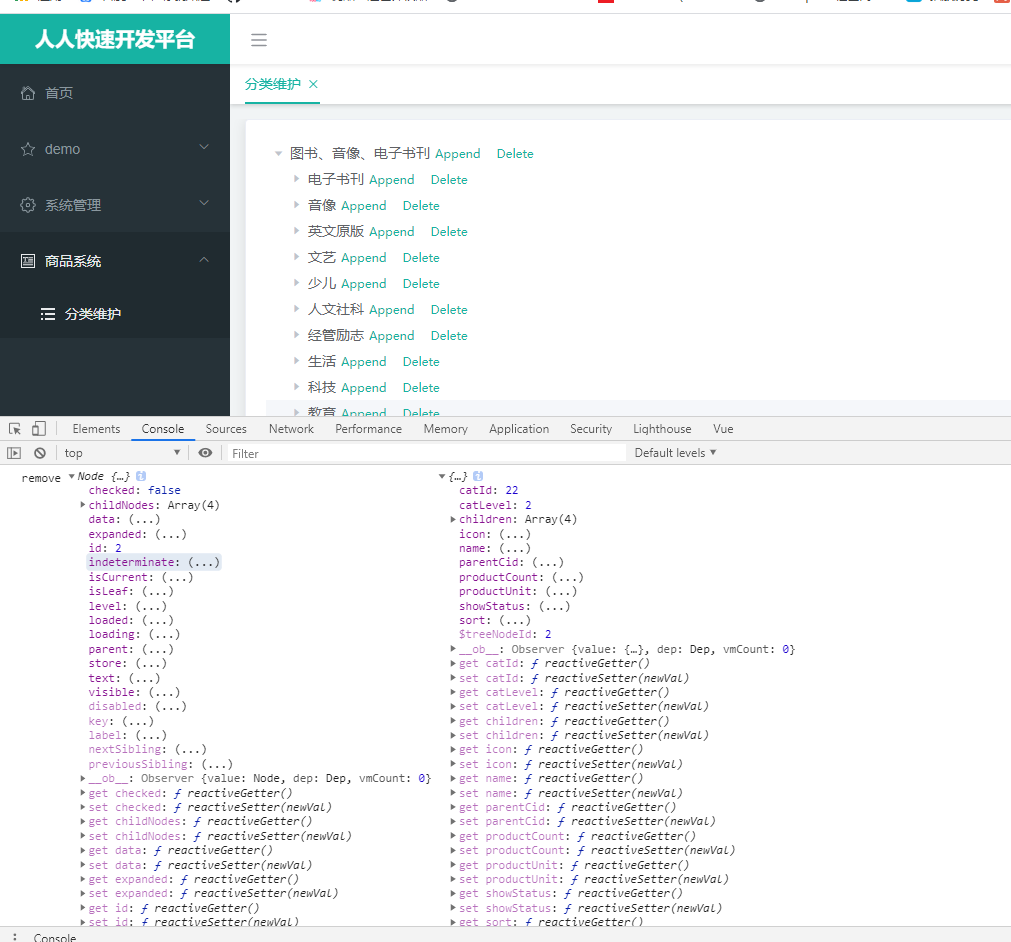
拖动结点
拖拽数据收集
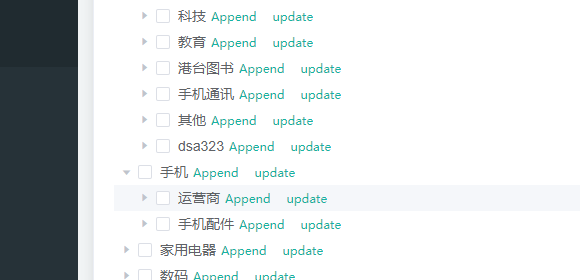
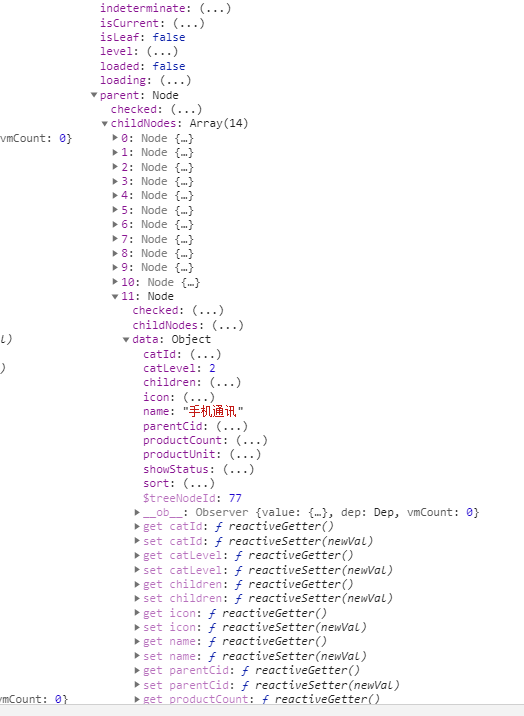
手机通讯最新的父节点id,最新的排序(和其他子节点放在一起重新排序),以及最新结点的层级,首先监听拖拽成功这个事件,监听成功后,将所有数据收集发给数据库 node-drop
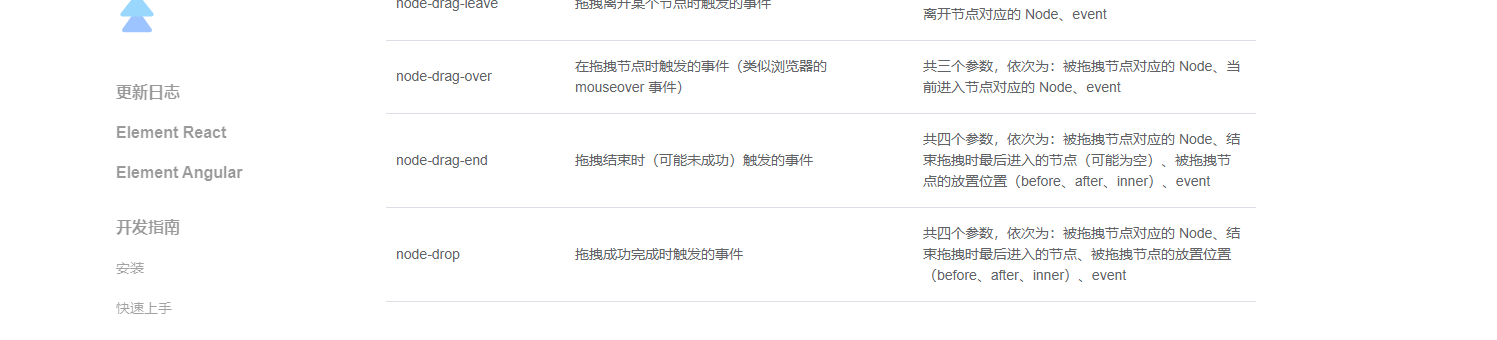
将手机通讯拖拽到其他的前面
第一个Node为拖拽的结点-手机通讯,data里面封装了结点的详细内容,第二个Node是什么之后,
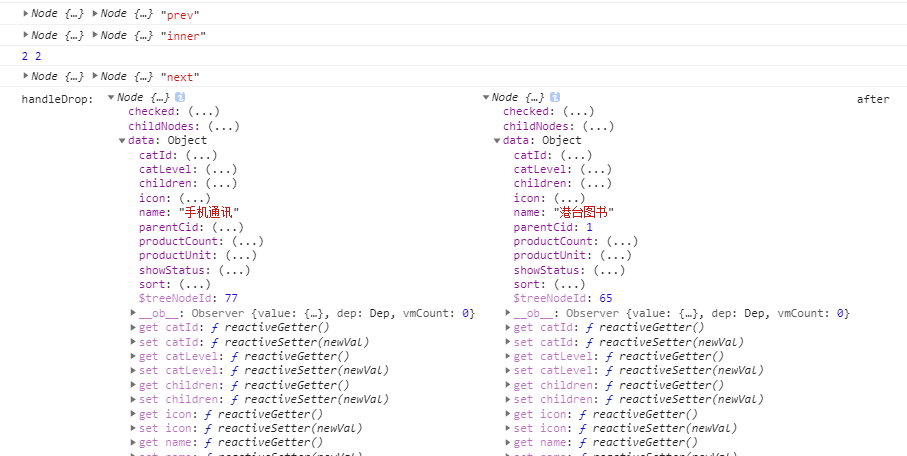
因为把手机下的手机通讯移到了港台图书的下面,所以手机通讯的最新父节点应该为港台图书的父节点
当前拖拽结点的最新顺序为:
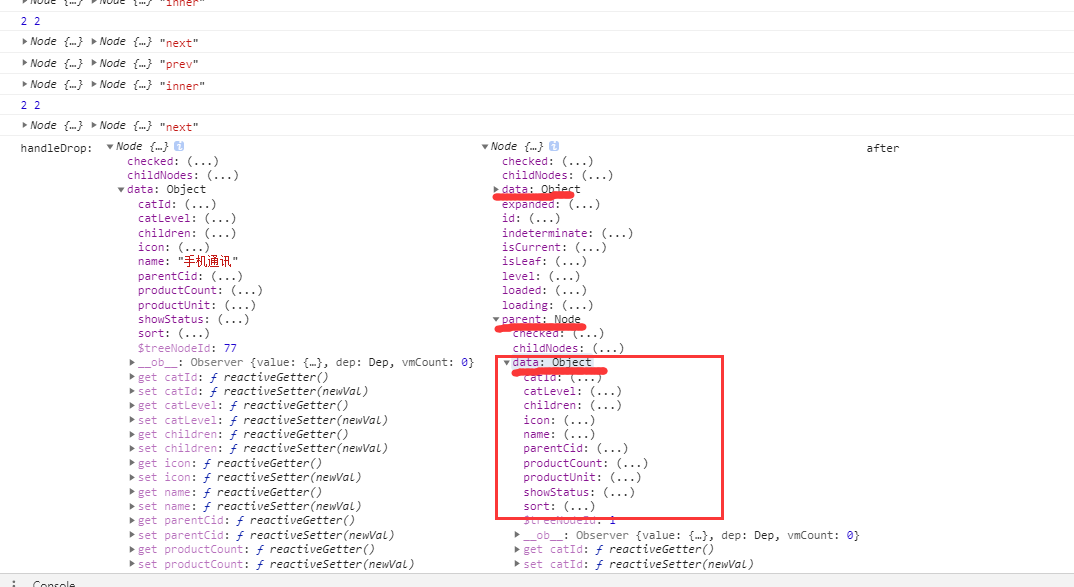
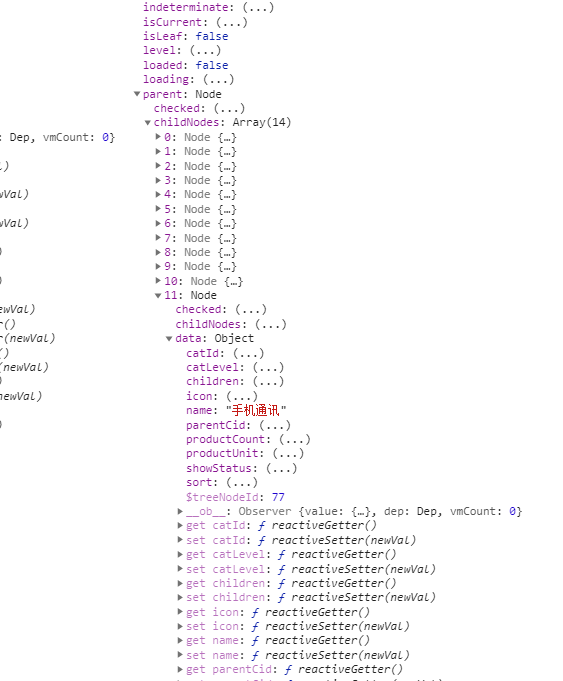
手机通讯所处的父节点的所有子节点重新从0排序,需要获取到拖拽结点-手机通讯,拖拽到港台图书所在的父节点-图书音像电子书刊,它所有子结点,这个父结点的最大特点是包含了刚拖拽进来的子节点-手机通讯
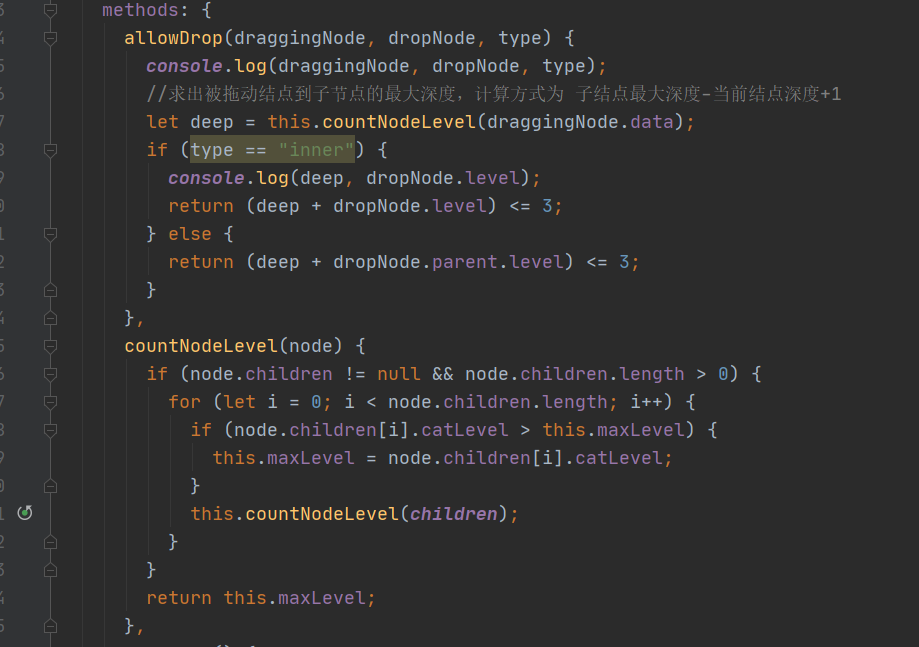
所以要遍历这些兄弟:如果以inner的方式进入,它的兄弟就是进入的结点里面的childNodes
当前拖拽的结点可能引起父子关系的变化
当前拖拽结点的最新层级(还是刚才那个图)的catLevel
总结:我们需要的所有信息都在第二个对象Node中获取到
最终代码
handleDrop(draggingNode, dropNode, dropType, ev) {
  console.log('handleDrop: ', draggingNode, dropNode, dropType);
  //1.当前结点最新父节点id
  let pCid;
  let siblings = null;
  if (dropType == "inner") {
    pCid = dropNode.data.catId;
    siblings = dropNode.childNodes;
  } else {
    pCid = dropNode.parent.data.catId == undefined ? 0 : dropNode.parent.data.catId;
    siblings = dropNode.parent.childNodes;
  }

  //2.当前拖拽结点的最新顺序
  for (let i = 0; i < siblings.length; i++) {
    if (siblings[i].data.catId === draggingNode.data.catId) {
      //如果遍历的是当前拖拽的结点,还需要额外修改他的parentCid
      let catLevel = draggingNode.level;
      if (siblings[i].level != draggingNode.level) {
        //当前结点层级发生变化
        catLevel = siblings[i].level;
        //继续修改子节点的层级
        this.updateChildNodeLevel(siblings[i]);
      }
      this.updateNodes.push({catId: siblings[i].data.catId, sort: i, parentCid: pCid, catLevel: catLevel});
    } else {
      this.updateNodes.push({catId: siblings[i].data.catId, sort: i});
    }
  }
  //3.当前拖拽结点的最新层级

  console.log("updateNodes:", this.updateNodes);
},
updateChildNodeLevel(node) {
  if (node.childNodes.length > 0) {
    for (let i = 0; i < node.childNodes.length; i++) {
      let cNode = node.childNodes[i].data;
      this.updateNodes.push({catId:cNode.catId,catLevel:node.childNodes[i].level})
      this.updateChildNodeLevel(node.childNodes[i]);
    }
  }
},
云存储的开通与使用
单体应用部署在一台服务器上,想要做文件上传,浏览器会给项目发送请求,将上传的文件交给他, 项目收到某个请求后,将某个文件保存在某个文件的位置下面,如果下次还想用某个文件,还会发请求,将这个文件返回给我们进行显示,分布式情况下,某一个服务要经常别别人访问,一台服务器不够,可能部署多台,假设商品服务部署了多台服务器,第一次负载均衡,文件上传,保存到第二个服务器上面,还像以前的方式,将当前文件保存在当前项目的某个文件夹下,下次请求想要获取文件,负载均衡到了其他服务器,其他服务器是没有这个文件的,所以会有些问题,解决方案是不论浏览器无论是发给哪个服务,进行文件上传,最终将上传的文件统一存储在一个文件系统里,这样,不同服务在一个地方写,也在一个地方读,就不会出现自己持有的文件,对方读不到的情况。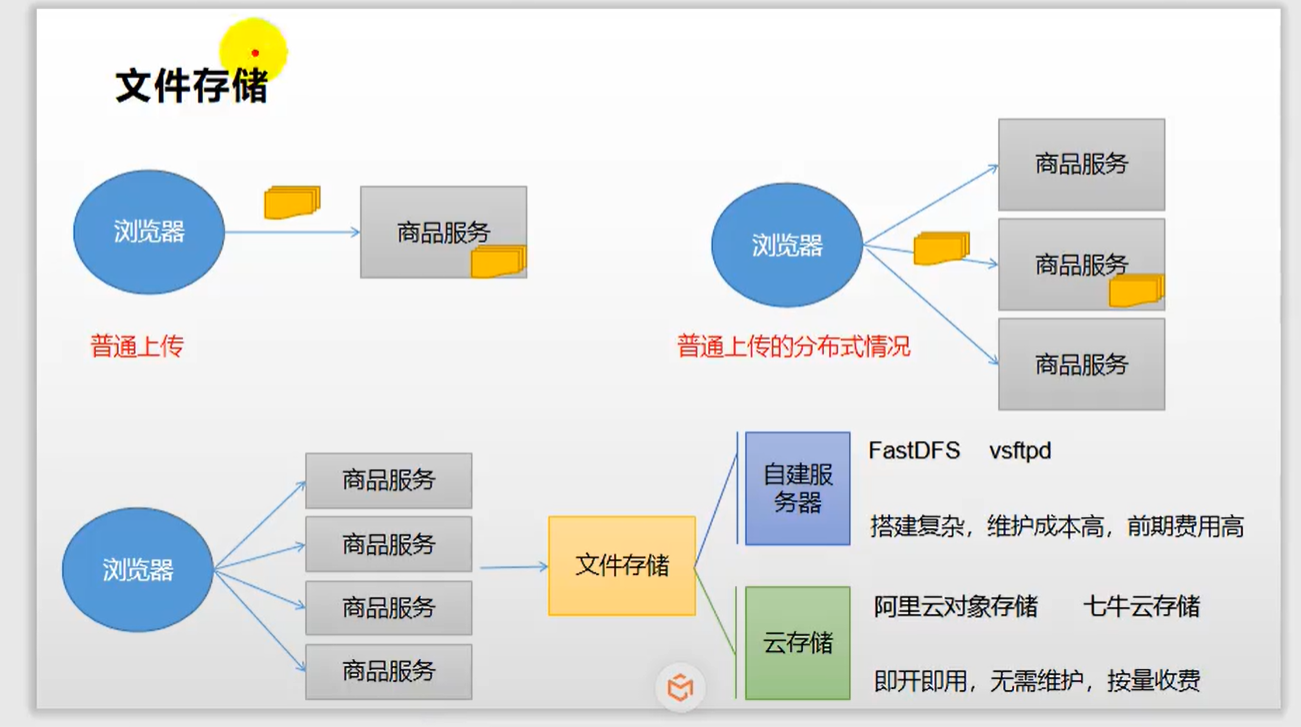
阿里对象存储 专业术语

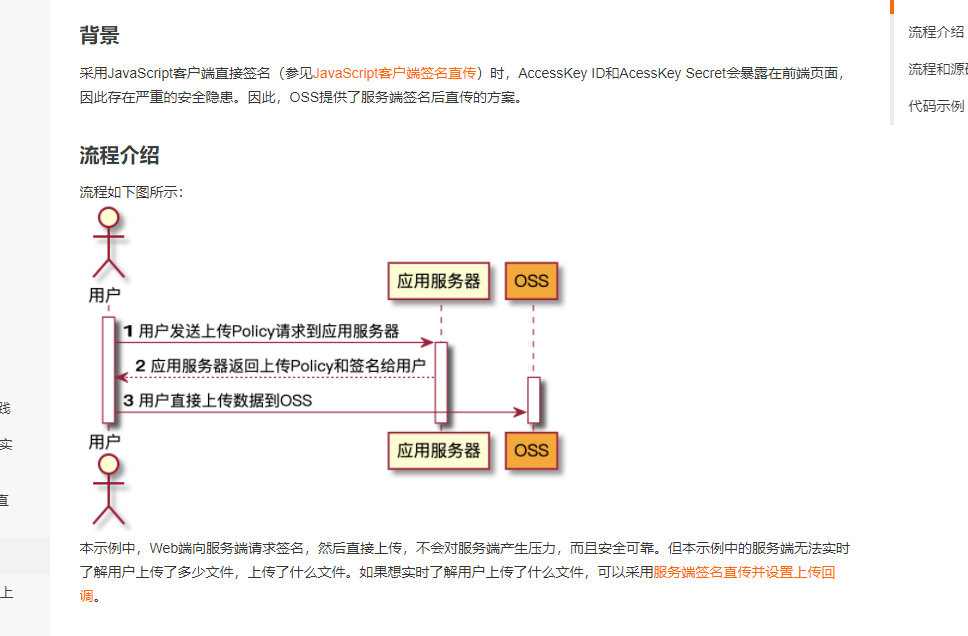
将操作服务的账号密码等信息还是存在自己的商品服务里面,前端想给阿里云上传数据,上传之前,找服务器要到一个,Policy(上传策略),服务器利用阿里云的账号密码,给他生成一个防伪的签名,签名里面包含访问阿里云这次的一个授权令牌,以及授权给阿里云的哪个地址,哪个位置这些信息,等前端从自己的服务器拿到这些信息以后,这些信息里面并没有账号密码,而是利用账号密码生成的一串防伪签名,前端带着这串防伪签名,以及要上传的文件交给阿里云,阿里云可以验证这片防伪签名,是正确的,阿里云就接收这次上传请求。这样文件就不先过服务器在交给阿里云了,要不然光上传的这些文件就占了很大的带宽,影响服务器处理别的请求。

注意版本
<!--        <dependency>-->
<!--            <groupId>com.alibaba.cloud</groupId>-->
<!--            <artifactId>spring-cloud-starter-alicloud-oss</artifactId>-->
<!--            <version>2.2.0.RELEASE</version>-->
<!--        </dependency>-->
cloud:
  alicloud:
    access-key: LTAI4GJxb8pn8Mjwhc9Fhp7p
    secret-key: dNdCGje904WFh6YYH36LZanVTm0KGt
    oss:
      endpoint: oss-cn-beijing.aliyuncs.com
经过自己服务器的做法
@Resource
private OSSClient ossClient;
@Test
public void testUpload() throws FileNotFoundException {
    // Endpoint以杭州为例,其它Region请按实际情况填写。
    //String endpoint = "oss-cn-beijing.aliyuncs.com";
    // 云账号AccessKey有所有API访问权限,建议遵循阿里云安全最佳实践,创建并使用RAM子账号进行API访问或日常运维,请登录 https://ram.console.aliyun.com 创建。
    //String accessKeyId = "LTAI4GJxb8pn8Mjwhc9Fhp7p";
    //String accessKeySecret = "dNdCGje904WFh6YYH36LZanVTm0KGt";

    // 创建OSSClient实例。
    OSS ossClient = new OSSClientBuilder().build(endpoint, accessKeyId, accessKeySecret);

    // 上传文件流。
    InputStream inputStream = new FileInputStream("D:\\测试\\timg.jpg");
    ossClient.putObject("gulimall-tangyao", "time.jpg", inputStream);

    // 关闭OSSClient。
    ossClient.shutdown();
    System.out.println("上传成功.");
}
以后会有非常多的第三方服务调用,对象存储,发送短信,发物流,为整个项目创建一个微服务来整合各种第三方功能 服务名为gulimall-third-party。
将common里面的对象存储去掉,其他服务就得配对象服务的内容,对象服务是一个公共服务就放在third-party里面

创建新的module
application.yml
spring:
  cloud:
    nacos:
      discovery:
        server-addr: 127.0.0.1:8848
    alicloud:
      access-key: LTAI4GJxb8pn8Mjwhc9Fhp7p
      secret-key: dNdCGje904WFh6YYH36LZanVTm0KGt
      oss:
        endpoint: oss-cn-beijing.aliyuncs.com
        bucket: gulimall-tangyao
  application:
    name: gulimall-third-party

server:
  port: 30000
bootstrap.properties
spring.application.name=gulimall-third-party
spring.cloud.nacos.config.server-addr=127.0.0.1:8848
spring.cloud.nacos.config.namespace=8434e75b-07f3-43ff-b7cd-e01b380a9b10

spring.cloud.nacos.config.extension-configs[0].data-id=oss.yml
spring.cloud.nacos.config.extension-configs[0].group=DEFAULT_GROUP
spring.cloud.nacos.config.extension-configs[0].refresh=true

pom.xml
<dependency>
    <groupId>com.atguigu.gulimall</groupId>
    <artifactId>gulimall-common</artifactId>
    <version>0.0.1-SNAPSHOT</version>
    <exclusions>
        <exclusion>
            <groupId>com.baomidou</groupId>
            <artifactId>mybatis-plus-boot-starter</artifactId>
        </exclusion>
    </exclusions>
</dependency>
 <dependency>
            <groupId>com.alibaba.cloud</groupId>
            <artifactId>spring-cloud-starter-alicloud-oss</artifactId>
            <version>2.2.0.RELEASE</version>
</dependency>

<dependencyManagement>
        <dependencies>
            <dependency>
                <groupId>org.springframework.cloud</groupId>
                <artifactId>spring-cloud-dependencies</artifactId>
                <version>${spring-cloud.version}</version>
                <type>pom</type>
                <scope>import</scope>
            </dependency>
            <dependency>
                <groupId>com.alibaba.cloud</groupId>
                <artifactId>spring-cloud-alibaba-dependencies</artifactId>
                <version>2.2.0.RELEASE</version>
                <type>pom</type>
                <scope>import</scope>
            </dependency>
        </dependencies>
    </dependencyManagement>
测试第三方服务
会发现ossClient 标红
@Autowired
private OSSClient ossClient;

@Test
public void testUpload() throws FileNotFoundException {
    // Endpoint以杭州为例,其它Region请按实际情况填写。
    String endpoint = "oss-cn-beijing.aliyuncs.com";
    // 云账号AccessKey有所有API访问权限,建议遵循阿里云安全最佳实践,创建并使用RAM子账号进行API访问或日常运维,请登录 https://ram.console.aliyun.com 创建。
    String accessKeyId = "LTAI4GJxb8pn8Mjwhc9Fhp7p";
    String accessKeySecret = "dNdCGje904WFh6YYH36LZanVTm0KGt";

    // 创建OSSClient实例。
    OSS ossClient = new OSSClientBuilder().build(endpoint, accessKeyId, accessKeySecret);

    // 上传文件流。
    InputStream inputStream = new FileInputStream("D:\\测试\\timg.jpg");
    ossClient.putObject("gulimall-tangyao", "haha.jpg", inputStream);

    // 关闭OSSClient。
    ossClient.shutdown();
    System.out.println("上传成功.");
}
测试成功,
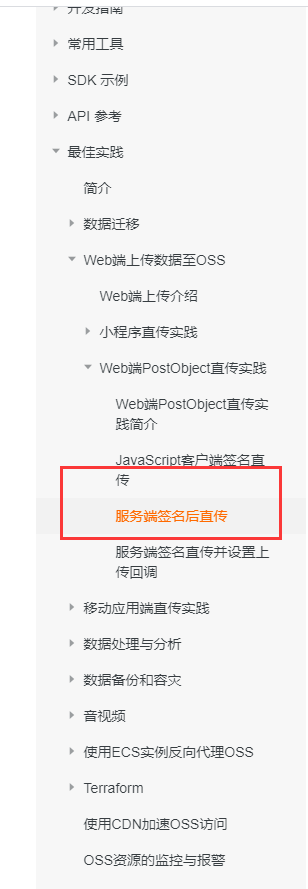
服务端签名后直传
先让浏览器去服务端获取签名,利用这个签名直接携带真正的文件, 直接提交给对象存储
https://help.aliyun.com/document_detail/31926.html?spm=a2c4g.11186623.6.1567.29d474b8CSmrUJ
https://help.aliyun.com/document_detail/91868.html?spm=a2c4g.11186623.2.15.60986e28iyiN73#concept-ahk-rfz-2fb
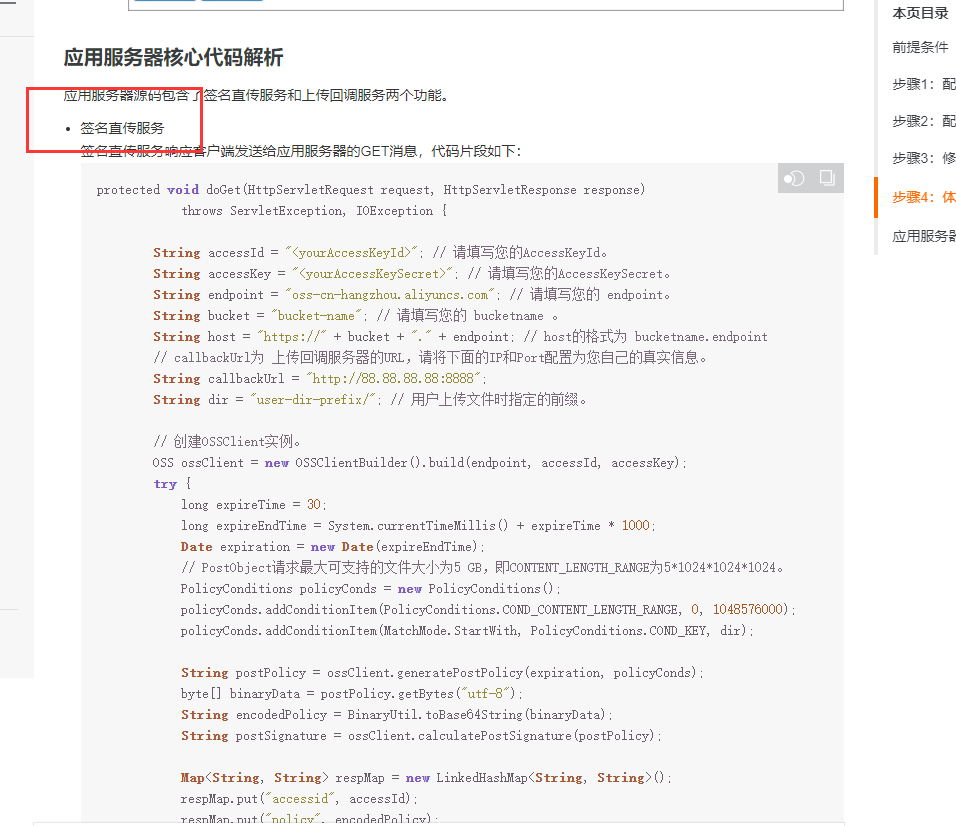
@RestController
public class OssController {
@Autowired
OSSClient ossClient;
@Value("${spring.cloud.alicloud.oss.endpoint}")
private String endpoint;
@Value("${spring.cloud.alicloud.oss.bucket}")
private String bucket;
@Value("${spring.cloud.alicloud.access-key}")
private String accessId;
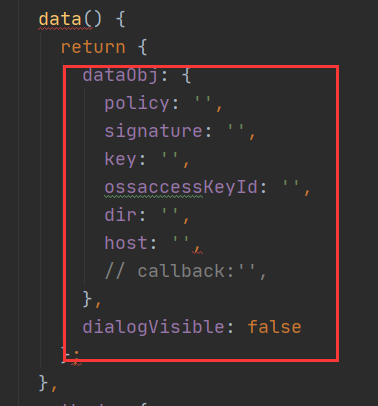
@RequestMapping("/oss/policy")
public Map<String, String> policy() {
// String accessId = "<yourAccessKeyId>"; // 请填写您的AccessKeyId。
// String accessKey = "<yourAccessKeySecret>"; // 请填写您的AccessKeySecret。
// String endpoint = "oss-cn-hangzhou.aliyuncs.com"; // 请填写您的 endpoint。
// String bucket = "gulimall-tangyao"; // 请填写您的 bucketname 。
String host = "https://" + bucket + "." + endpoint; // host的格式为 bucketname.endpoint
// callbackUrl为 上传回调服务器的URL,请将下面的IP和Port配置为您自己的真实信息。
// String callbackUrl = "http://88.88.88.88:8888";
String format = new SimpleDateFormat("yyyy-MM-dd").format(new Date());
String dir = format + "/"; // 用户上传文件时指定的前缀。
Map<String, String> respMap = null;
// 创建OSSClient实例。
// OSS ossClient = new OSSClientBuilder().build(endpoint, accessId, accessKey);
try {
long expireTime = 30;
long expireEndTime = System.currentTimeMillis() + expireTime * 1000;
Date expiration = new Date(expireEndTime);
// PostObject请求最大可支持的文件大小为5 GB,即CONTENT_LENGTH_RANGE为5*1024*1024*1024。
PolicyConditions policyConds = new PolicyConditions();
policyConds.addConditionItem(PolicyConditions.COND_CONTENT_LENGTH_RANGE, 0, 1048576000);
policyConds.addConditionItem(MatchMode.StartWith, PolicyConditions.COND_KEY, dir);
String postPolicy = ossClient.generatePostPolicy(expiration, policyConds);
byte[] binaryData = postPolicy.getBytes("utf-8");
String encodedPolicy = BinaryUtil.toBase64String(binaryData);
String postSignature = ossClient.calculatePostSignature(postPolicy);
respMap = new LinkedHashMap<String, String>();
respMap.put("accessid", accessId);
respMap.put("policy", encodedPolicy);
respMap.put("signature", postSignature);
respMap.put("dir", dir);
respMap.put("host", host);
respMap.put("expire", String.valueOf(expireEndTime / 1000));
// respMap.put("expire", formatISO8601Date(expiration));
// JSONObject jasonCallback = new JSONObject();
// jasonCallback.put("callbackUrl", callbackUrl);
// jasonCallback.put("callbackBody",
// "filename=${object}&size=${size}&mimeType=${mimeType}&height=${imageInfo.height}&width=${imageInfo.width}");
// jasonCallback.put("callbackBodyType", "application/x-www-form-urlencoded");
// String base64CallbackBody = BinaryUtil.toBase64String(jasonCallback.toString().getBytes());
// respMap.put("callback", base64CallbackBody);
//
// JSONObject ja1 = JSONObject.fromObject(respMap);
// // System.out.println(ja1.toString());
// response.setHeader("Access-Control-Allow-Origin", "*");
// response.setHeader("Access-Control-Allow-Methods", "GET, POST");
// response(request, response, ja1.toString());
} catch (Exception e) {
// Assert.fail(e.getMessage());
System.out.println(e.getMessage());
} finally {
ossClient.shutdown();
}
return respMap;
}
}
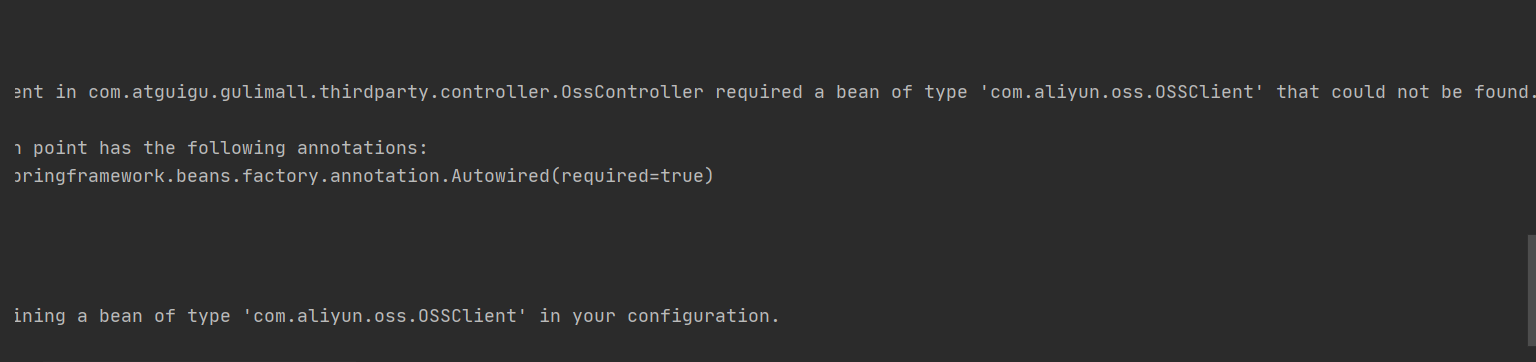
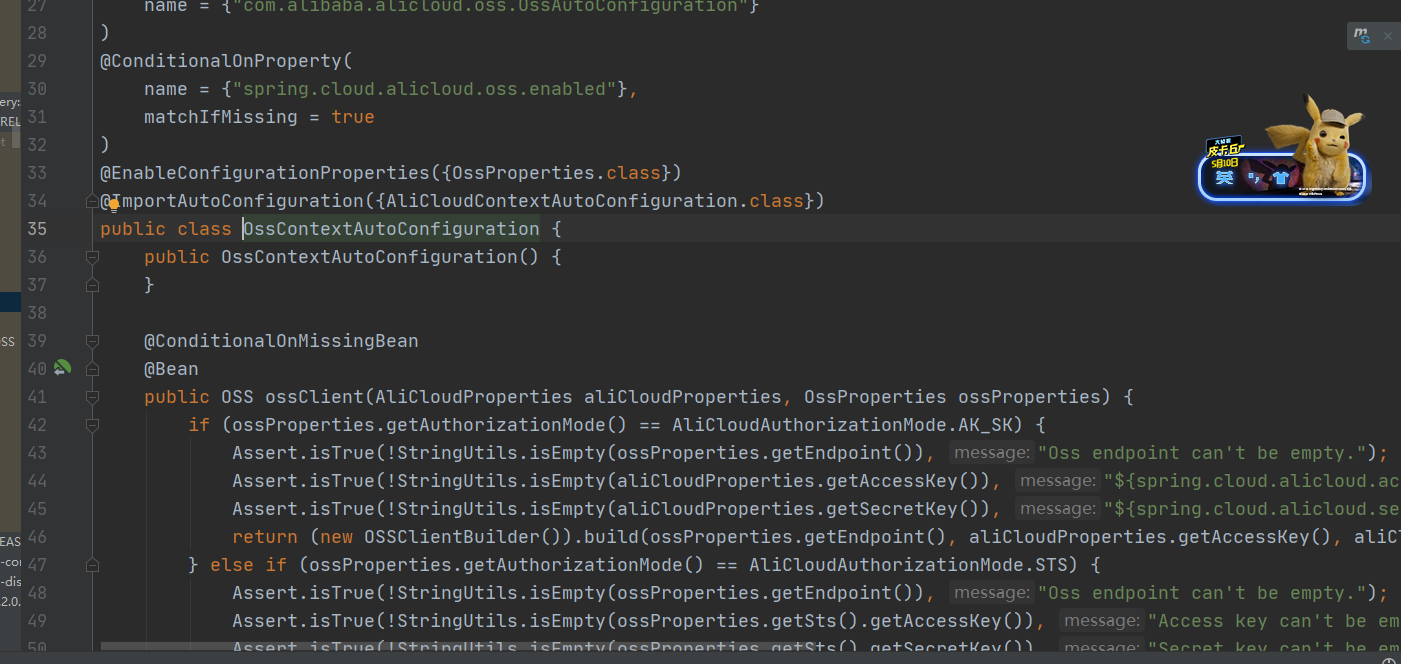
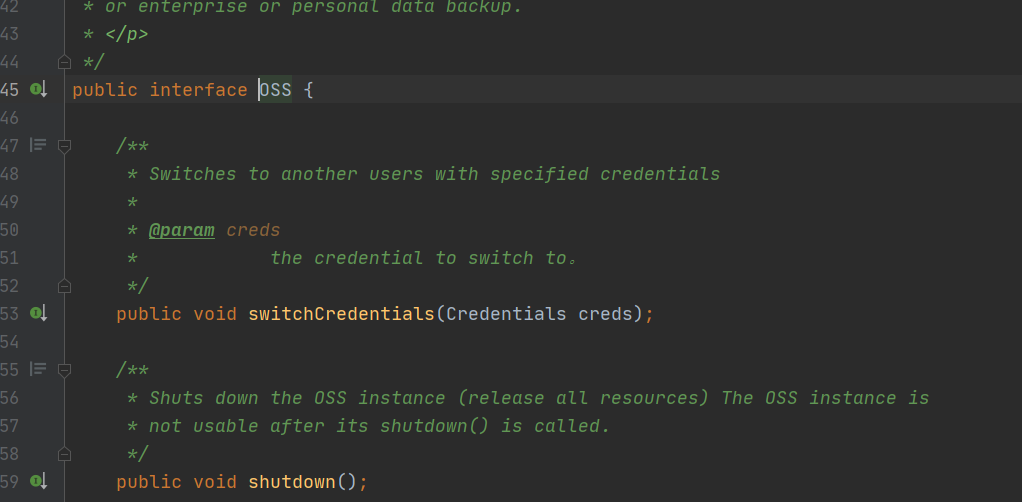
打开OssContext (对象存储环境的自动配置)发现 OSS是以接口类型放的,但是自动注入的时候是实现类型,所以不可以
http://localhost:30000/oss/policy

网关新增路由
#        http://localhost:88/api/thirdparty/oss/policy
        - id: third_party_route
          uri: lb://gulimall-third-party
          predicates:
            - Path=/api/thirdparty/**
          filters:
            - RewritePath=/api/thirdparty/(?<segment>/?.*), /$\{segment}
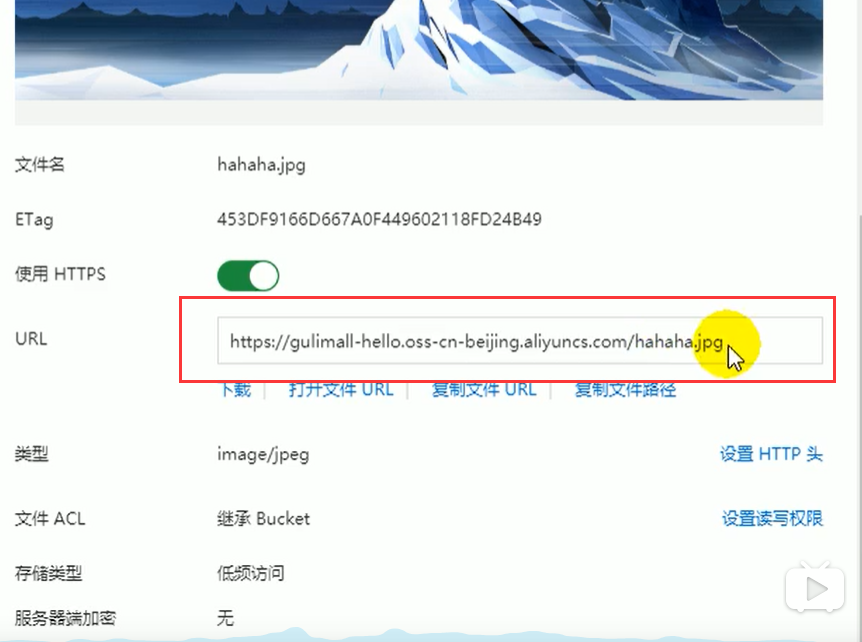
OSS前后联调测试上传
将封装好的部分粘贴到tablecomponents下
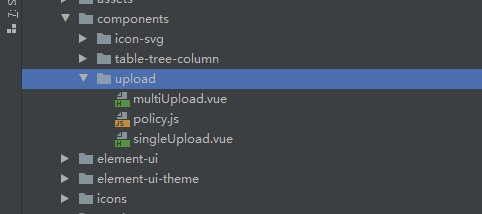
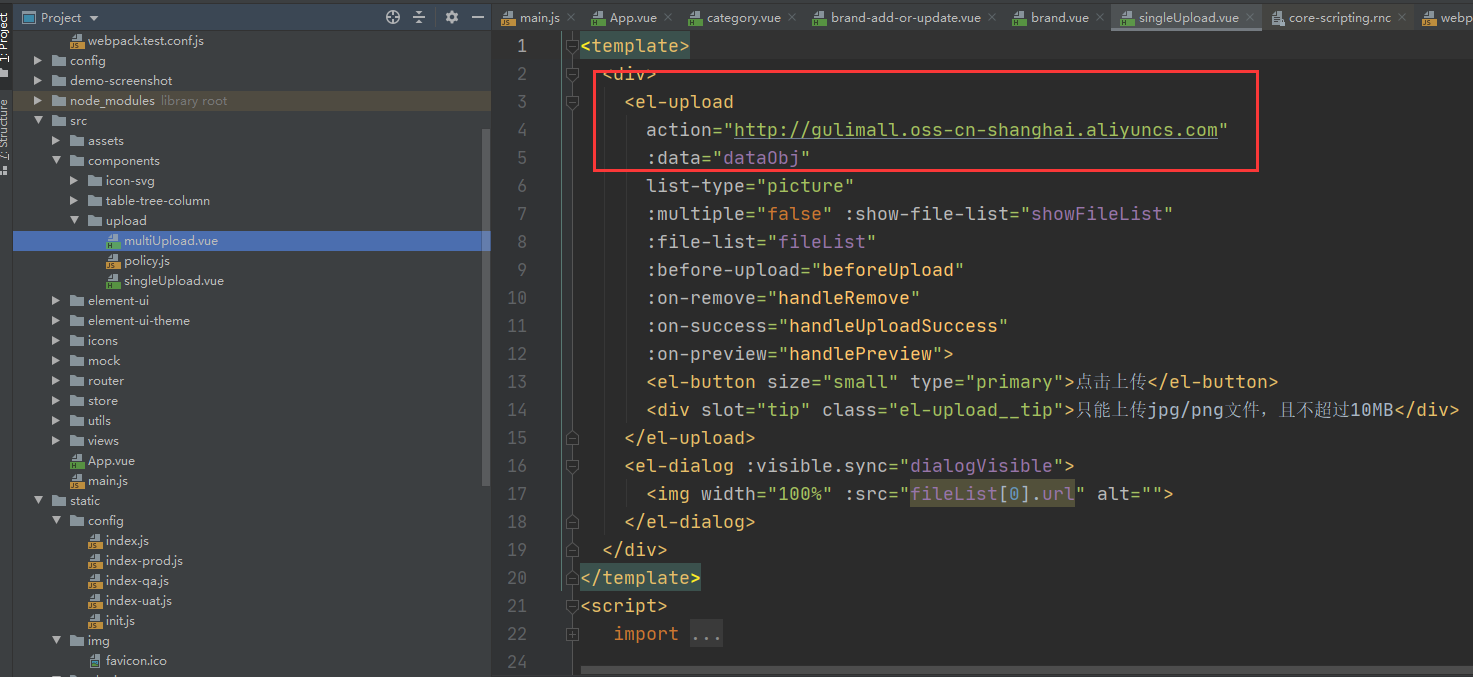
更改文件提交地址(单文件和多文件都改)
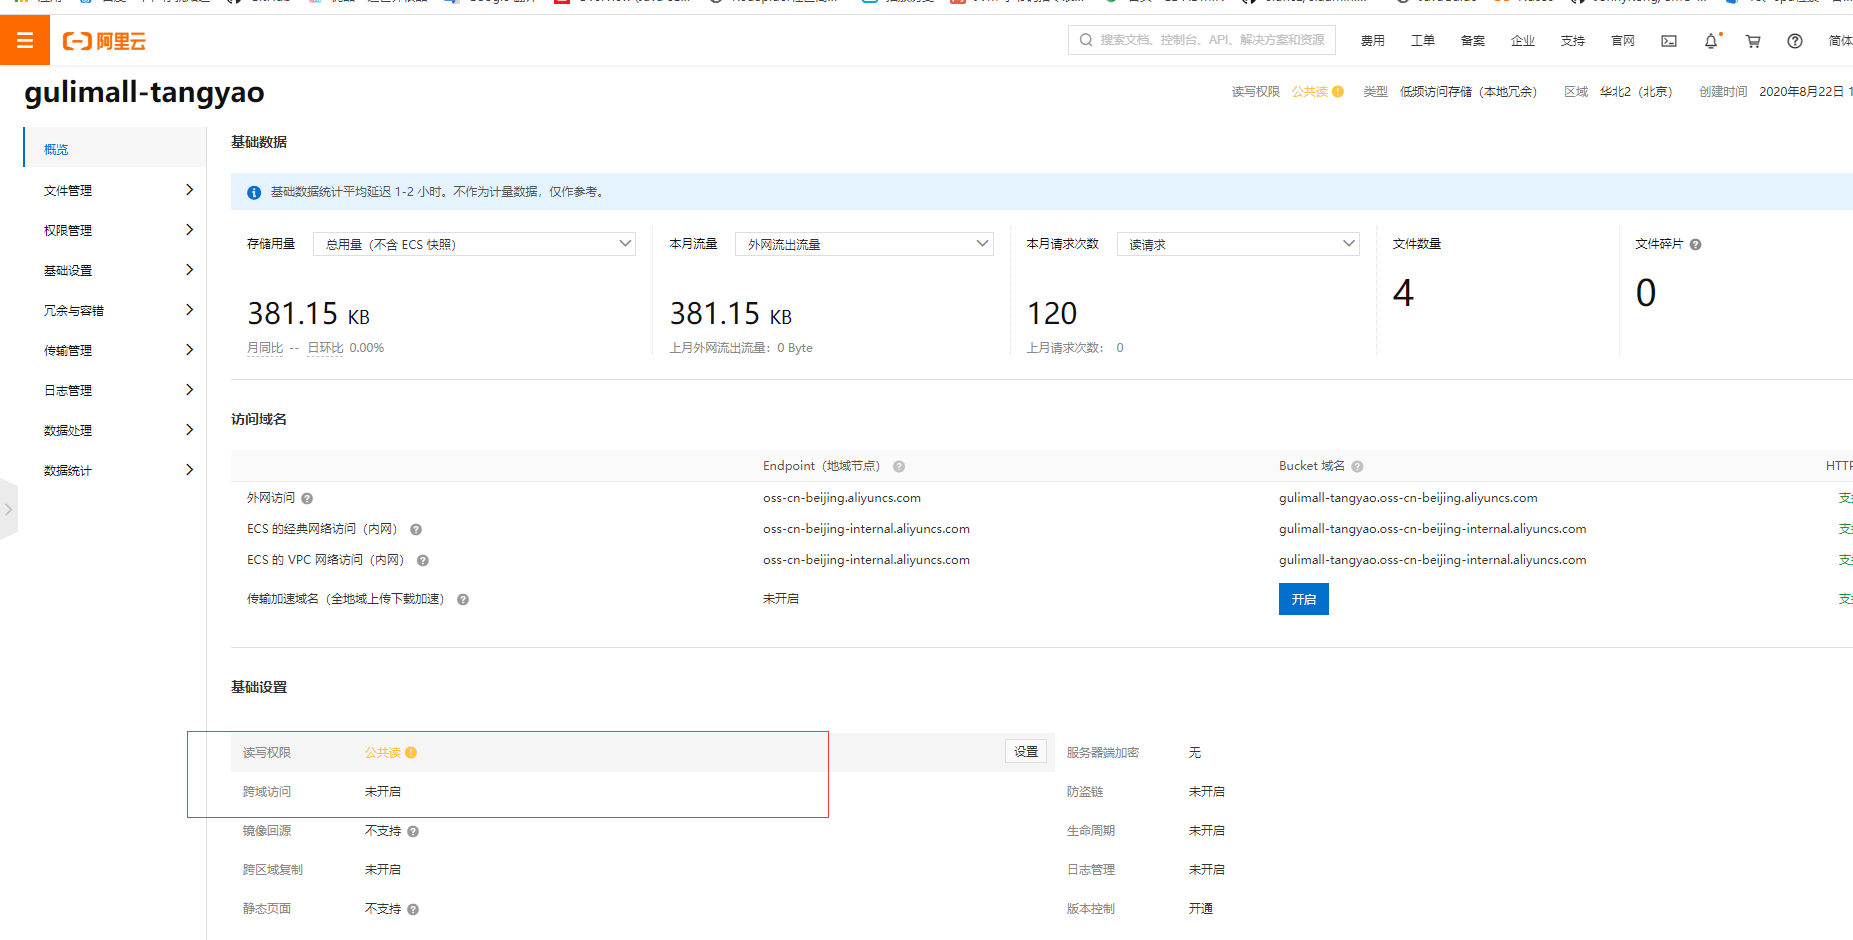
https://oss.console.aliyun.com/bucket/oss-cn-beijing/gulimall-tangyao/overview
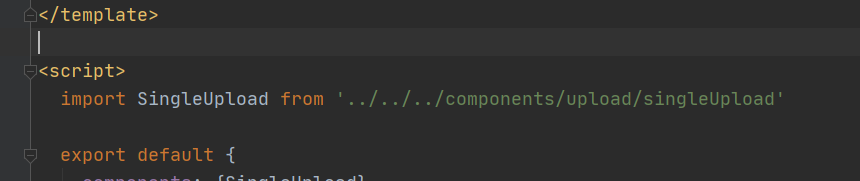
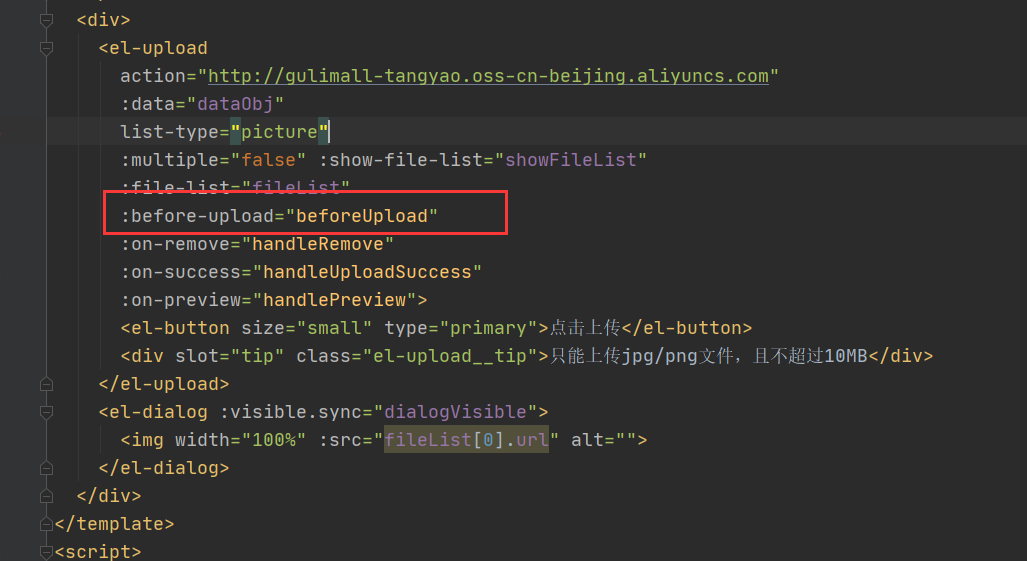
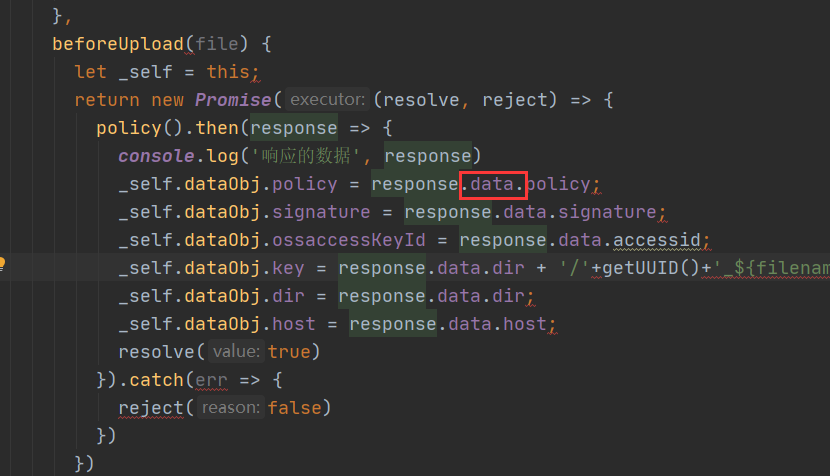
引入singleUploadh组件后 点击上传,会调用beforeUpload,根据代码分析,重新封装接口数据到data中,
产生了跨域问题
Access to XMLHttpRequest at ‘http://gulimall-tangyao.oss-cn-beijing.aliyuncs.com/’ from origin ‘http://localhost:8001’ has been blocked by CORS policy: Response to preflight request doesn’t pass access control check: No ‘Access-Control-Allow-Origin’ header is present on the requested resource.

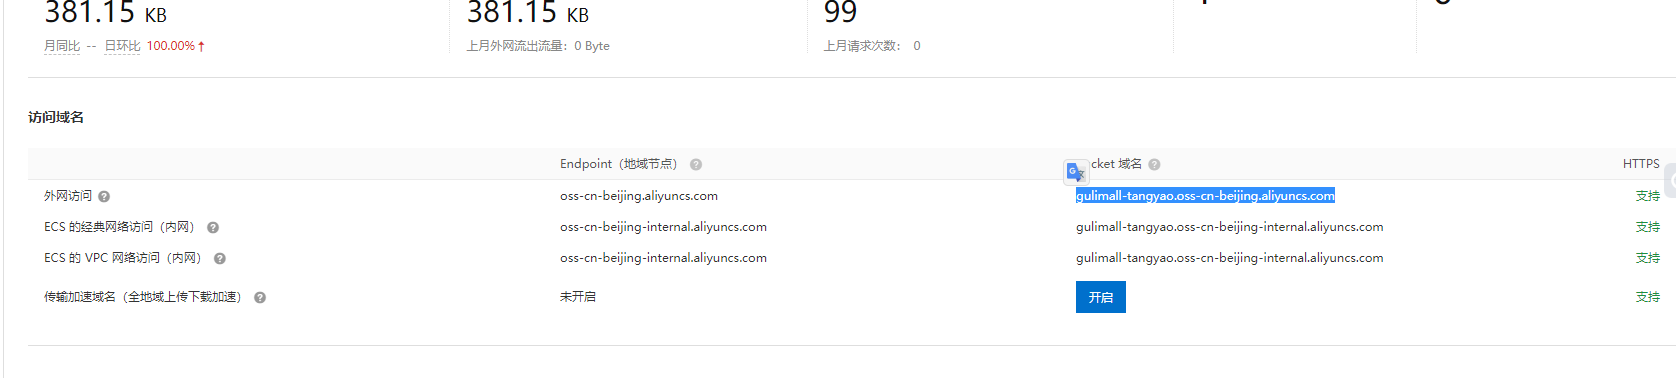
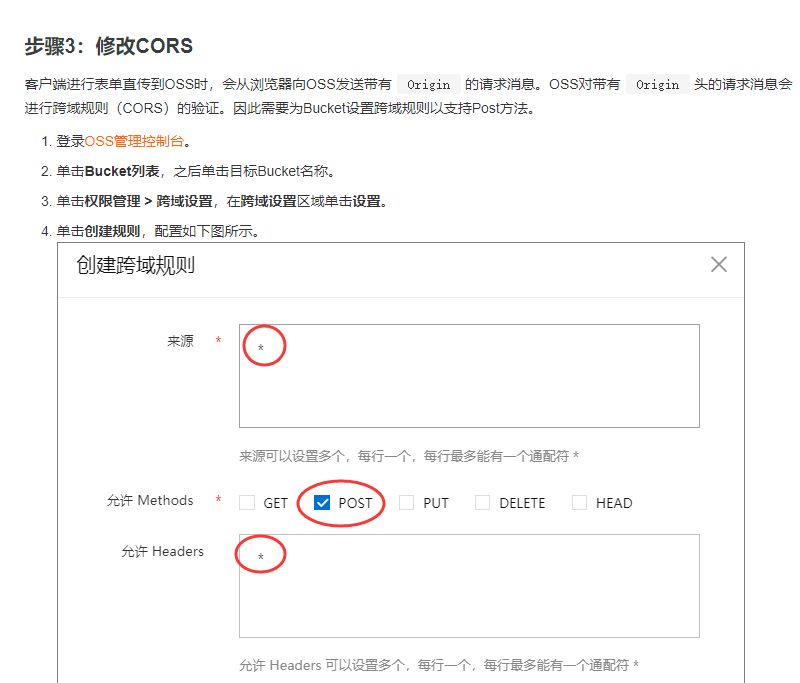
因为浏览器直接将文件以及dataObj以post方式直接提交给对象存储,所以存在了跨域请求,所以在OSS中设置为能够跨域访问

包括在文档中也说了
去掉多余的目录结构

设置完成后再来测试一下
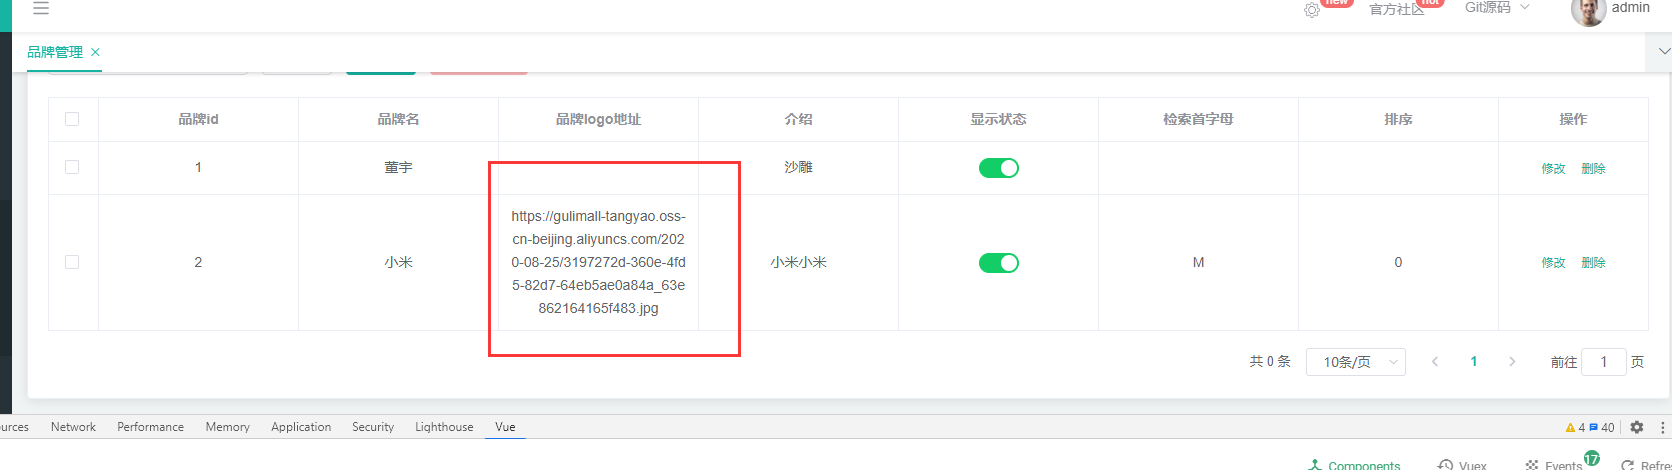
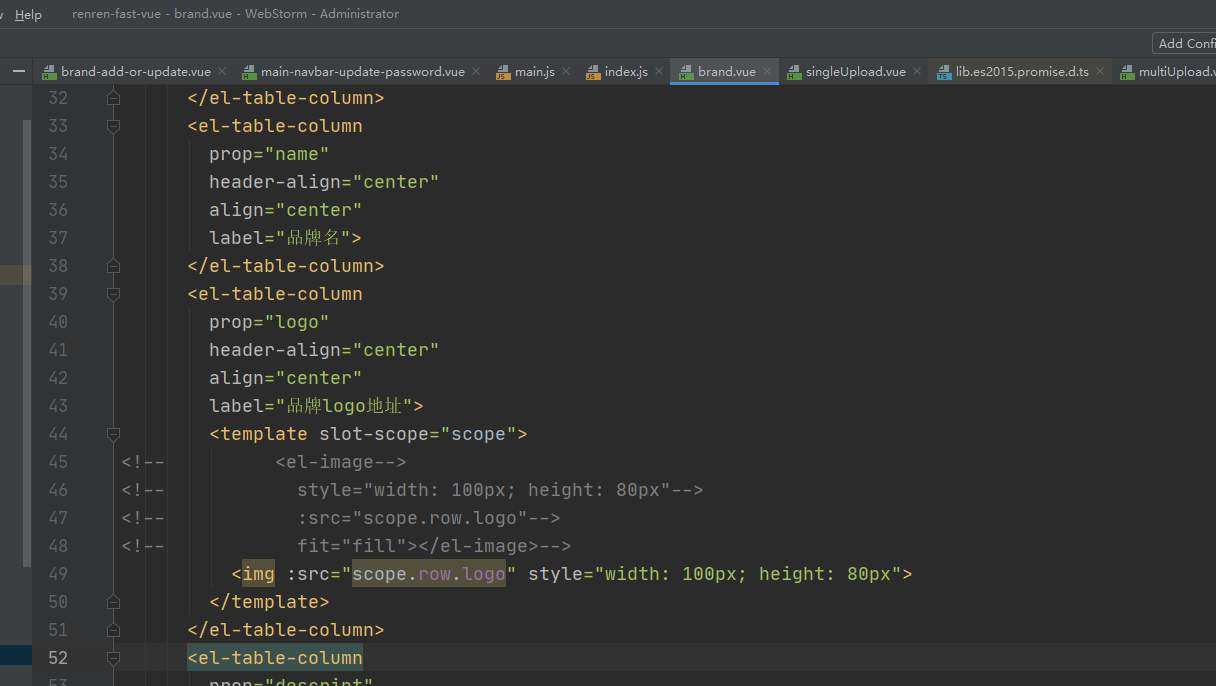
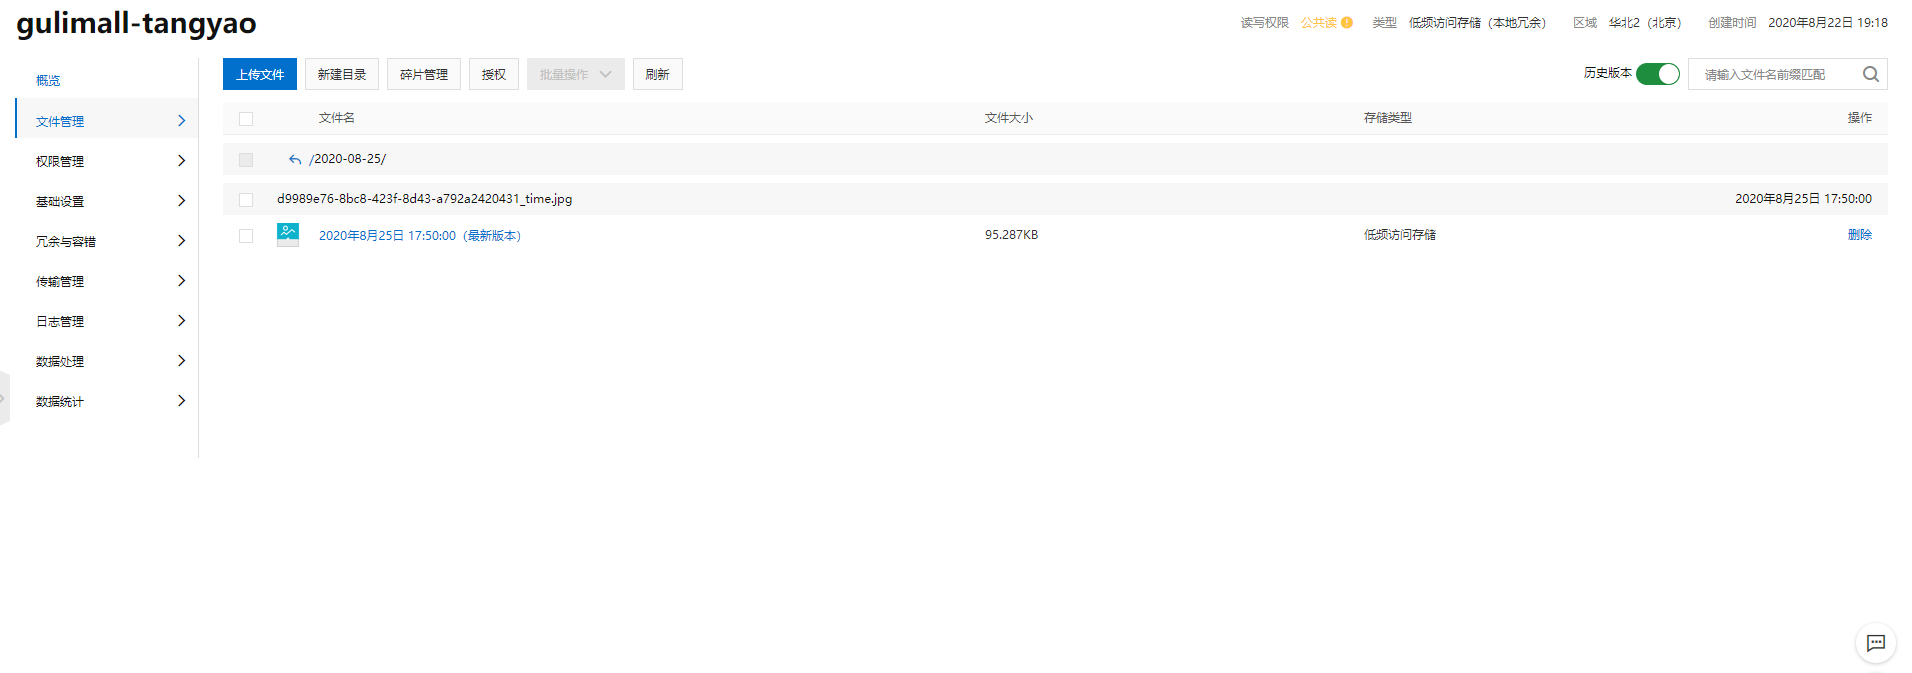 验证表单上传完表单后图片logo地址有没有变
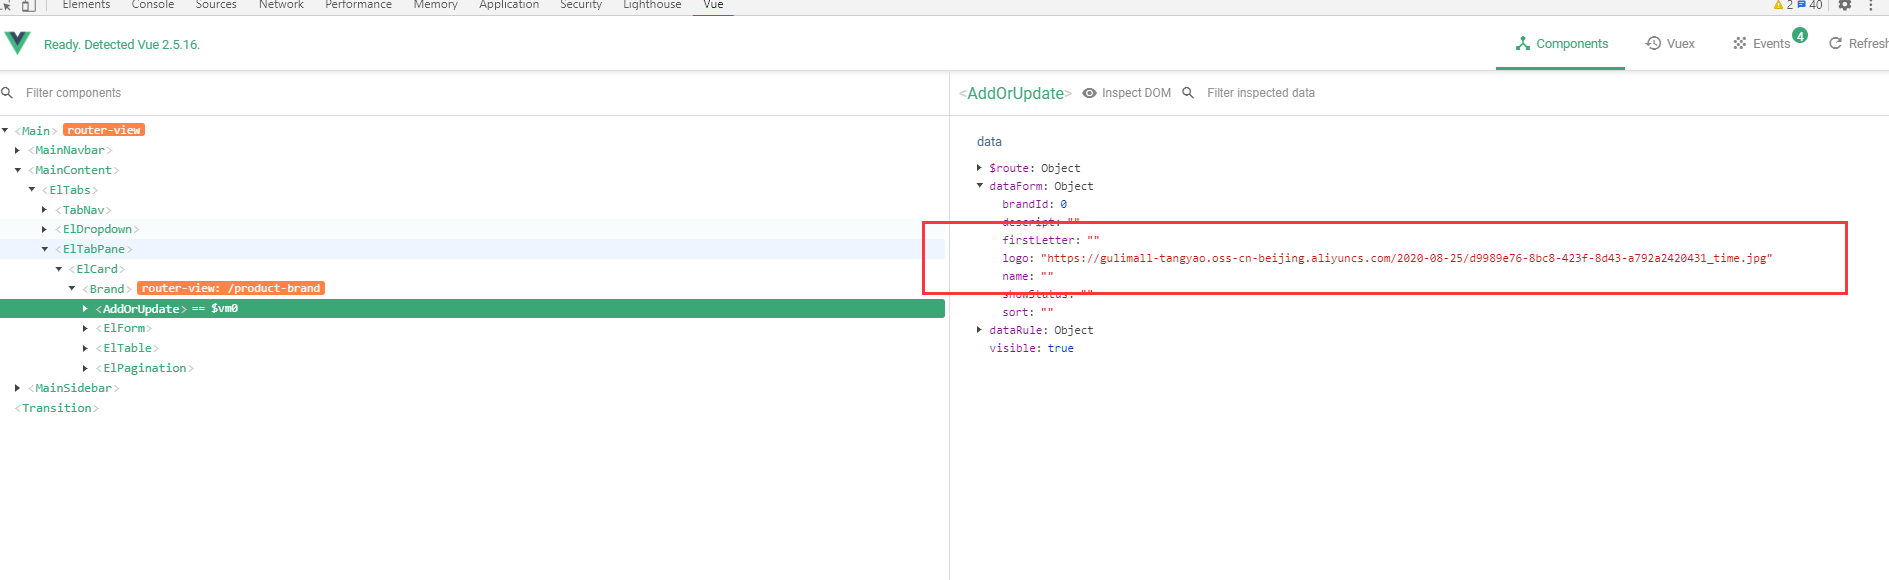
发现已经改变啦
删除图片重新上传,图片logo地址也会跟着改变
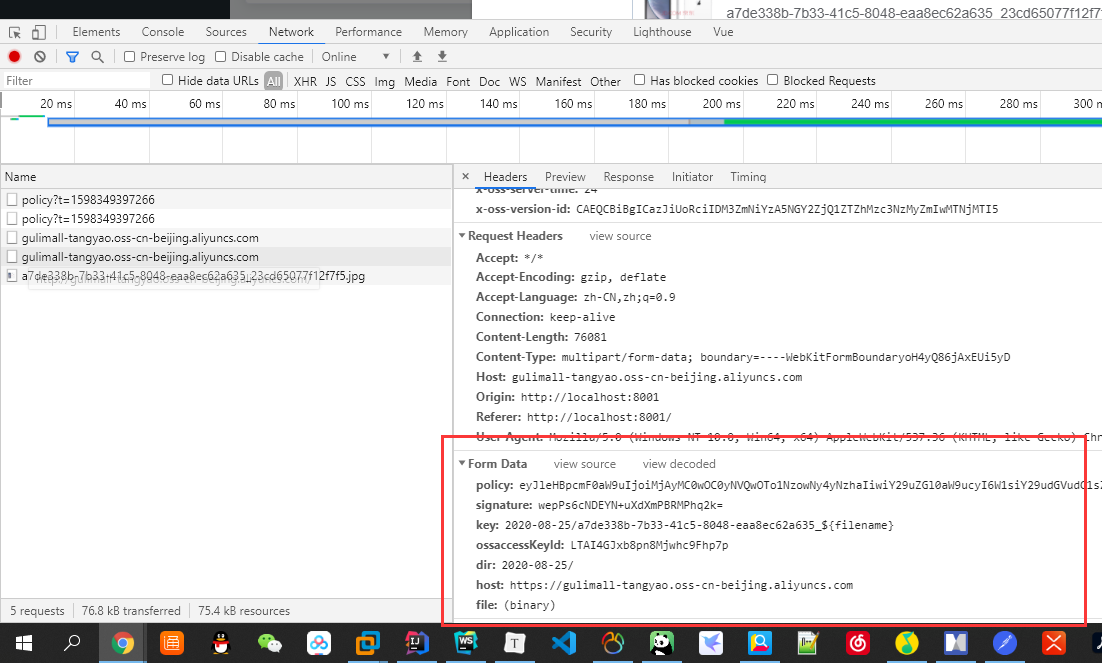
流程:上传的时候,浏览器会发请求,找服务端找policy签名数据,要到签名数据后,再去给阿里云提交请求,第一个还是跨域的的OPTIONS,将真正的数据以及和policy拿到的内容 全部提交给阿里云(包括文件),由阿里云进行相关的验证及存储。
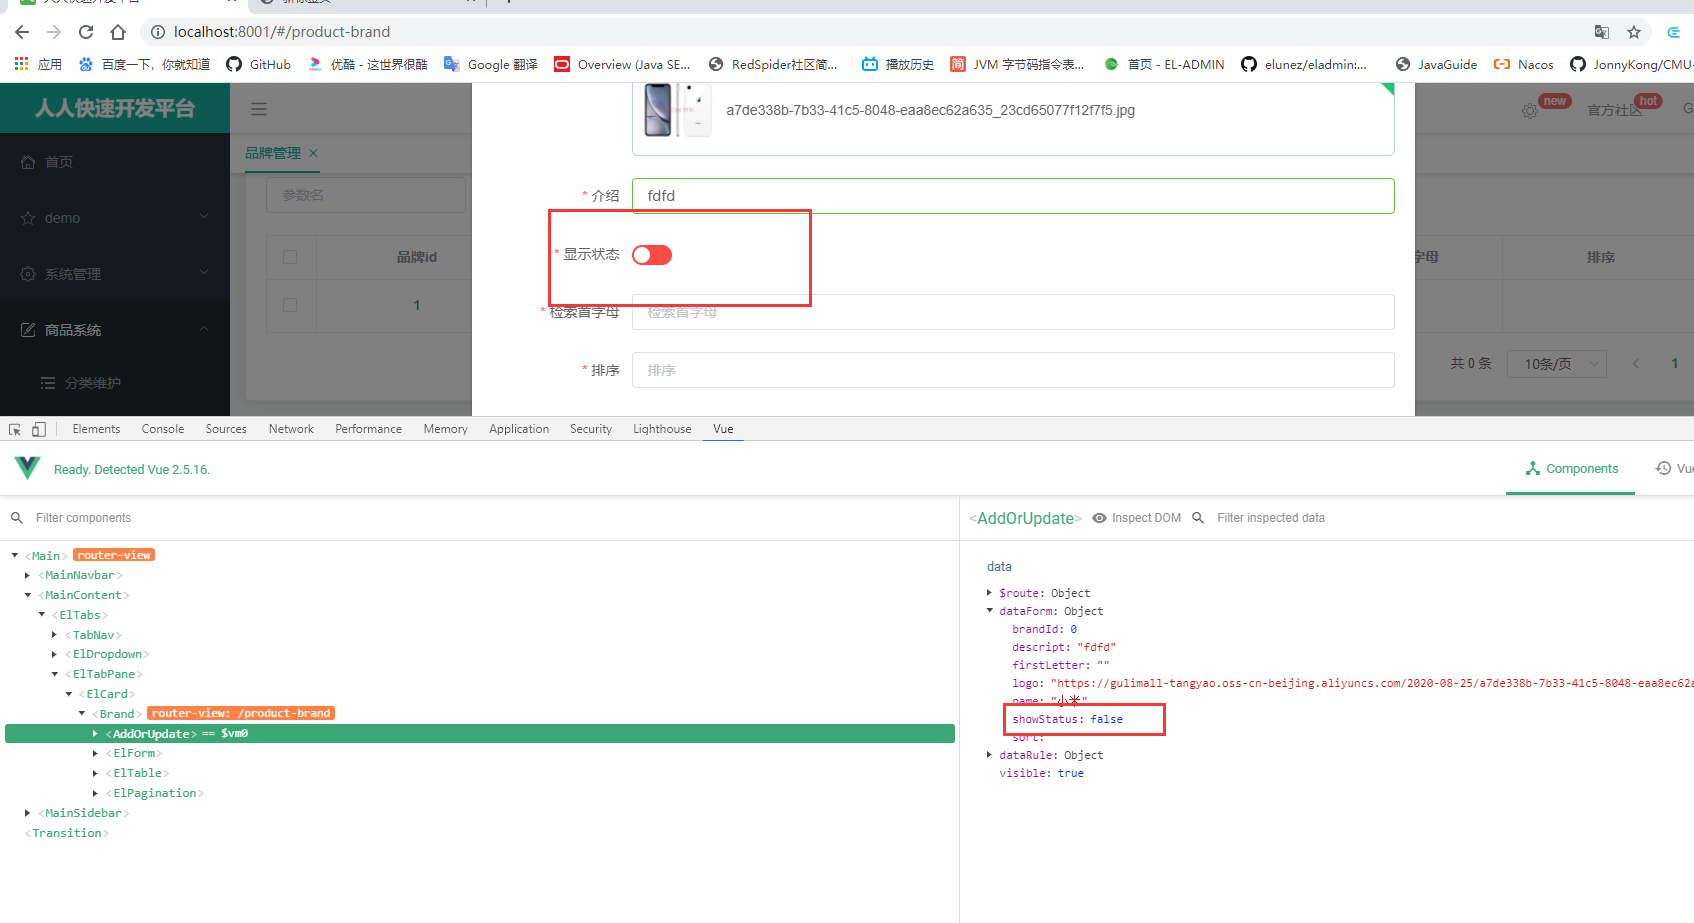
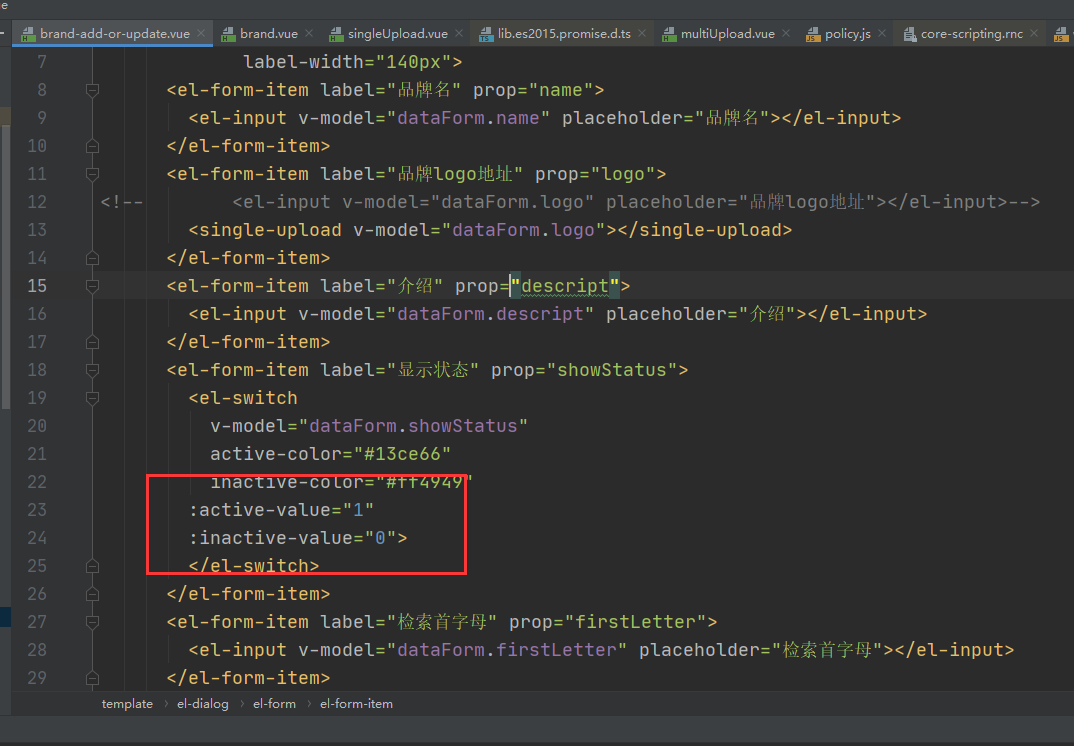
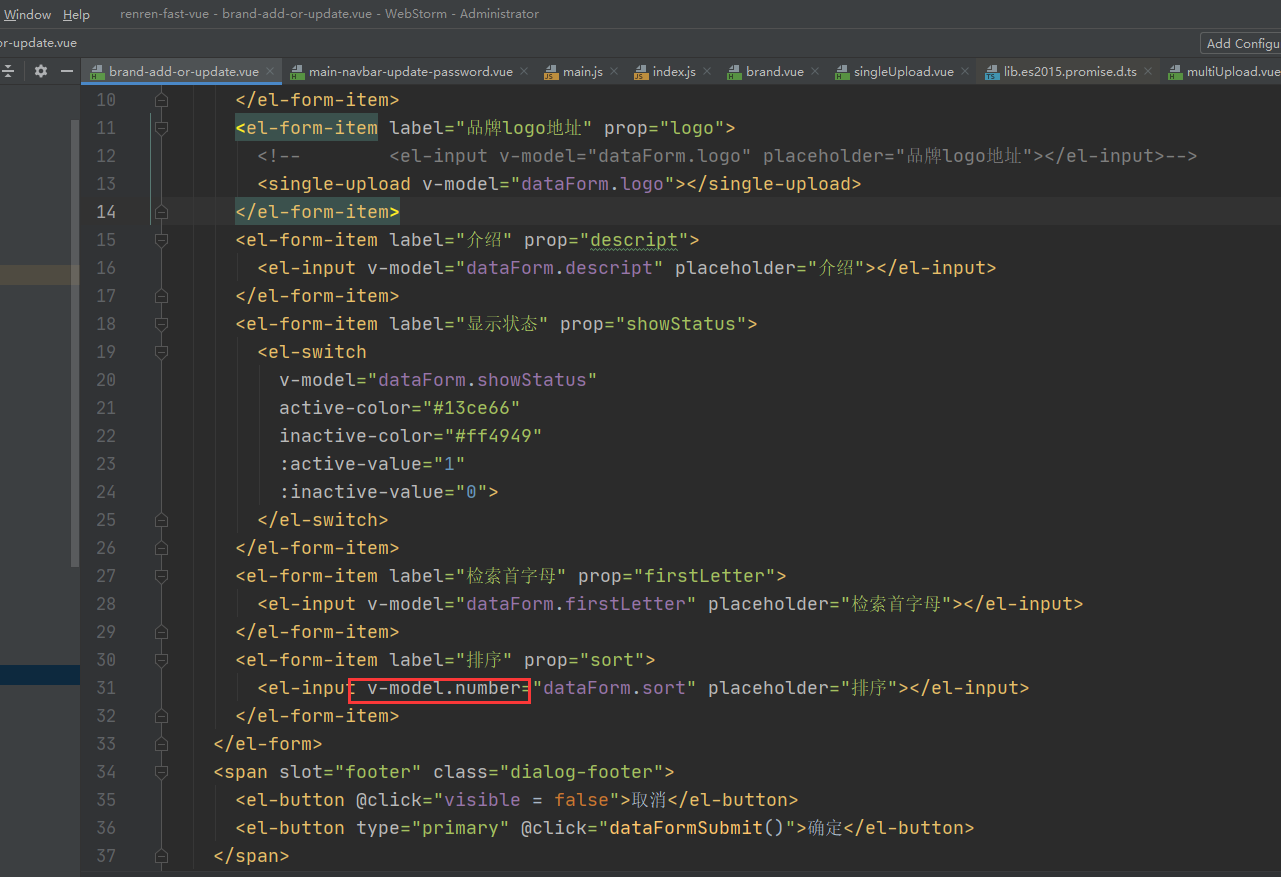
调试品牌新增
将按钮激活与否原本的ture false将修改为1,0
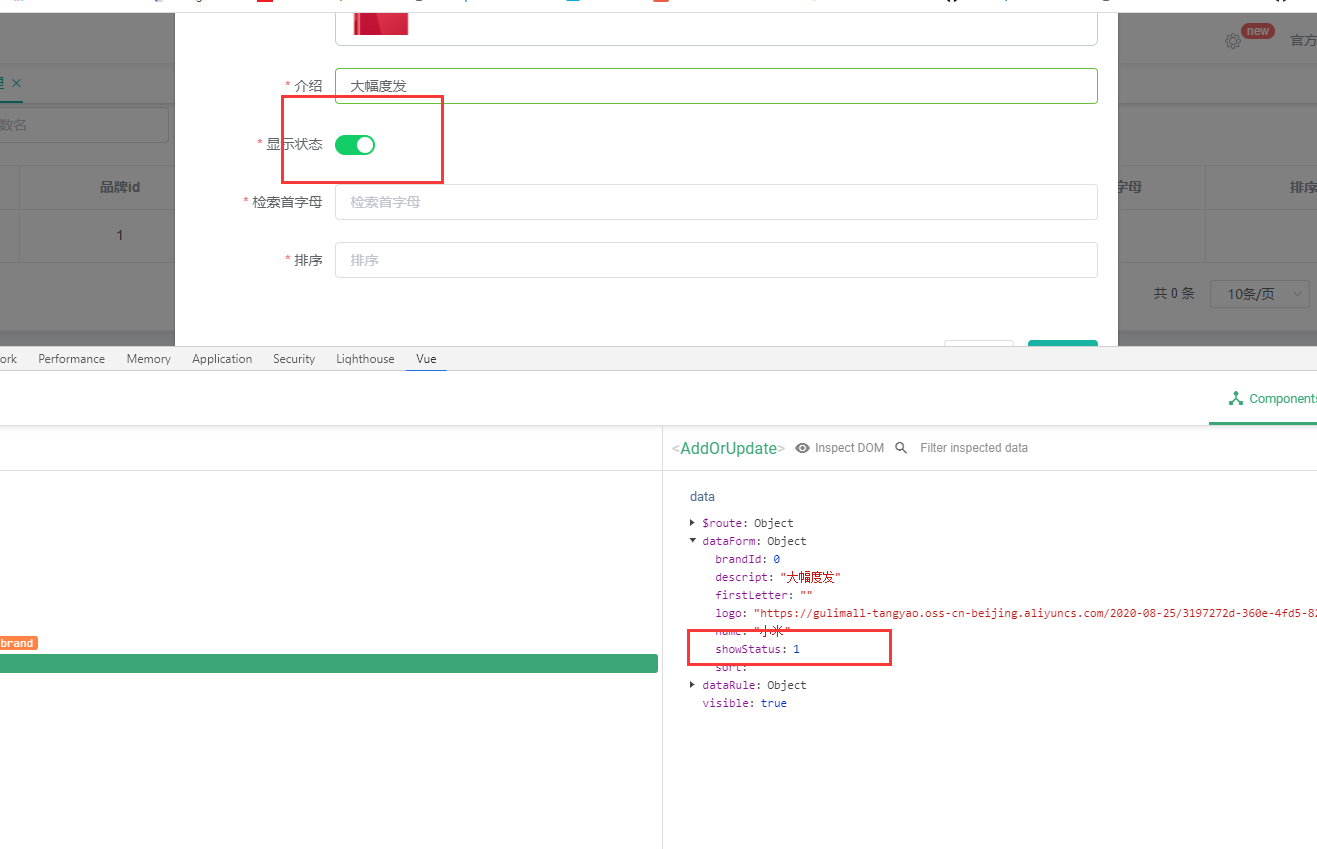
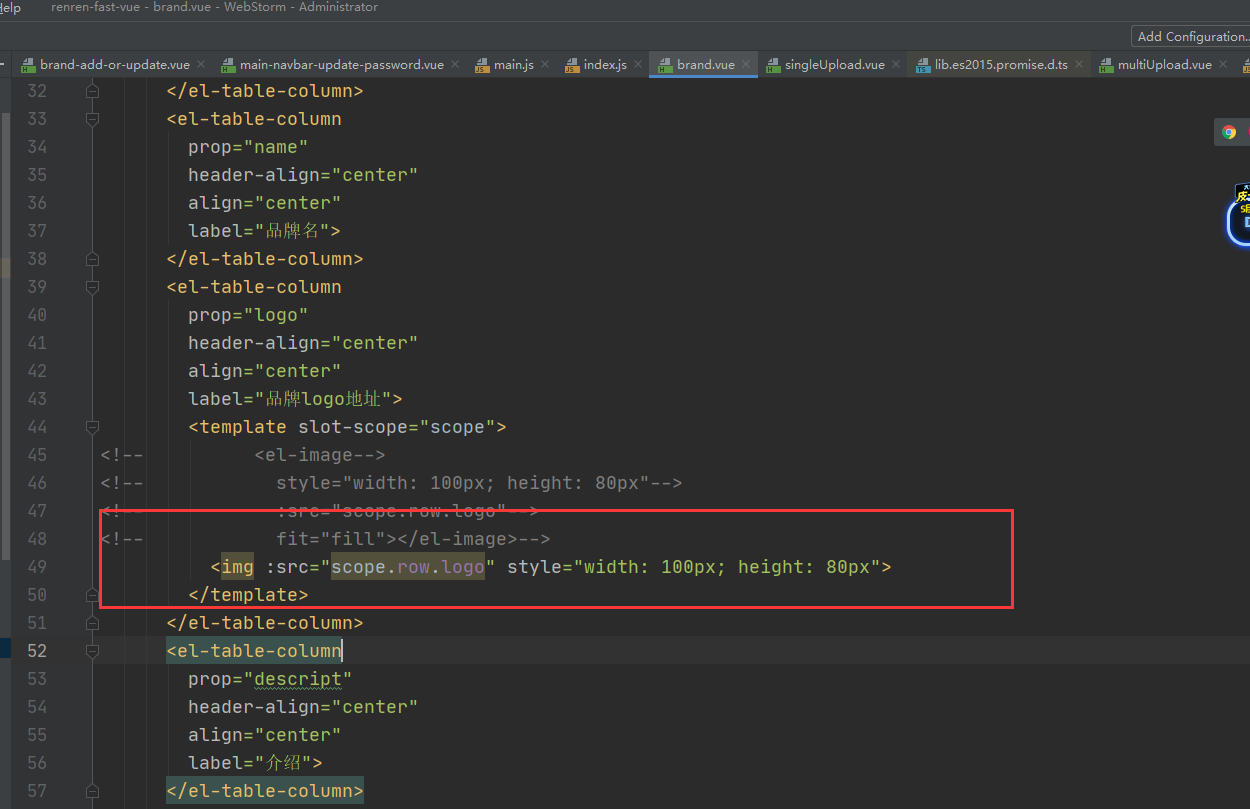
插入成功但是显示的是地址,要改为图片显示
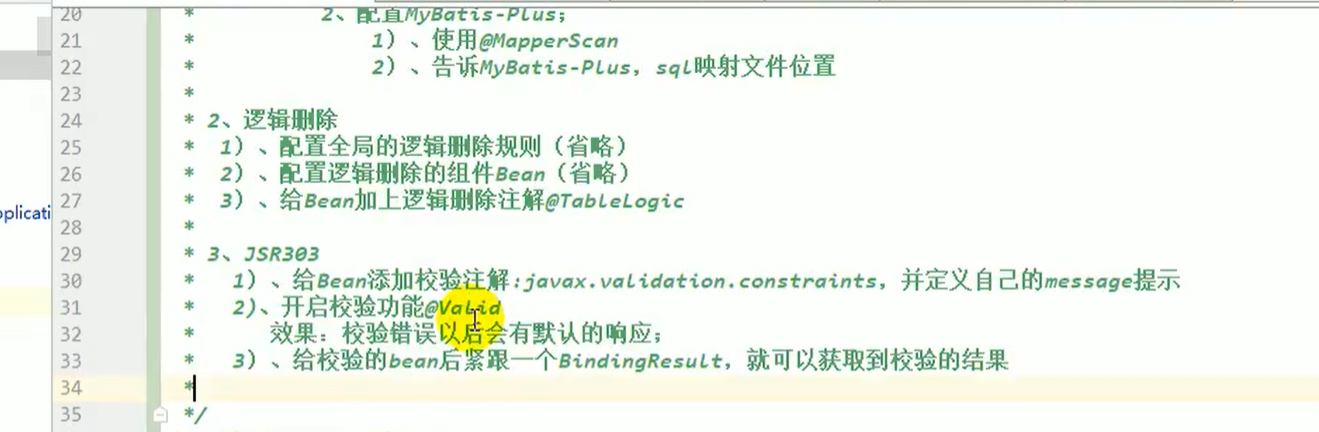
JSR303
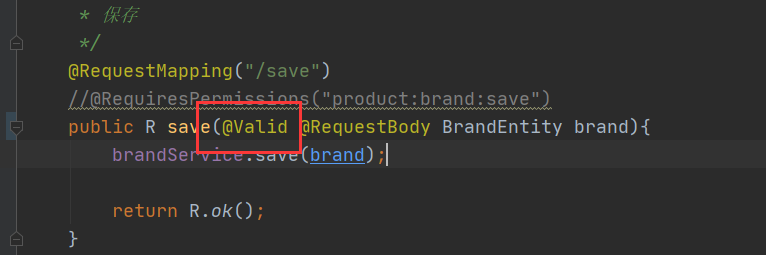
1.给Bean添加校验注解 javax.validation.constraints 并填写自己的message提示
2.controller 中接收的对象添加注解@Valid开启校验
效果:校验错误以后会有默认的响应
测试一下状态码是400代表数据校验不通过
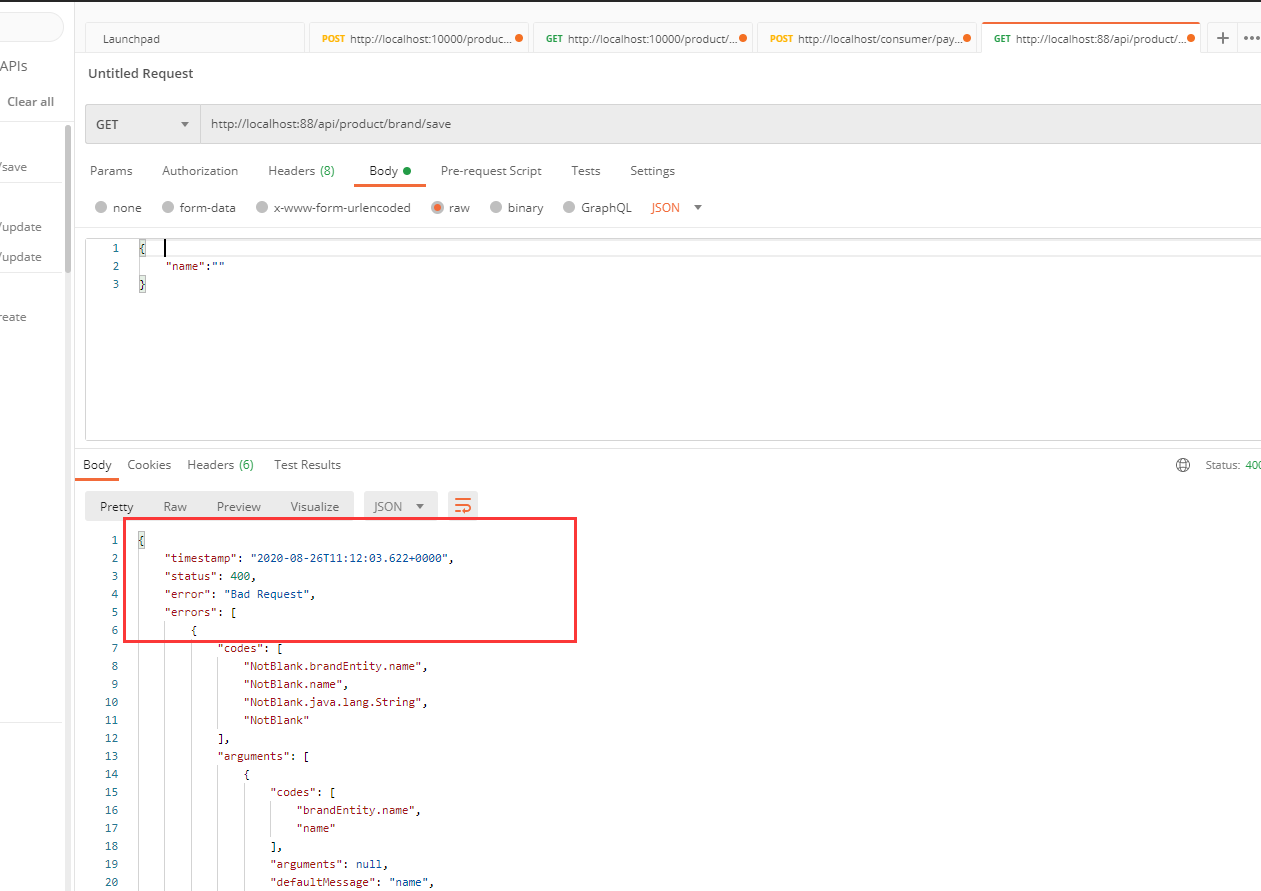
{
    "timestamp": "2020-10-04 10:06:57",
    "status": 400,
    "error": "Bad Request",
    "errors": [
        {
            "codes": [
                "NotBlank.brandEntity.name",
                "NotBlank.name",
                "NotBlank.java.lang.String",
                "NotBlank"
            ],
            "arguments": [
                {
                    "codes": [
                        "brandEntity.name",
                        "name"
                    ],
                    "arguments": null,
                    "defaultMessage": "name",
                    "code": "name"
                }
            ],
            "defaultMessage": "不能为空",
            "objectName": "brandEntity",
            "field": "name",
            "rejectedValue": "",
            "bindingFailure": false,
            "code": "NotBlank"
        }
    ],
    "message": "Validation failed for object='brandEntity'. Error count: 1",
    "path": "/product/brand/save"
}
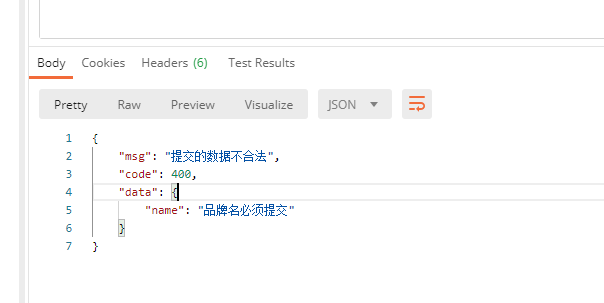
但是这些错误不服务业务规定,应该为这样的对象
{
    code:xxx ,
    message:xxx ,
    data:{
        哪个字段发生了错误,错误消息提示是什么
    }

}
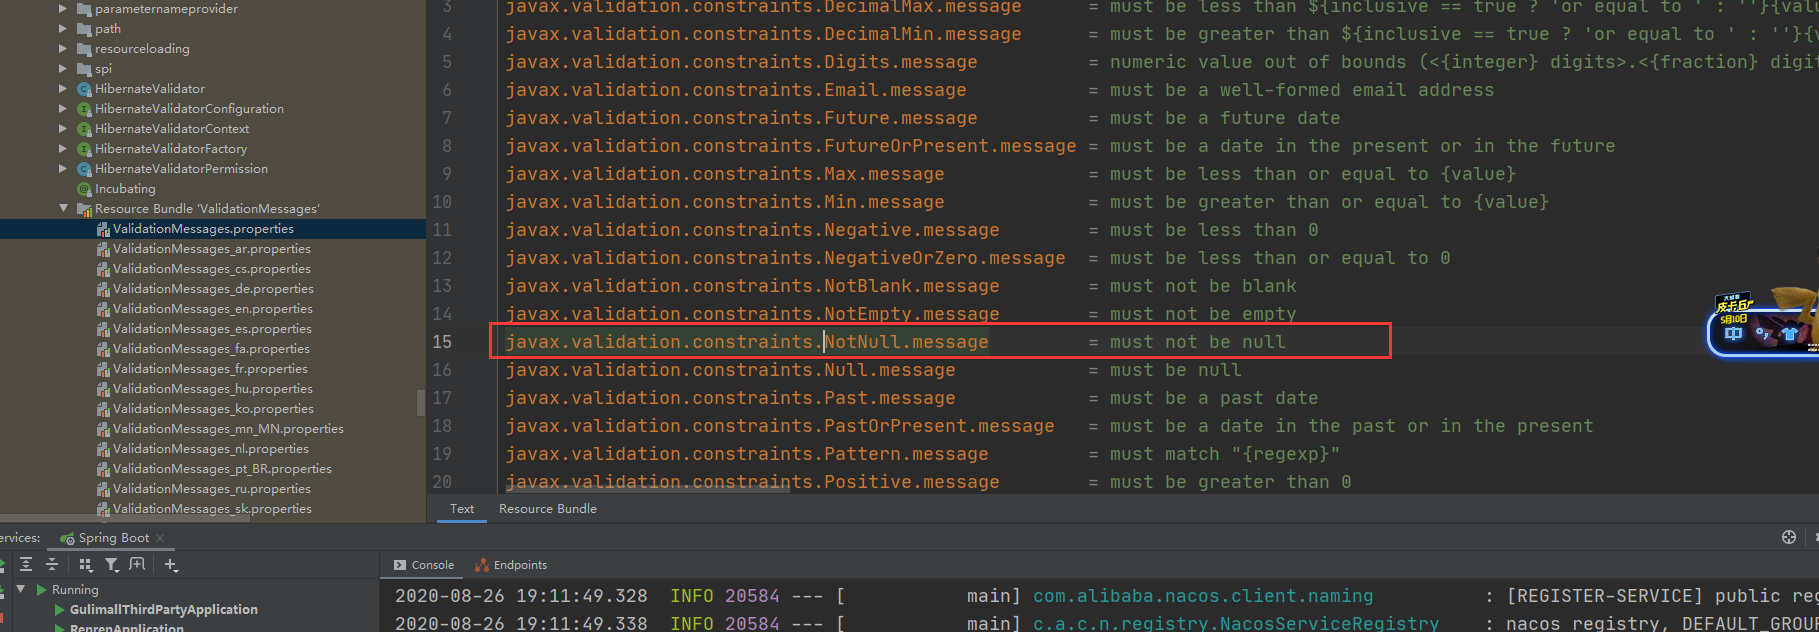
也可以自定义错误消息提示,否则叫默认取出ValidationMessages.properties 里面的javax.validation.constraints.NotBlank.message 的内容
@NotBlank(message = "品牌名必须提交")

搜索ValidationMessages.properties
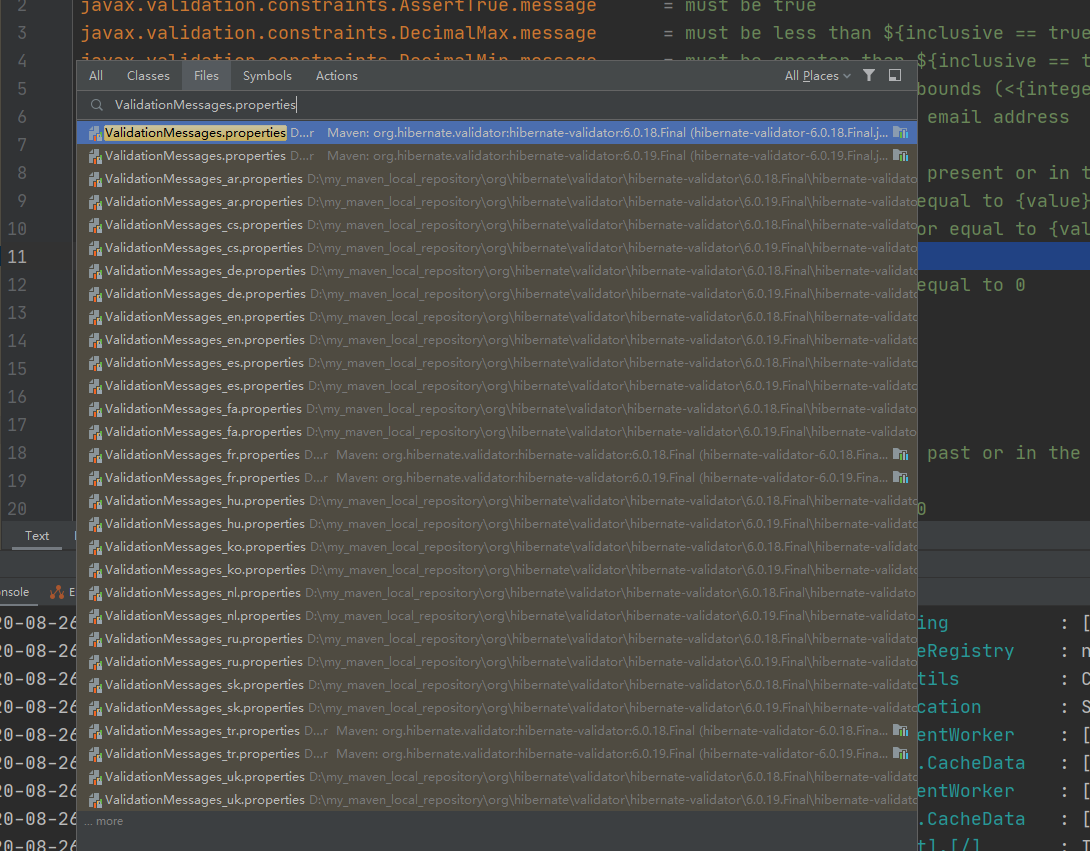
搜索ValidationMessages_zh_CN.properties 对应的中文提示
3.紧跟一个BindingResult,可以获得校验的结果
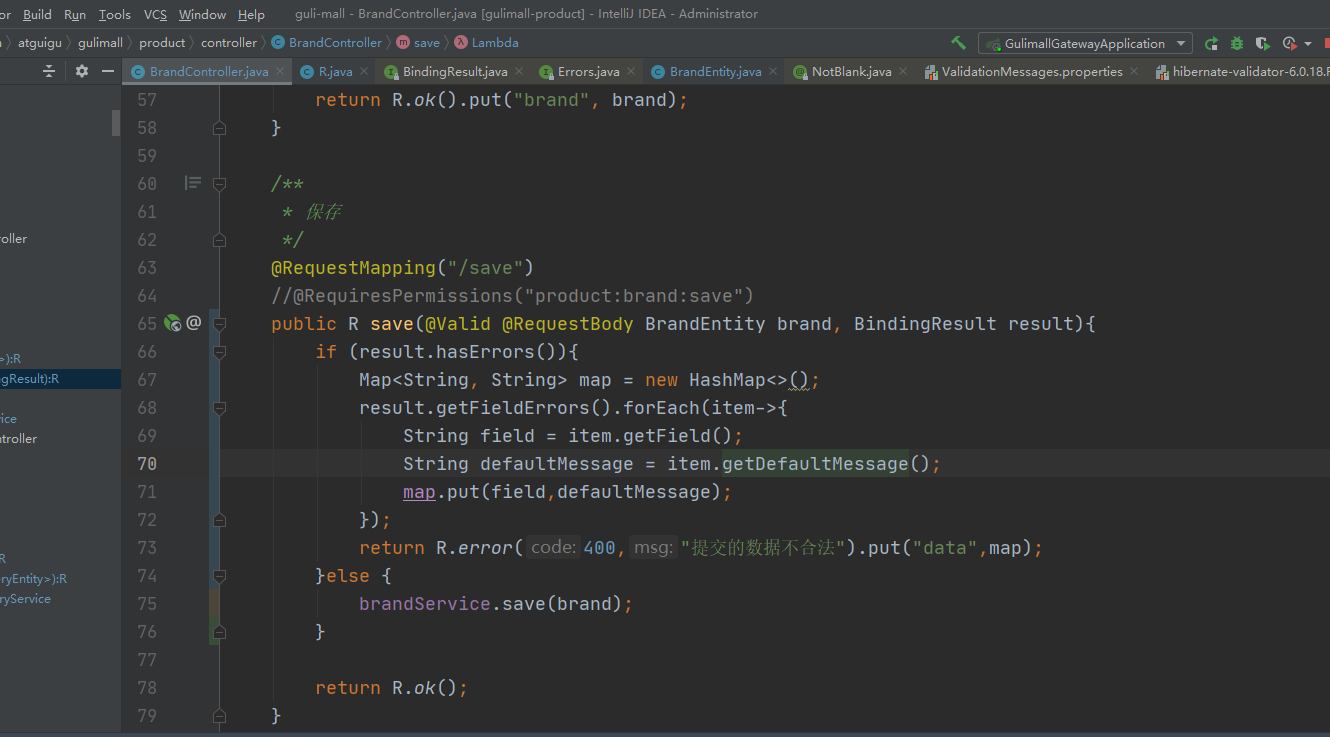
@RequestMapping("/save")
//@RequiresPermissions("product:brand:save")
public R save(@Valid @RequestBody BrandEntity brand, BindingResult result){
    if (result.hasErrors()){
        Map<String, String> map = new HashMap<>();
        result.getFieldErrors().forEach(item->{
            String field = item.getField();
            String defaultMessage = item.getDefaultMessage();
            map.put(field,defaultMessage);
        });
        return R.error(400,"提交的数据不合法").put("data",map);
    }else {
        brandService.save(brand);
    }

    return R.ok();
}
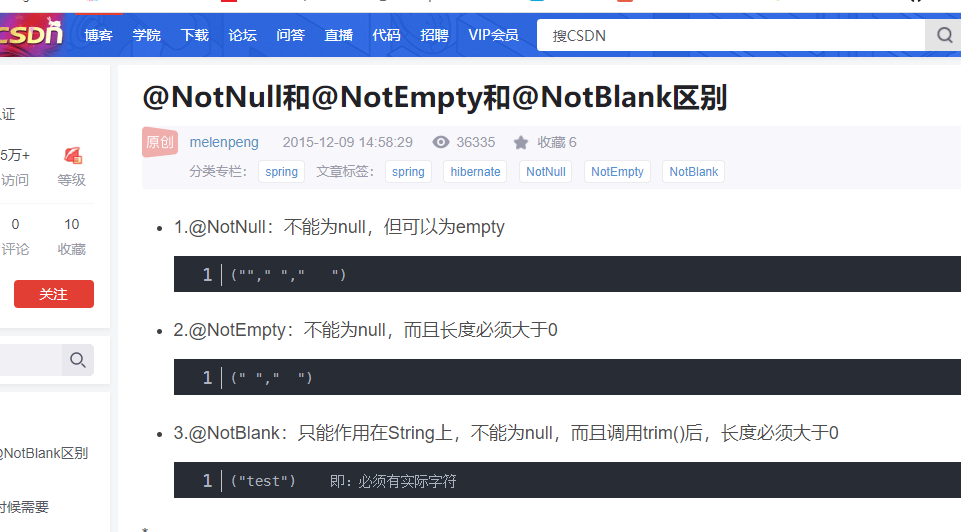
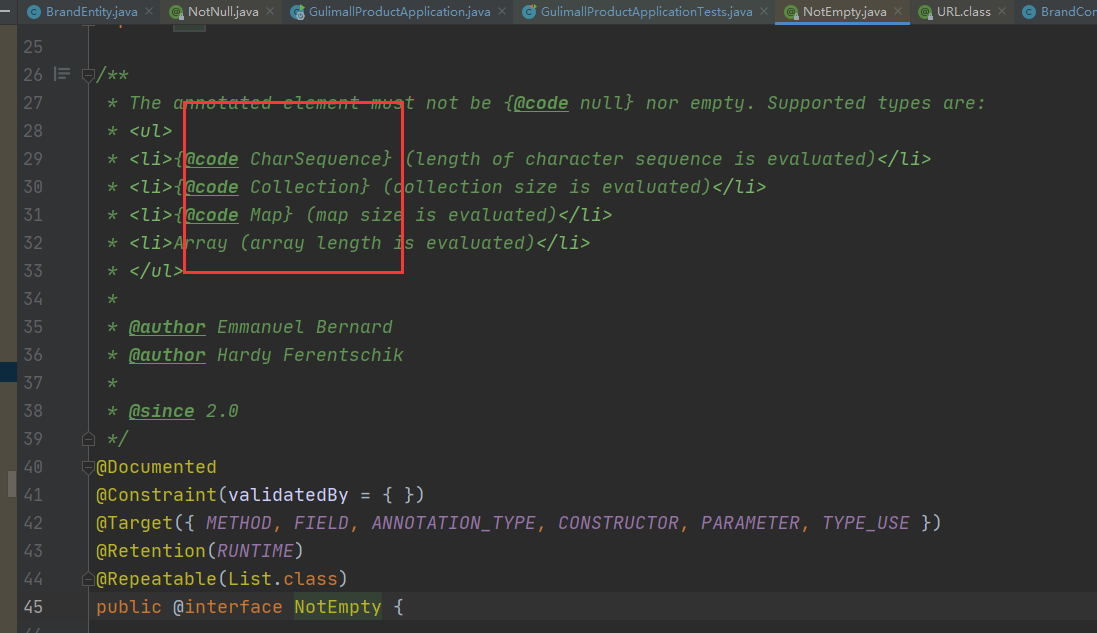
注意一些细节@NotEmpty的适用范围
@Data
@TableName("pms_brand")
public class BrandEntity implements Serializable {
private static final long serialVersionUID = 1L;
/**
* 品牌id
*/
@TableId
private Long brandId;
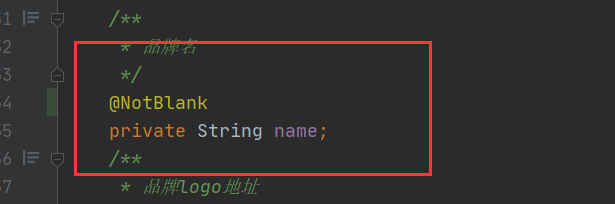
/**
* 品牌名
这里用@NotBlank,表示该字符串必须要有实际内容且不能是空字符串“ ”
*/
@NotBlank(message = "品牌名必须提交")
private String name;
/**
* 品牌logo地址
*/
@NotEmpty
@URL(message = "logo必须是一个合法的url地址")
private String logo;
/**
* 介绍
*/
private String descript;
/**
* 显示状态[0-不显示;1-显示]
*/
private Integer showStatus;
/**
* 检索首字母
* 正则表达式在这里不需要加"/^[a-zA-Z]$/"
* 这里用@NotEmpty表示,不能为null也不能空,就算为空字符串,“ ”,因为下面的 @Pattern会进一步检验字符串内容为一个字母
*/
@NotEmpty
@Pattern(regexp="^[a-zA-Z]$",message = "检索首字母必须是一个字母")
private String firstLetter;
/**
* 排序
*/
@NotNull
@Min(value = 0,message = "排序必须大于等于0")
private Integer sort;
}
总结
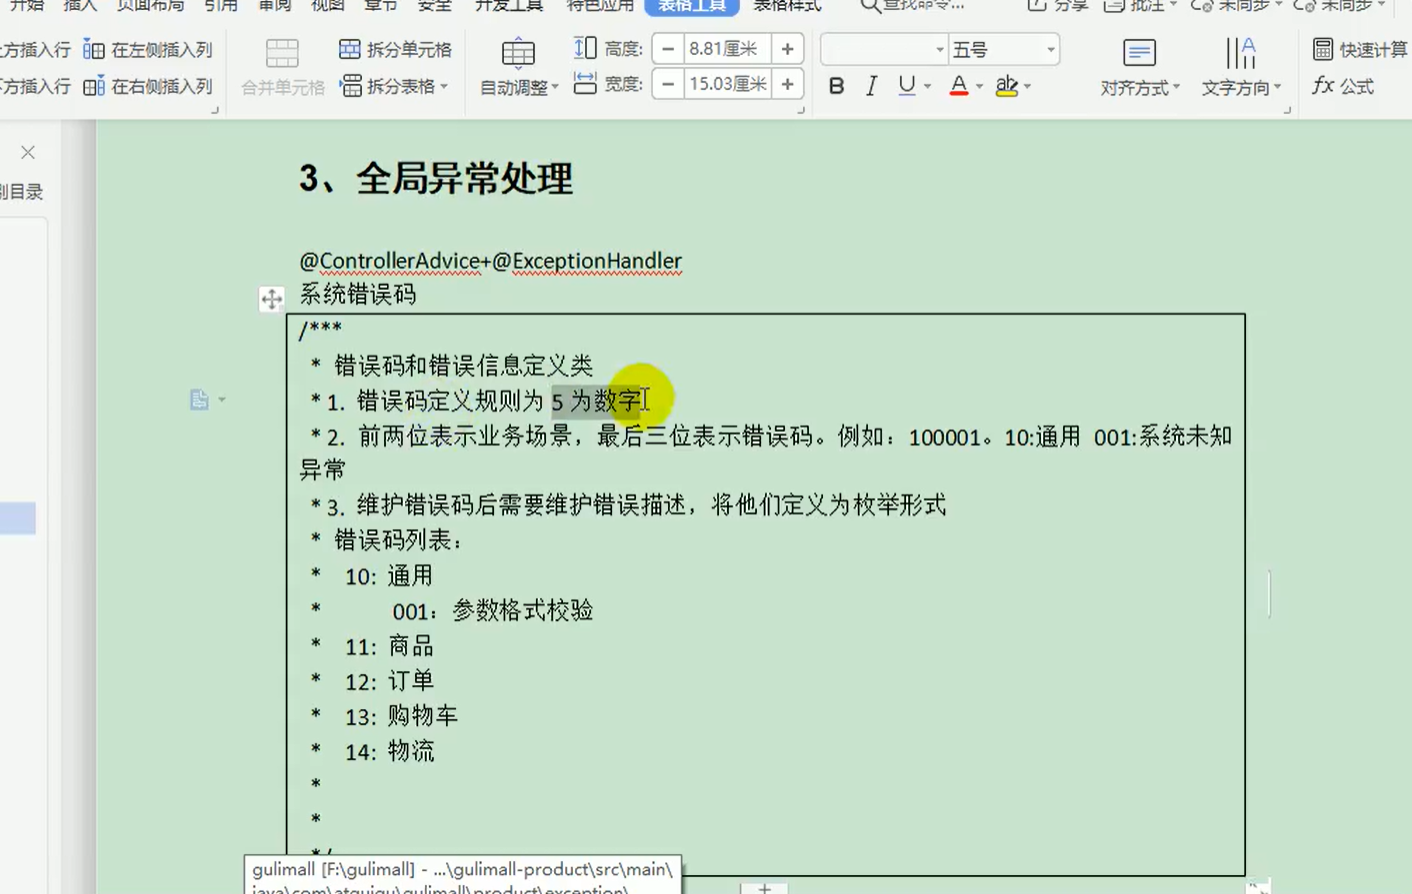
统一的异常处理@ControllerAdvance
后来很多业务的新增修改都增加了这些校验功能,之前那个校验过程的很多都是重复的,做一个统一的处理
package com.atguigu.common.exception;
/**
* @author tangyao
* @version 1.0.0
* @Description TODO
* @createTime 2020年08月26日 23:47:00
*/
public enum BizCodeEnum {
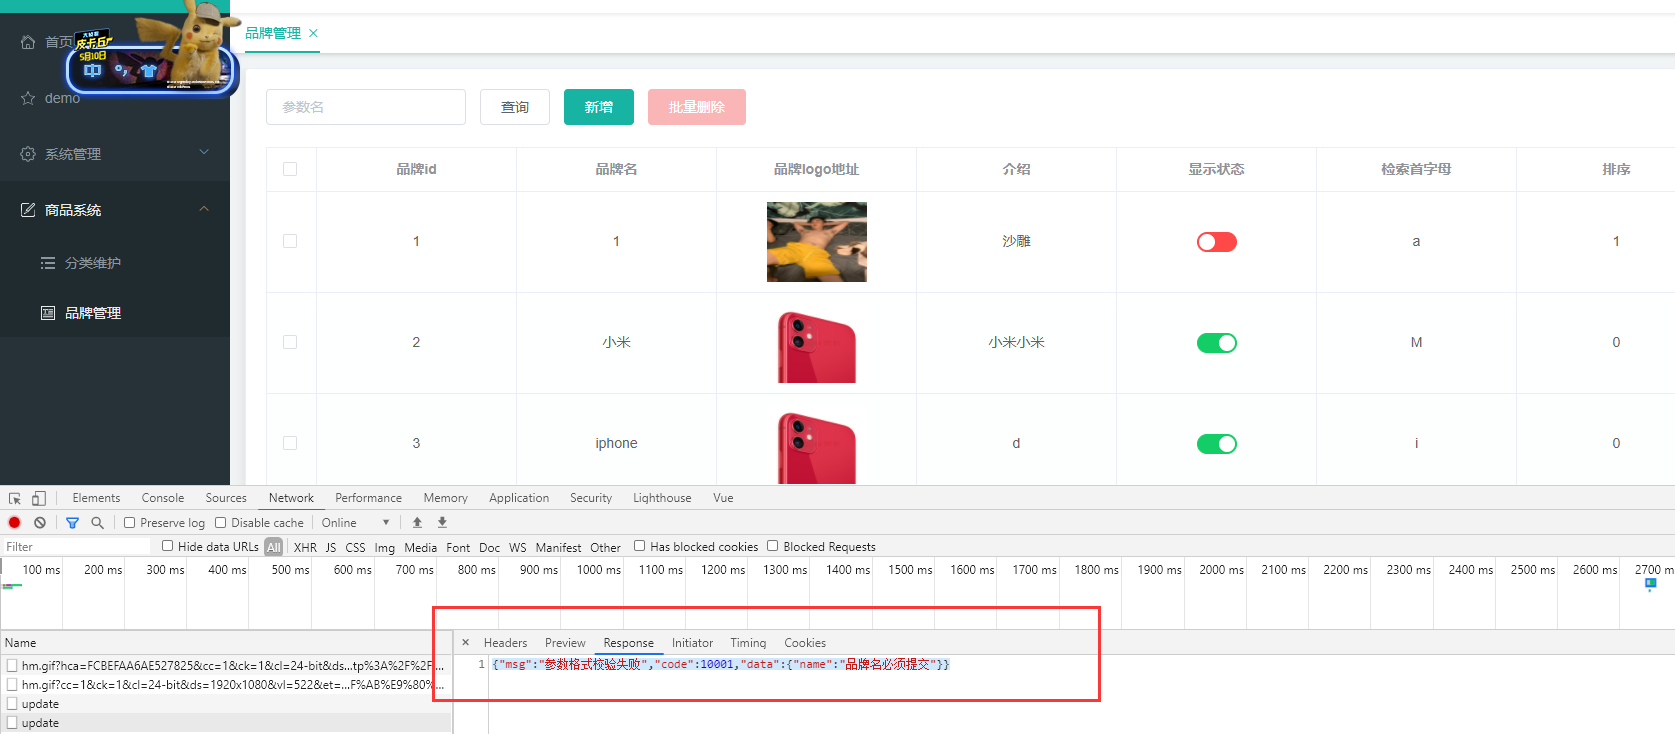
UNKNOW_EXCEPTION(10000,"系统未知异常"),
VALID_EXCEPTION(10001,"参数格式校验失败");
private int code;
private String message;
BizCodeEnum(int code, String message) {
this.code = code;
this.message = message;
}
public int getCode() {
return code;
}
public String getMessage() {
return message;
}
}
package com.atguigu.gulimall.product.exception;

import com.atguigu.common.exception.BizCodeEnum;
import com.atguigu.common.utils.R;
import lombok.extern.slf4j.Slf4j;
import org.springframework.validation.BindingResult;
import org.springframework.web.bind.MethodArgumentNotValidException;
import org.springframework.web.bind.annotation.ExceptionHandler;
import org.springframework.web.bind.annotation.RestControllerAdvice;

import java.util.HashMap;
import java.util.Map;

/**
 * @author tangyao
 * @version 1.0.0
 * @Description TODO
 * @createTime 2020年08月26日 23:03:00
 */

/**
 * 集中处理所有异常
 */
@Slf4j
@RestControllerAdvice(basePackages = "com.atguigu.gulimall.product.controller")
public class GulimallExceptionControllerAdvance {

    @ExceptionHandler(value = MethodArgumentNotValidException.class)
    public R handleValidException(MethodArgumentNotValidException e) {
        log.error("数据校验出现问题{},异常类型{}", e.getMessage(), e.getClass());
        BindingResult bindingResult = e.getBindingResult();
        Map<String, String> errorMap = new HashMap<>();
        bindingResult.getFieldErrors().forEach(fieldError -> {
            errorMap.put(fieldError.getField(), fieldError.getDefaultMessage());
        });
        return R.error(BizCodeEnum.VALID_EXCEPTION.getCode(), BizCodeEnum.VALID_EXCEPTION.getMessage()).put("data", errorMap);
    }

    @ExceptionHandler(value = Throwable.class)
    public R handleException(Throwable throwable) {
        return R.error(BizCodeEnum.UNKNOW_EXCEPTION.getCode(), BizCodeEnum.UNKNOW_EXCEPTION.getMessage());
    }
}
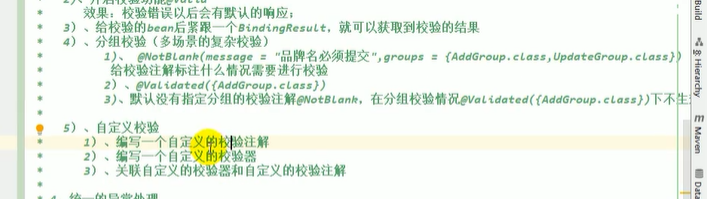
JSR303分组校验与自定义校验器
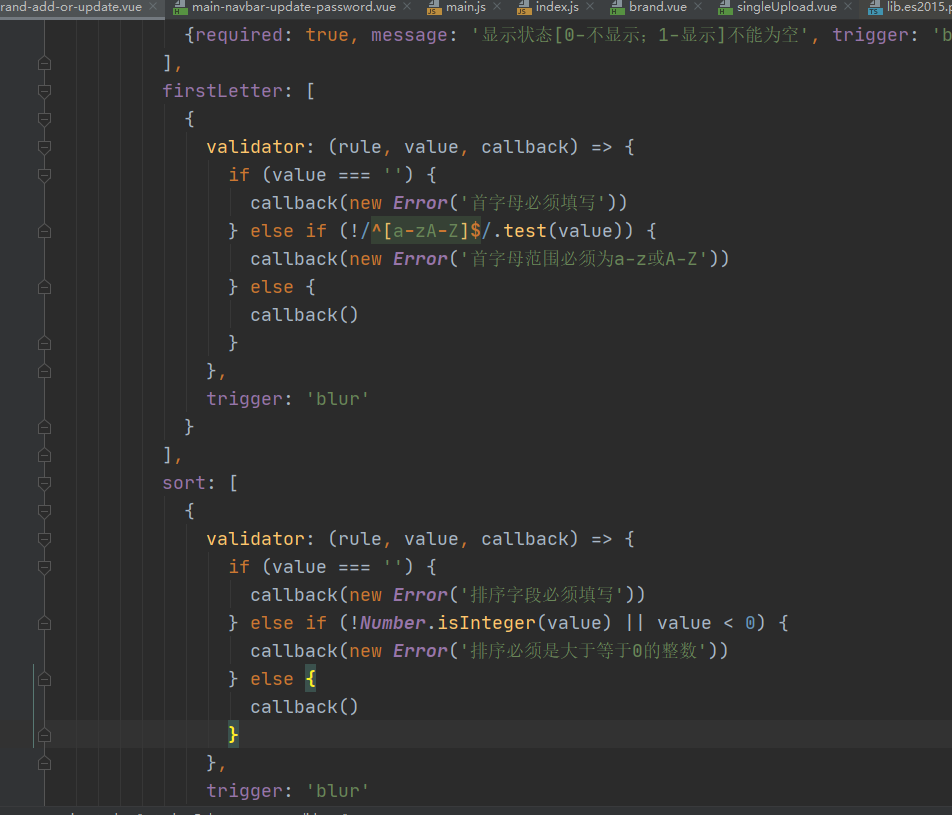
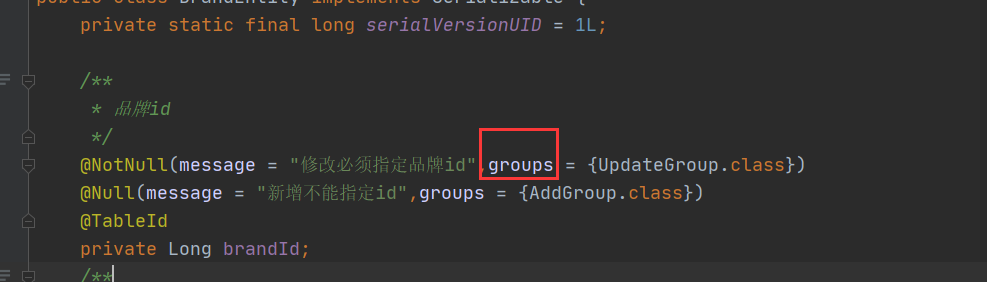
group类型是一个数组,里面可以指定多种类型,而且规定这个类型必须是接口,接口起到标识作用,

public interface AddGroup {
}
public interface UpdateGroup {
}
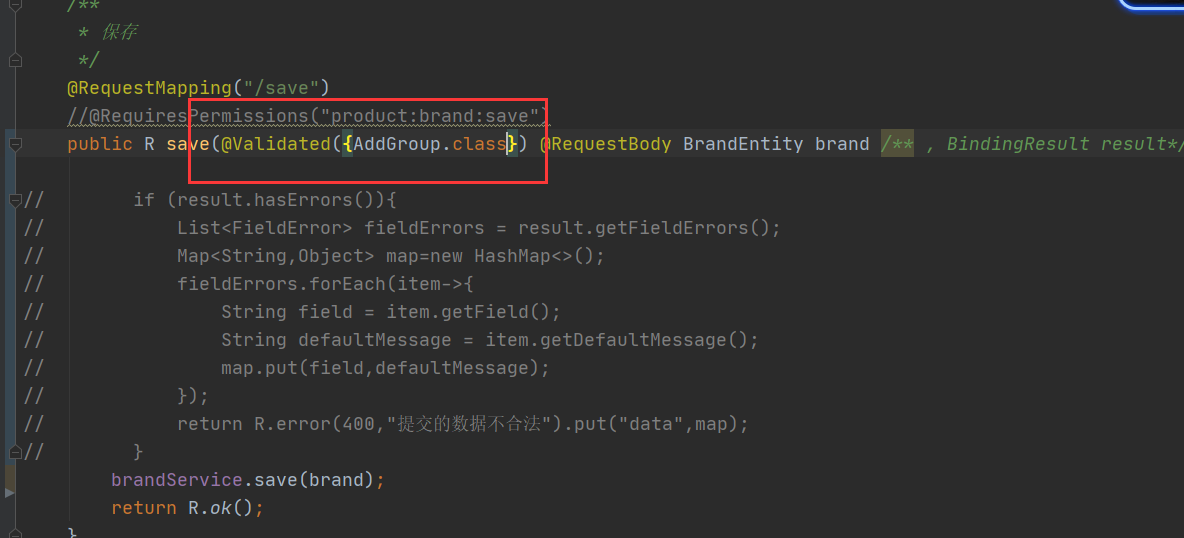
@Valid是规范,@Validated是Spring提供的注解

@Data
@TableName("pms_brand")
public class BrandEntity implements Serializable {
private static final long serialVersionUID = 1L;
/**
* 品牌id
*/
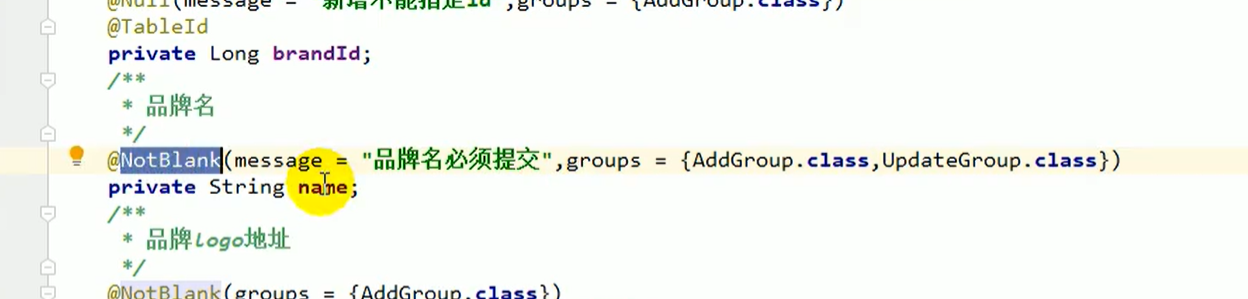
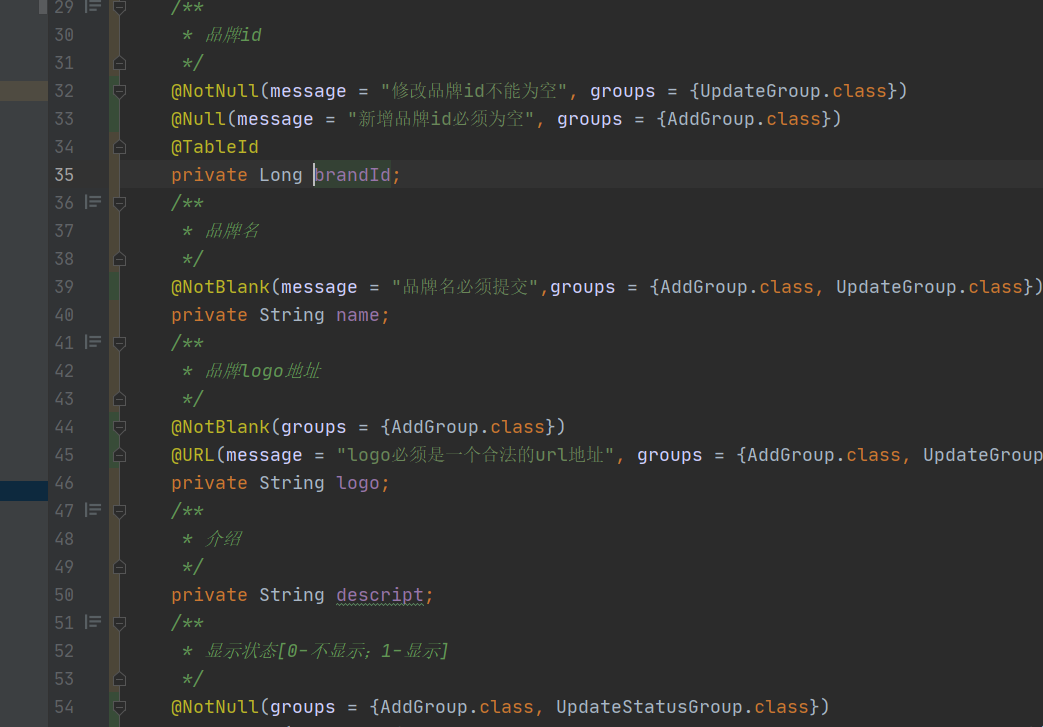
@NotNull(message = "修改品牌id不能为空", groups = {UpdateGroup.class})
@Null(message = "新增品牌id必须为空", groups = {AddGroup.class})
@TableId
private Long brandId;
/**
* 品牌名
* 这里用@NotBlank,表示该字符串必须要有实际内容且不能是空字符串“ ”
*/
@NotBlank(message = "品牌名必须提交",groups = {AddGroup.class, UpdateGroup.class})
private String name;
/**
* 品牌logo地址
*/
@NotBlank(groups = {AddGroup.class})
@URL(message = "logo必须是一个合法的url地址", groups = {AddGroup.class, UpdateGroup.class})
private String logo;
/**
* 介绍
*/
private String descript;
/**
* 显示状态[0-不显示;1-显示]
*/
@NotNull(groups = {AddGroup.class, UpdateStatusGroup.class})
@ListValue(groups = {AddGroup.class, UpdateStatusGroup.class, UpdateGroup.class})
private Integer showStatus;
/**
* 检索首字母
* 正则表达式在这里不需要加"/^[a-zA-Z]$/"
* 这里用@NotEmpty表示,不能为null也不能空,就算为空字符串,“ ”,因为下面的 @Pattern会进一步检验字符串内容为一个字母
*/
@NotEmpty(groups = {AddGroup.class})
@Pattern(regexp = "^[a-zA-Z]$", message = "检索首字母必须是一个字母", groups = {AddGroup.class, UpdateGroup.class})
private String firstLetter;
/**
* 排序
*/
@NotNull(groups = {AddGroup.class})
@Min(value = 0, message = "排序必须大于等于0", groups = {AddGroup.class, UpdateGroup.class})
private Integer sort;
}
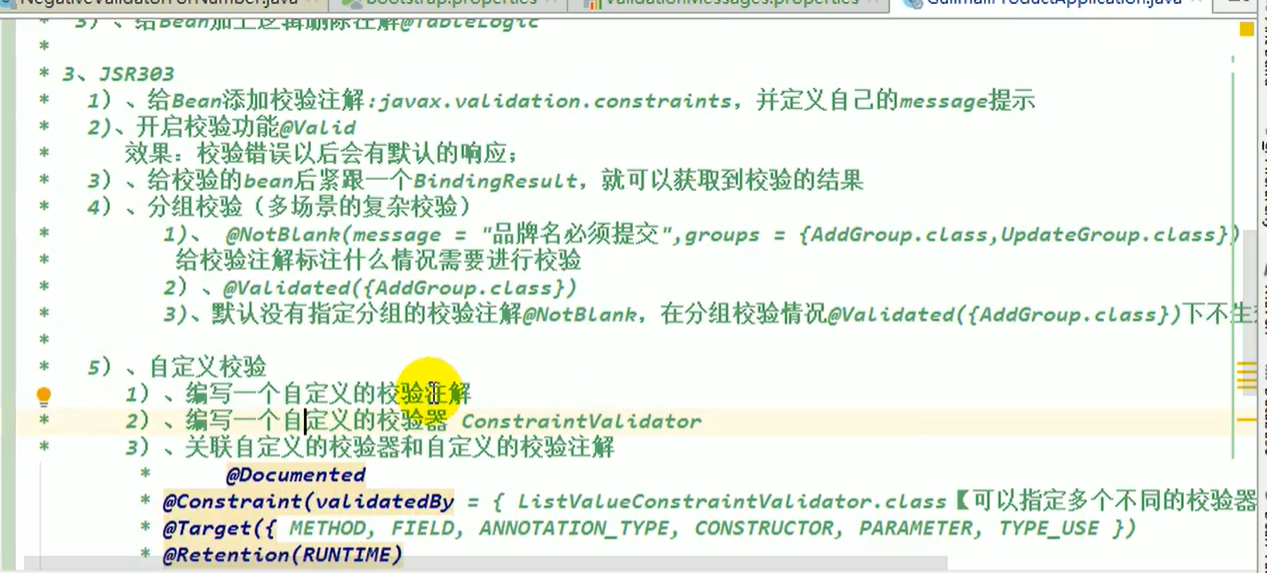
自定义校验
自定义注解如何定义,参考@NotBlank注解,一个校验注解必须满足规范,首先必须拥有三个属性,
//校验出错后,错误信息去哪取,默认这个属性,取ValidationMessages.properties取
String message() default "{javax.validation.constraints.NotBlank.message}";
//也要支持分组校验的功能
Class<?>[] groups() default { };
//自定义负载信息
Class<? extends Payload>[] payload() default { };
作为校验注解还必须标写元信息数据,
@Documented
//校验注解是使用哪个校验器校验的,这里可以指定校验器,这里不指定需要在初始化指定
@Constraint(validatedBy = { })
//这个注解可以标注在哪些位置
@Target({ METHOD, FIELD, ANNOTATION_TYPE, CONSTRUCTOR, PARAMETER, TYPE_USE })
//校验注解的时机
@Retention(RUNTIME)
//可重复注解
@Repeatable(List.class)
在common添加依赖
<dependency>
    <groupId>javax.validation</groupId>
    <artifactId>validation-api</artifactId>
    <version>2.0.1.Final</version>
</dependency>
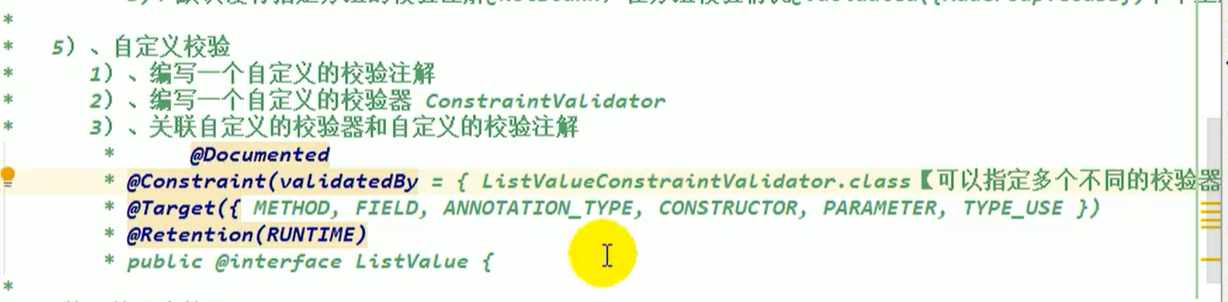
编写自定义校验注解,validatedBy可以有多个校验器
@Documented
//指定校验器
@Constraint(validatedBy = {ListValConstraintValidator.class})
@Target({METHOD, FIELD, ANNOTATION_TYPE, CONSTRUCTOR, PARAMETER, TYPE_USE})
@Retention(RUNTIME)
public @interface ListValue {
    //变量一般是校验注解的全类名
    String message() default "{com.atguigu.common.valid.ListValue.message}";

    Class<?>[] groups() default {};

    Class<? extends Payload>[] payload() default {};

    int[] vals = {0, 1};
}
resources下创建配置文件
ValidationMessages.properties,当然也可以用message写在注解上面
com.atguigu.common.valid.ListValue.message=必须提交指定的值

是利用ConstraintValidator进行校验,并且可以有多个校验器,
public class ListValConstraintValidator implements ConstraintValidator<ListValue,Integer> {
    private Set<Integer> set=new HashSet<>();
    @Override
    public void initialize(ListValue constraintAnnotation) {
        int[] vals = ListValue.vals;
        for (int val : vals) {
            set.add(val);
        }
    }
    /**
     *
     * @param value 需要校验的值
     * @param context
     * @return
     */
    @Override
    public boolean isValid(Integer value, ConstraintValidatorContext context) {
        return set.contains(value);
    }
}
这里只是更改了状态,没有提交品牌名,可是还不能去掉UpdateGroup.class,否则就允许前端直接提交name是空的字段,究其原因,是修改状态和修改整个完整信息共用了一个update接口
解决方案:
新添加一个接口分组,和一个请求的接口
public interface UpdateStatusGroup {
}
/**
 * 修改状态
 */
@RequestMapping("/update/status")
//@RequiresPermissions("product:brand:update")
public R updateStatus(@Validated({UpdateStatusGroup.class}) @RequestBody BrandEntity brand){
    brandService.updateById(brand);

    return R.ok();
}
/**
 * 品牌id
 */
@NotNull(message = "修改品牌id不能为空", groups = {UpdateGroup.class,UpdateStatusGroup.class})
@Null(message = "新增品牌id必须为空", groups = {AddGroup.class})
@TableId
private Long brandId;
/**
 * 显示状态[0-不显示;1-显示]
 */
@NotNull(groups = {AddGroup.class, UpdateStatusGroup.class})
@ListValue(groups = {AddGroup.class, UpdateStatusGroup.class})
private Integer showStatus;
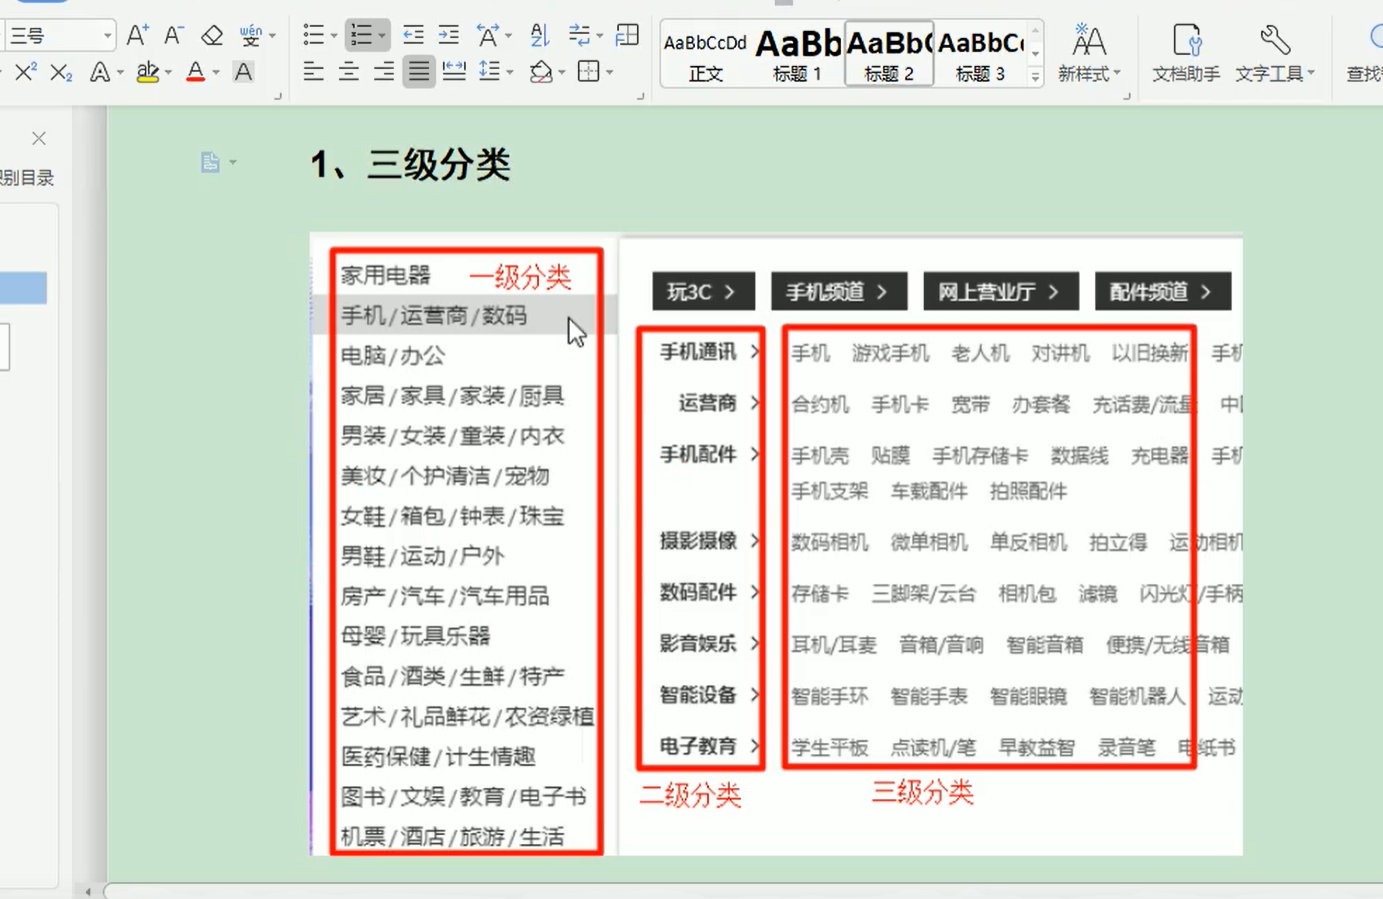
SPU&SKU规格参数&销售属性

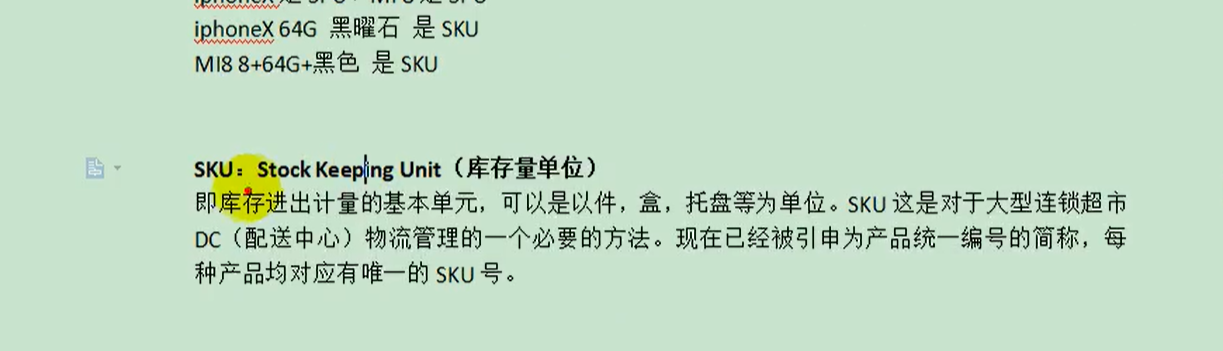
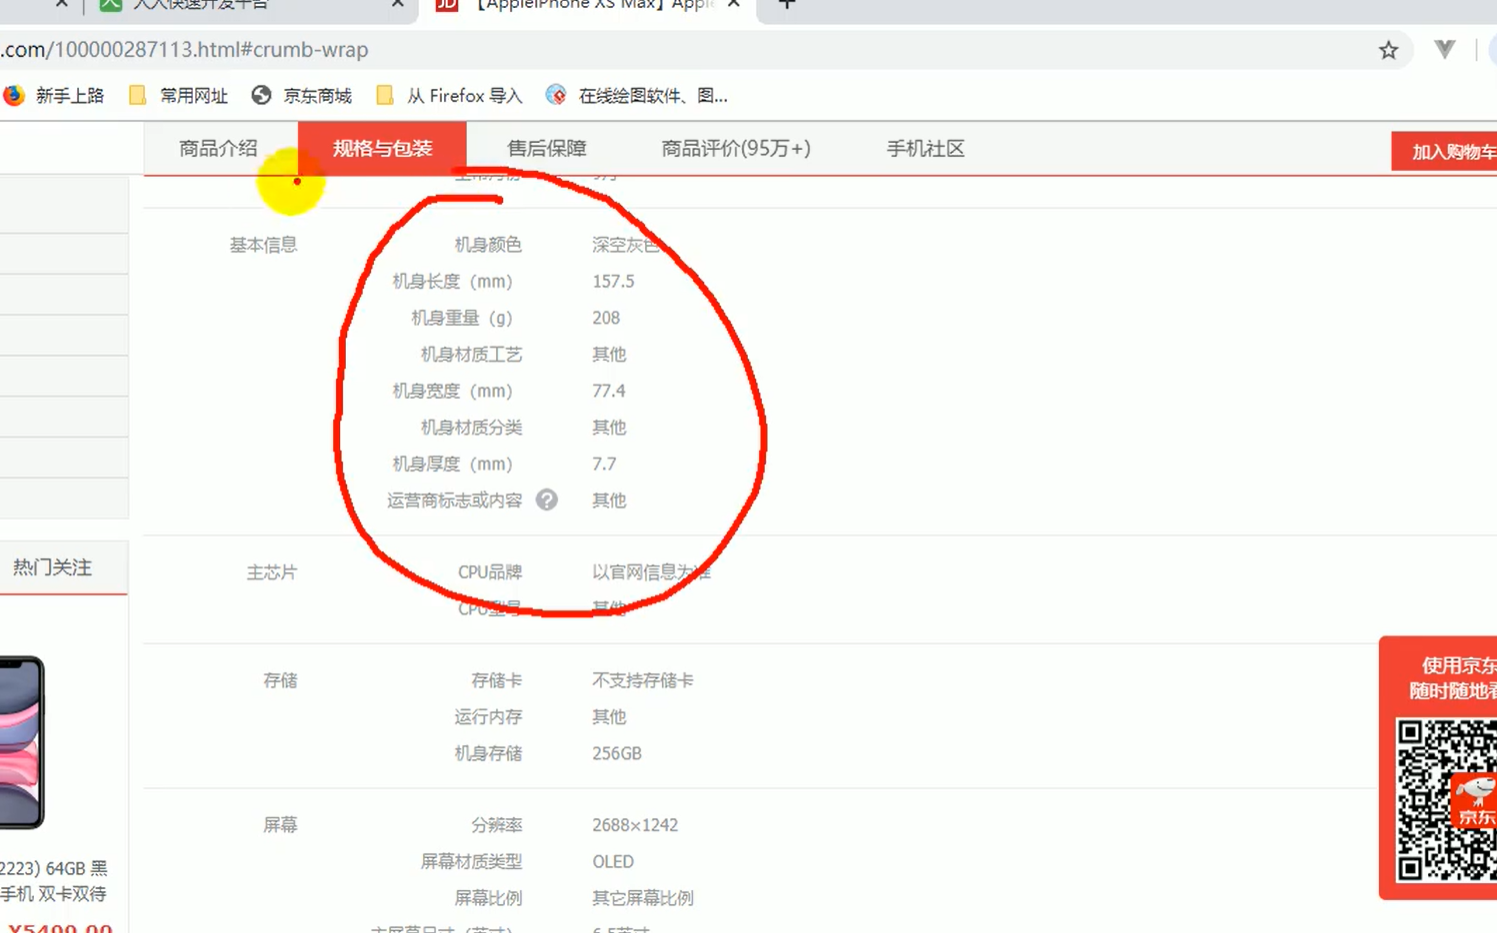
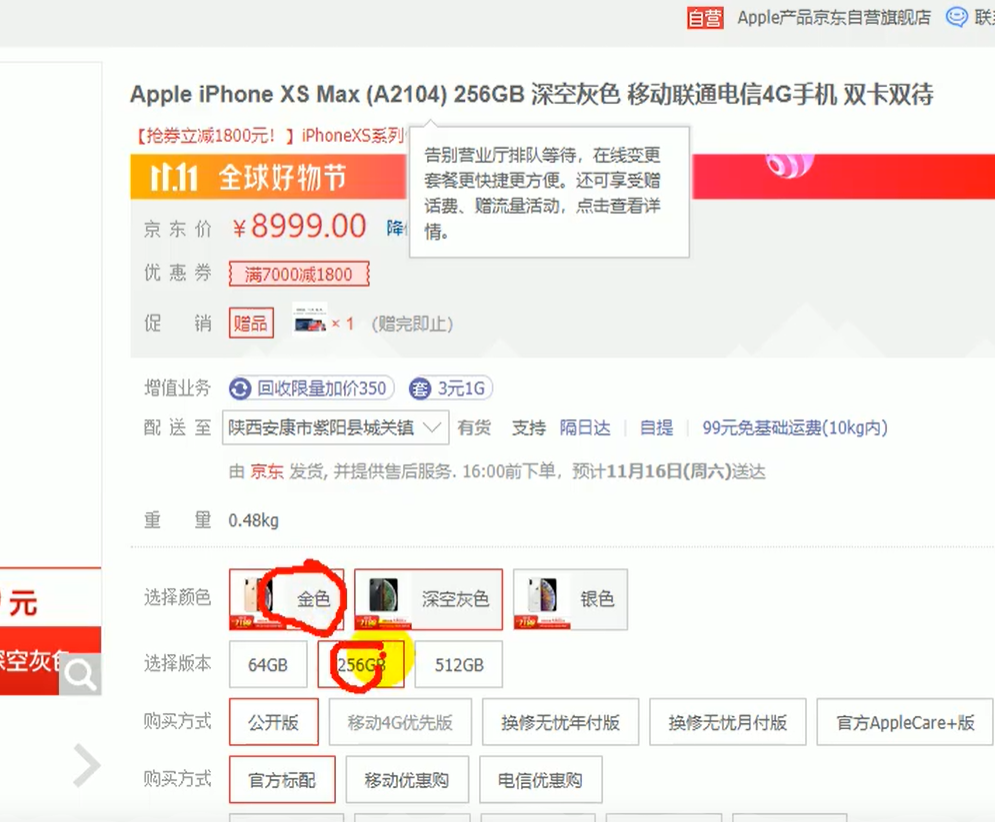
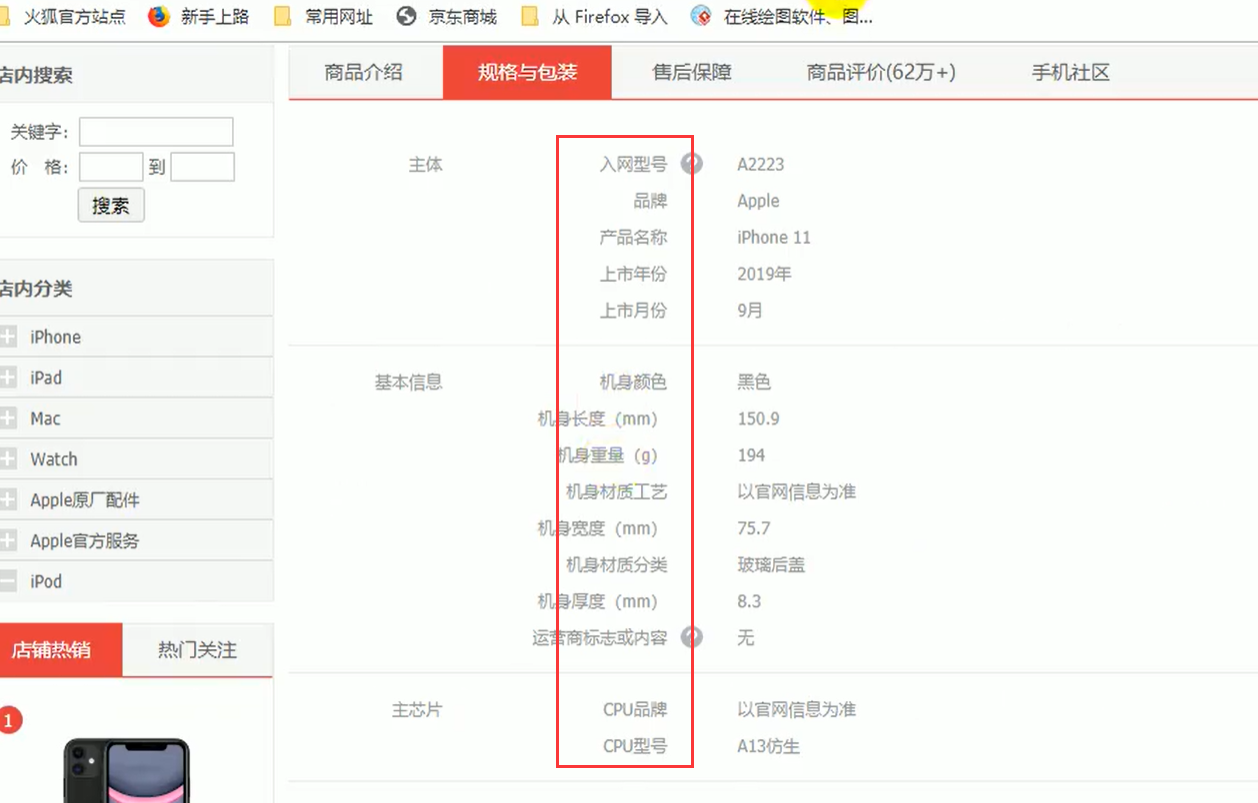
规格与包装就是基本属性,同一个spu无论切换上面版本,基本属性都是一样的。能完全决定销售与库存量的叫做销售属性
分组,属性名,属性值,

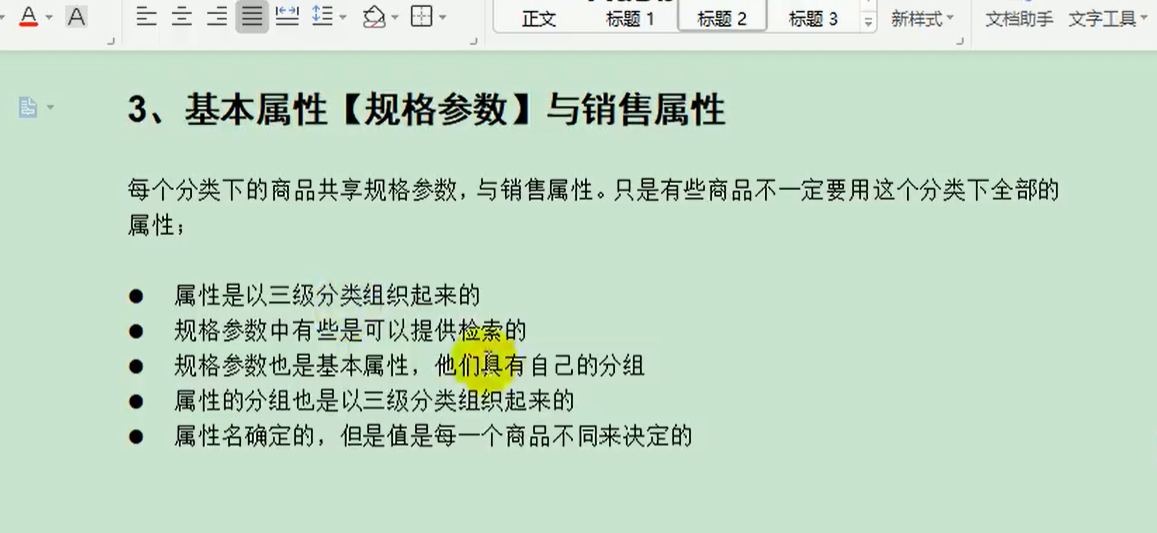
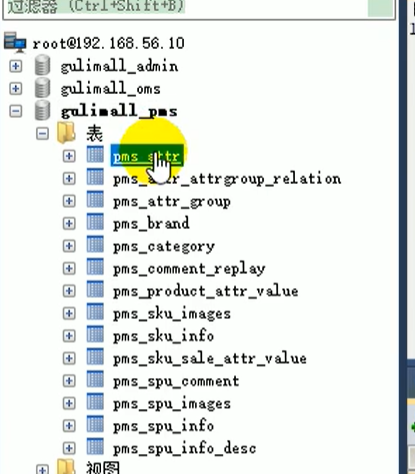
这里捋一遍表的含义与对应关系,对接下来的业务开发有及其大的帮助
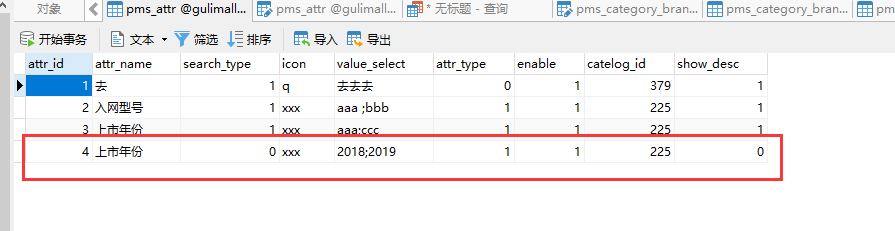
pms_attr 属性表:根据attr_type属性类型字段,分为基本属性(spu相关)和销售属性(sku相关),
冗余存储了三级分类id(注意拼写,这里有一个坑,数据库中表设计拼写错了,和前端传过来的值对应的时候注意),有些属性是可以被检索的,比如cpu型号为麒麟990芯片,由search_type确定。
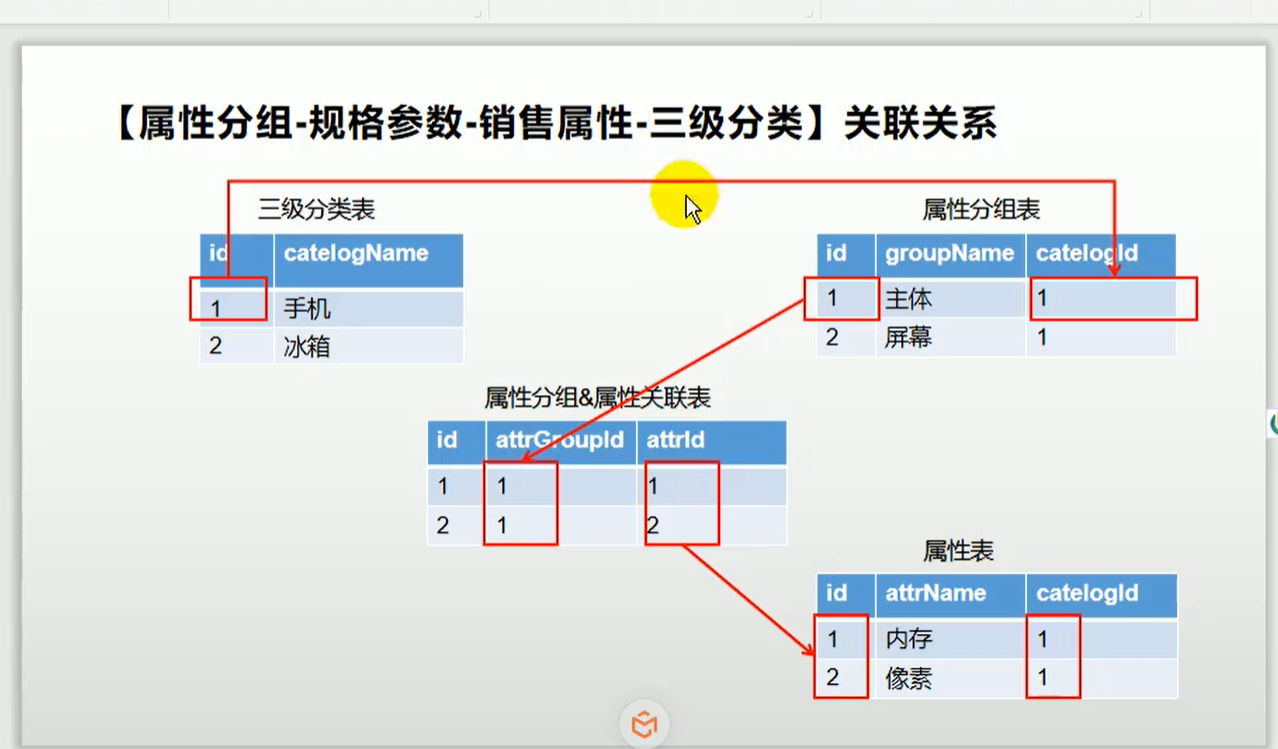
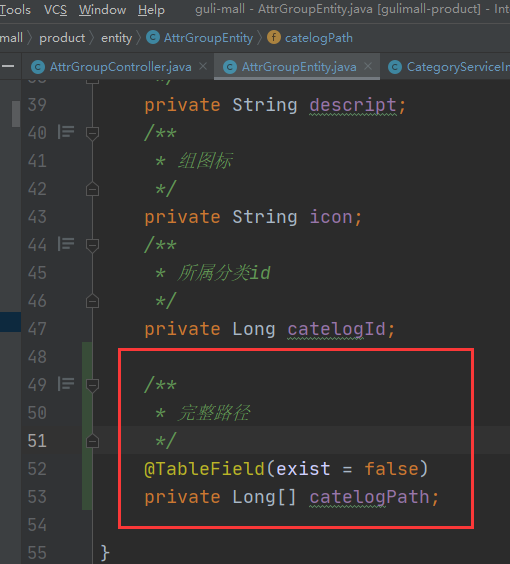
pms_attr_group 属性分组表:比如主体为一个分组,基本信息为一个分组,里面也冗余存储了三级分类id
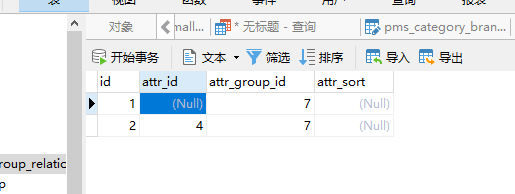
pms_attr_attrgroup_relation 属性分组关系表:每个分组对应下面的属性,比如主体分组下对应着——入网型号,品牌,产品名称,等等属性
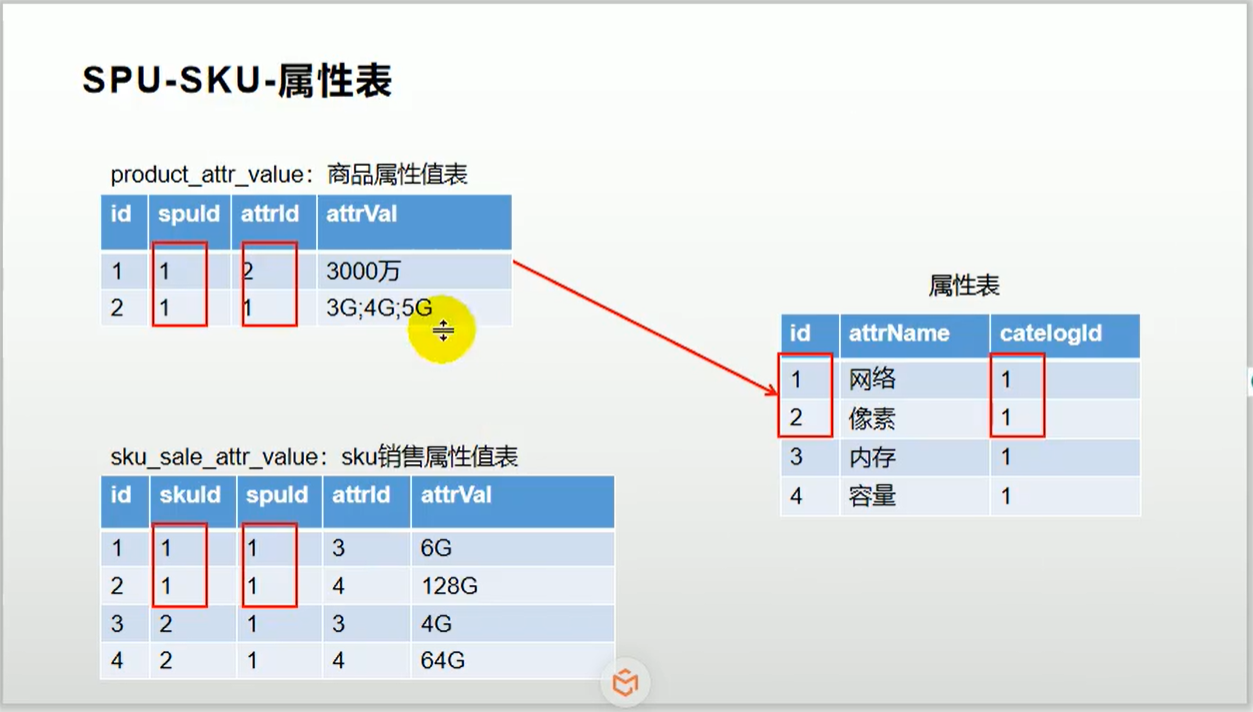
pms_product_attr_value 商品属性值表:每一个spu的基本属性对应的值是在这里确定的。
pms_spu_info 商品基本信息表:真正的spu信息,id是商品id,冗余了三级分类id
pms_sku_info 库存量详细信息表:sku的详细信息,比如spu荣耀v20的spuId为1 ,他有四个sku,这些sku的详细信息都在这里,
pms_sku_images sku图片表:每一个sku对应的所有图片,比如说1号sku有5张图片,就有五行记录,
pms_sku_sale_attr_value sku销售属性值表:比如保存每一个sku的颜色,内存大小等销售属性,sku个数是笛卡尔积,也就是说,如果销售属性只有颜色为黑色和白色,内存大小为6+128和8+256,就会有2*2=4个sku
接口文档地址
https://easydoc.xyz/s/78237135/
前端组件抽取,父子组件维护
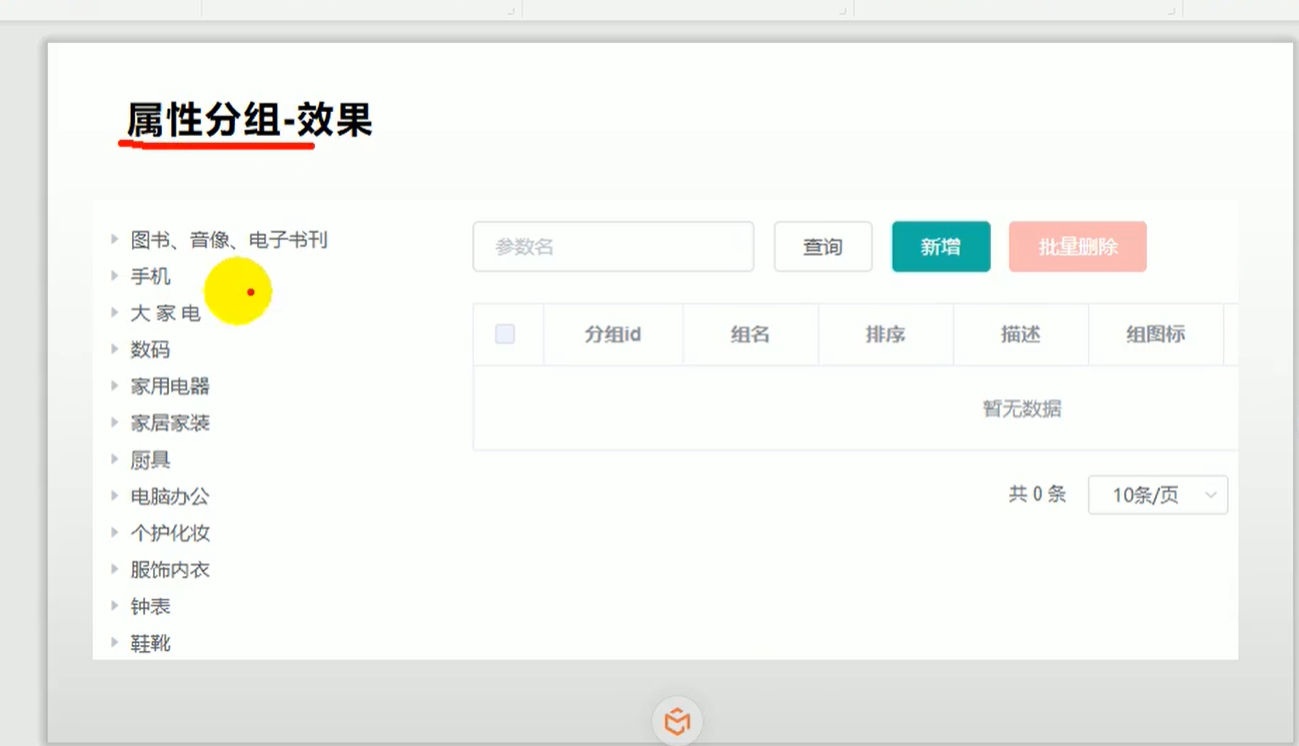
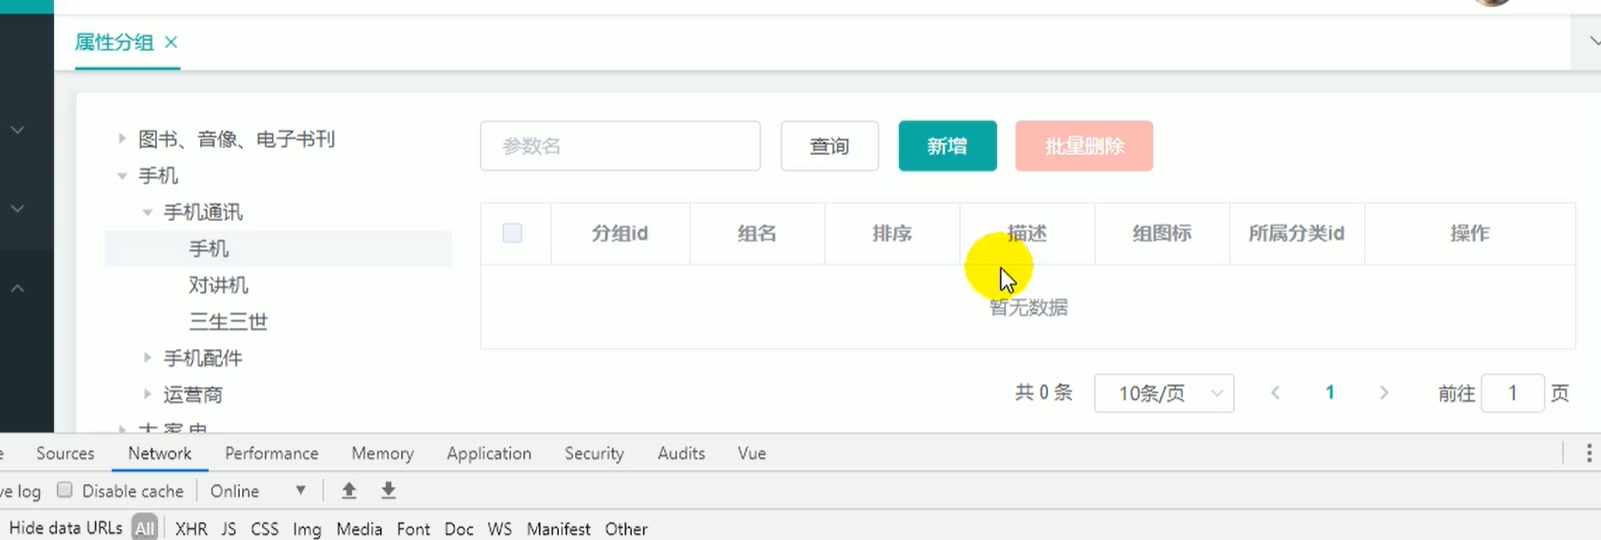
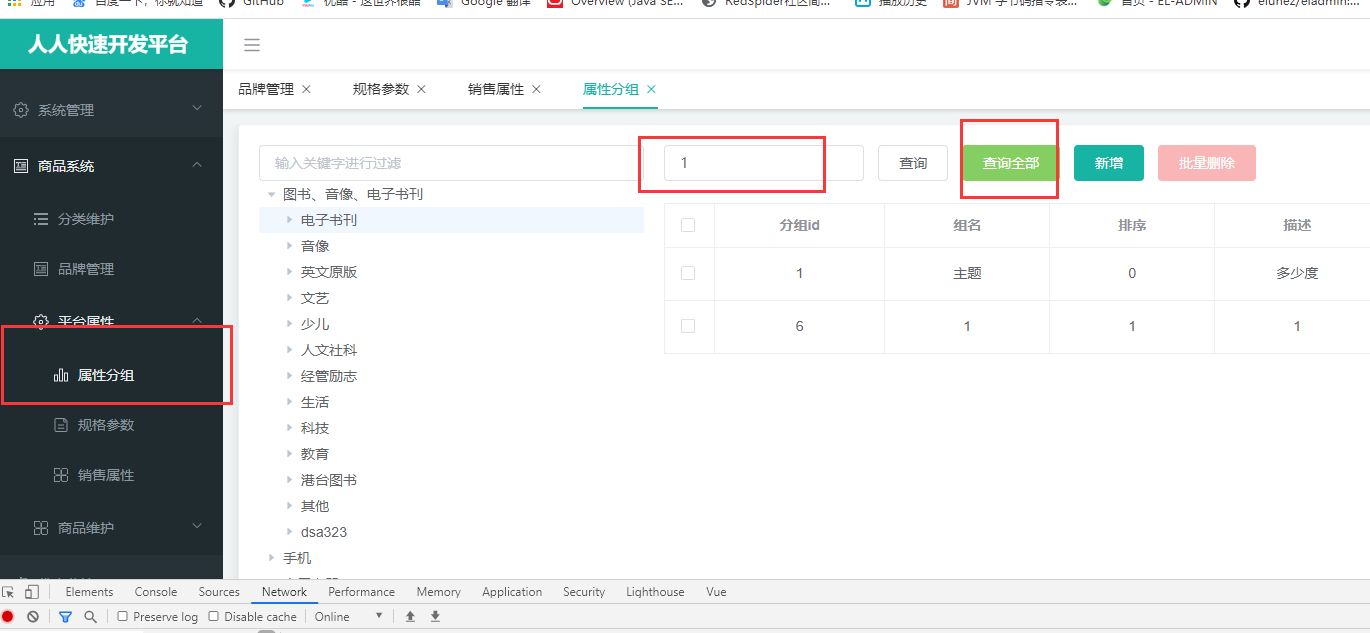
选中一个属性分类,新增属性分组,为每一个分组下,可以关联一些规格参数
在gulimall_admin 执行sys_menus.sql

分组功能:选中一个三级分类,会显示这个分类下已经有的分组,可以新增添加分组,还需要三级分类的整个菜单树,只要展示效果,而且以后都要用到,所以将三级分类功能抽取出来。
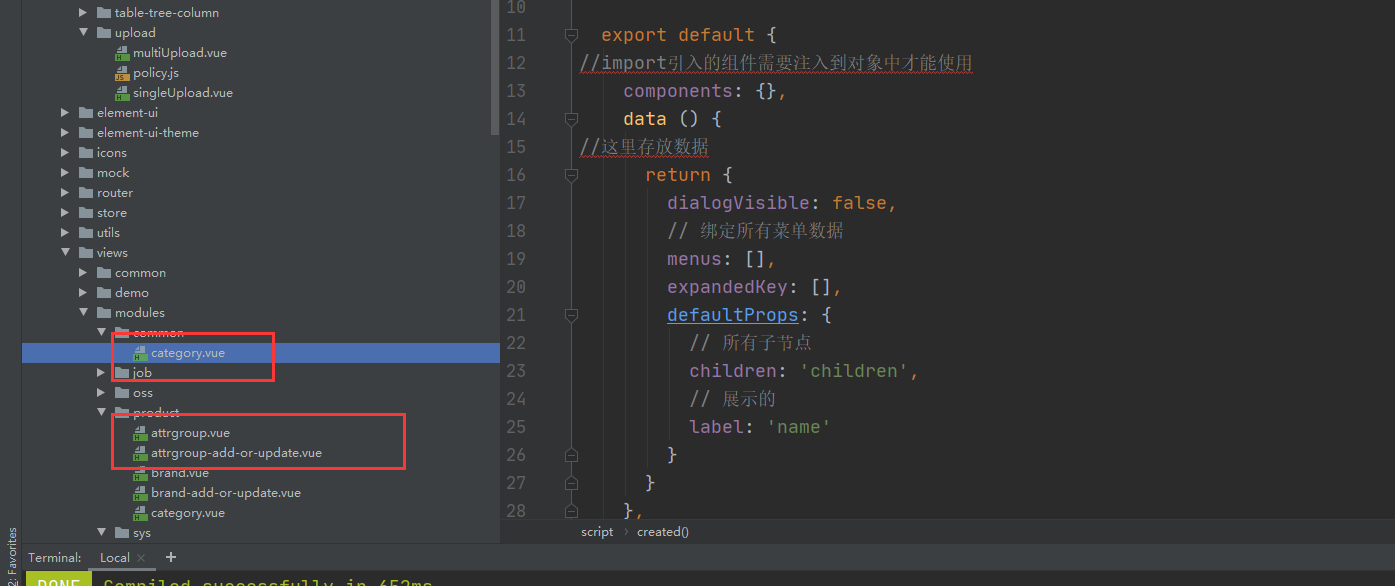
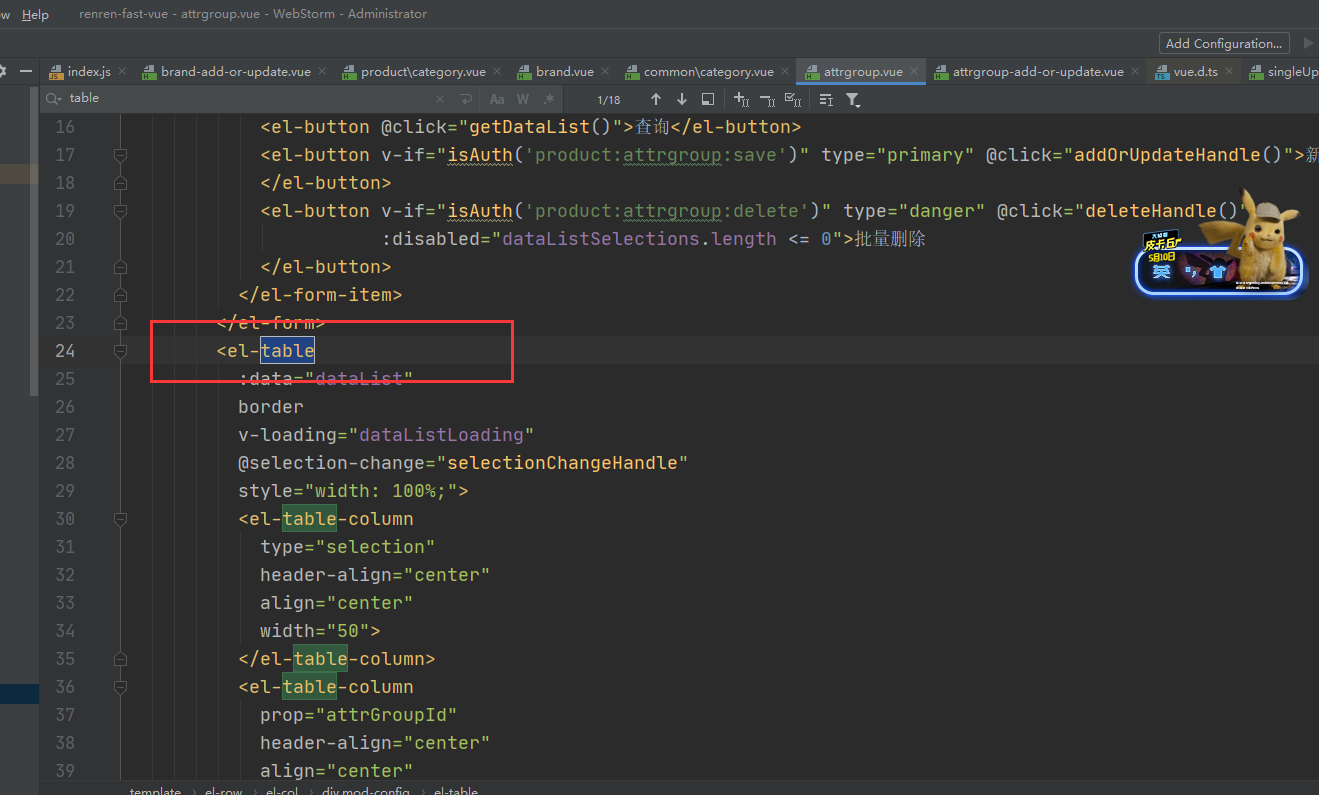
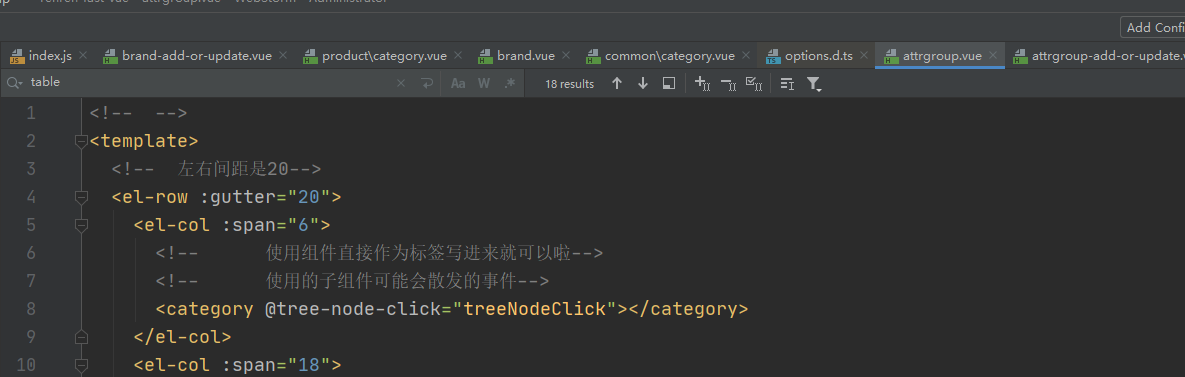
先给属性分组创建组件,如图,所以在product下会有attrgroup.vue组件
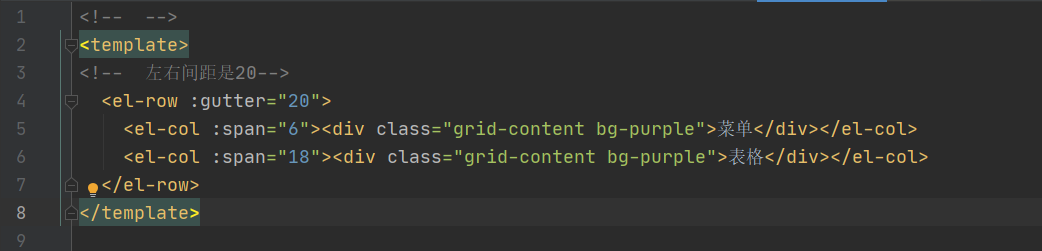
显示效果是左边是菜单,右边是表格,
https://element.eleme.cn/#/zh-CN/component/layout

想把菜单中内容eltree抽取出来
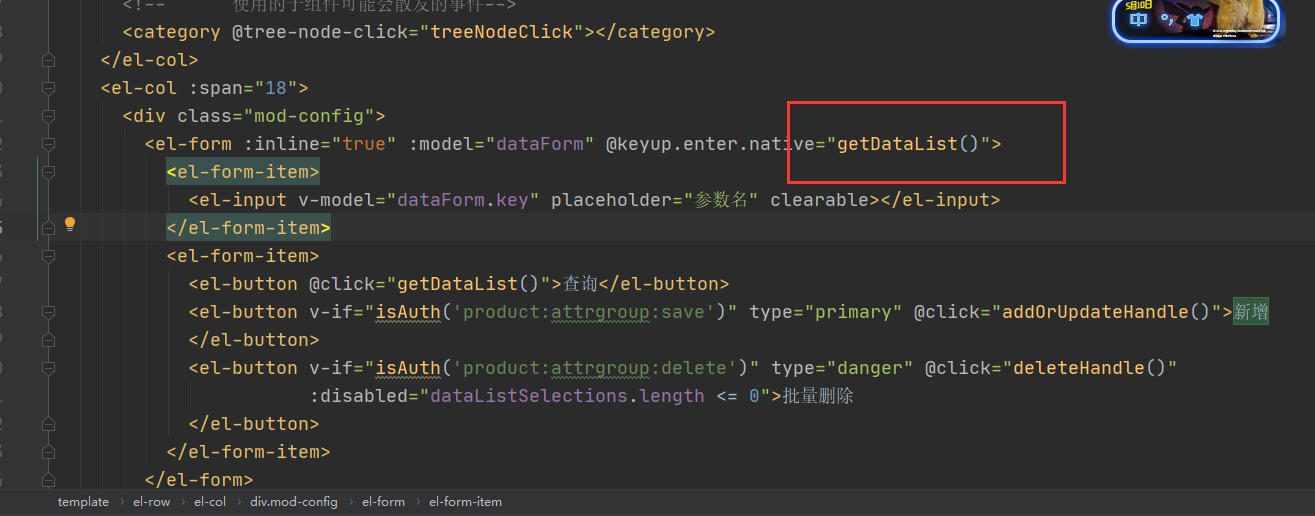
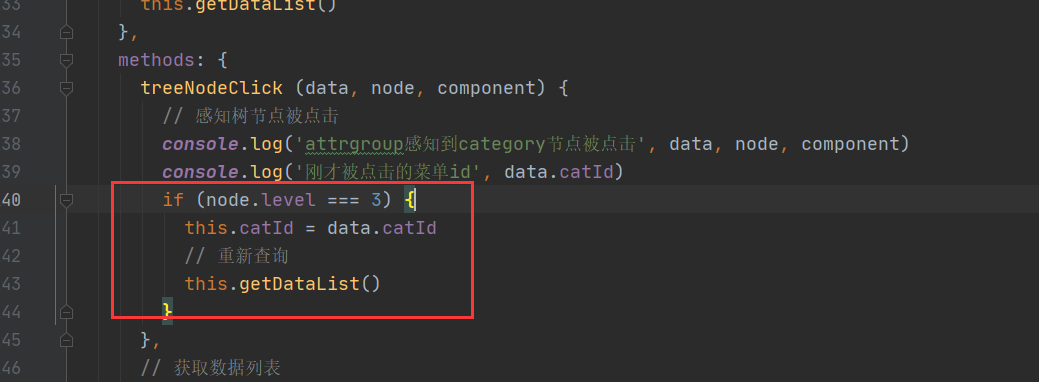
想要绑定单击事件,单击某个三级分类的时候,让表格里面的数据查询出来
也就是单击eltree中menus的一个三级分类,让attrgroup动态刷新table表格里面的内容,查询自己分类下的数据

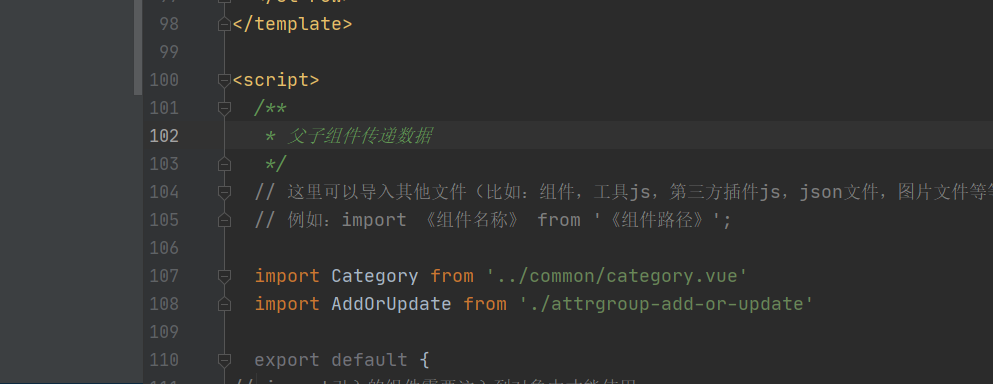
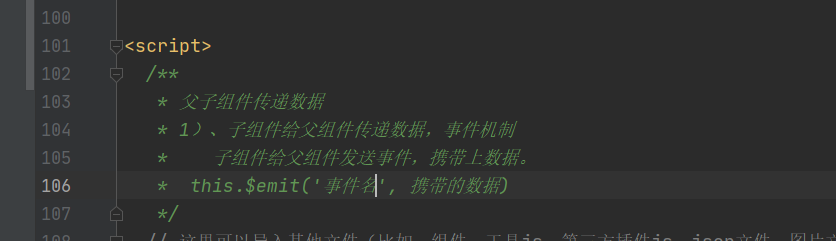
父子组件传递数据
attrgroup引用了Category,希望点击Category ,attrgroup会感知到,
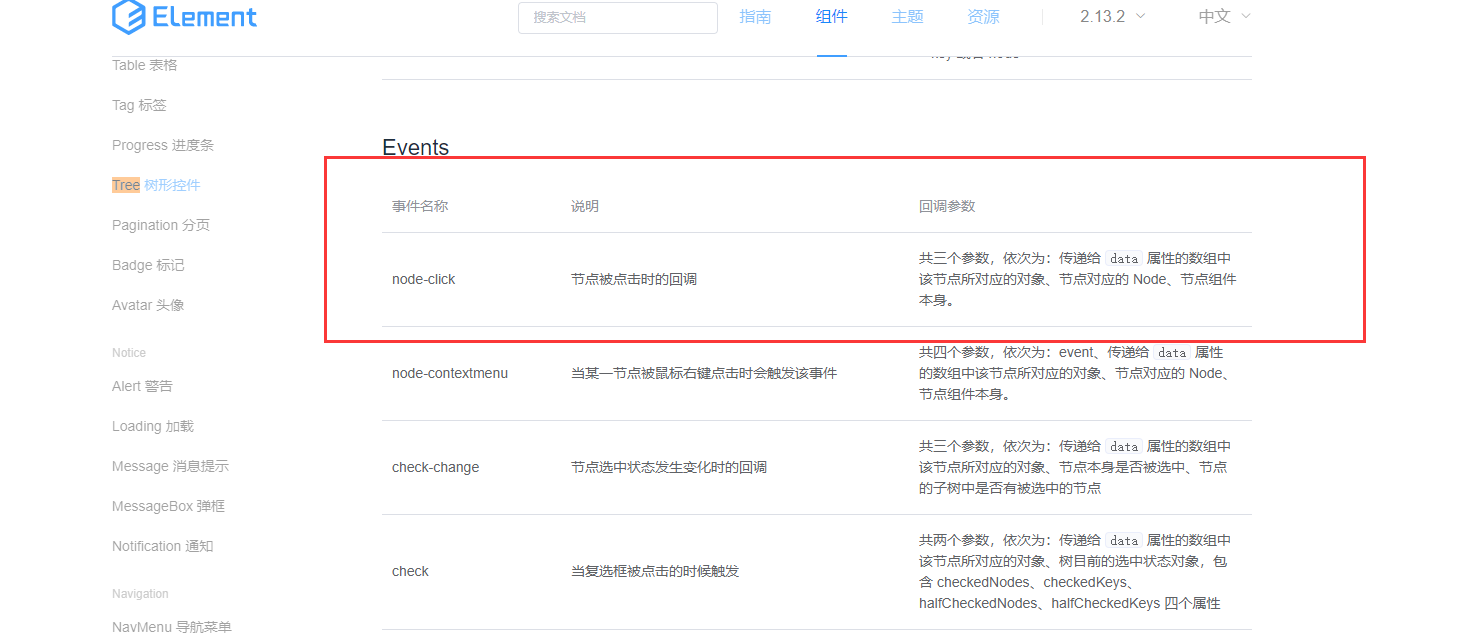
给eltree绑定单击事件


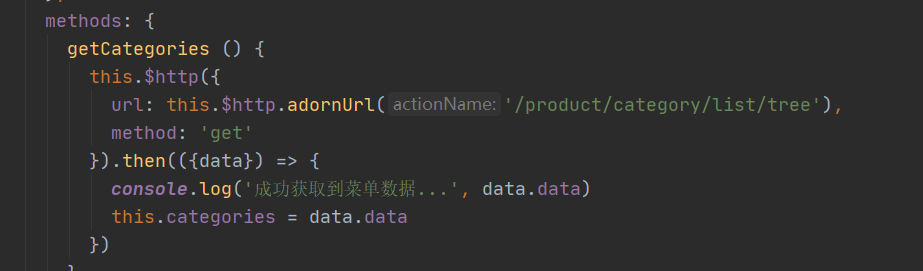
获取分类属性分组
更改接口增加categoryId的条件

public PageUtils queryPage(Map<String, Object> params, Long catelogId) {
    if (catelogId == 0) {
        IPage<AttrGroupEntity> page = this.page(new Query<AttrGroupEntity>().getPage(params),
                new QueryWrapper<>());
        return new PageUtils(page);
    } else {
        QueryWrapper<AttrGroupEntity> wrapper = new QueryWrapper<AttrGroupEntity>().eq("catelog_id", catelogId);
        String key = (String) params.get("key");
        //select * from pms_attr_group where catelog_id=? and (attr_group_id=key or attr_group_name like key)
        if (StringUtils.isNotEmpty(key)) {
            wrapper.and(obj -> obj
                    .eq("attr_group_id", key)
                    .or()
                    .like("attr_group_name ", key));
        }
        IPage<AttrGroupEntity> page = this.page(new Query<AttrGroupEntity>().getPage(params), wrapper);
        return new PageUtils(page);
    }
}
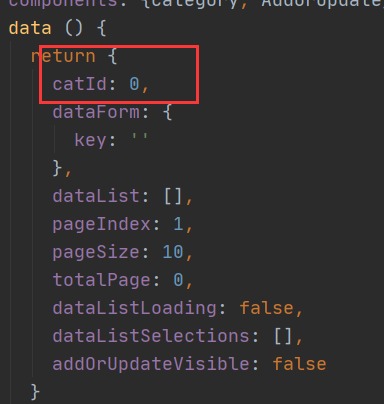
增加一个变量
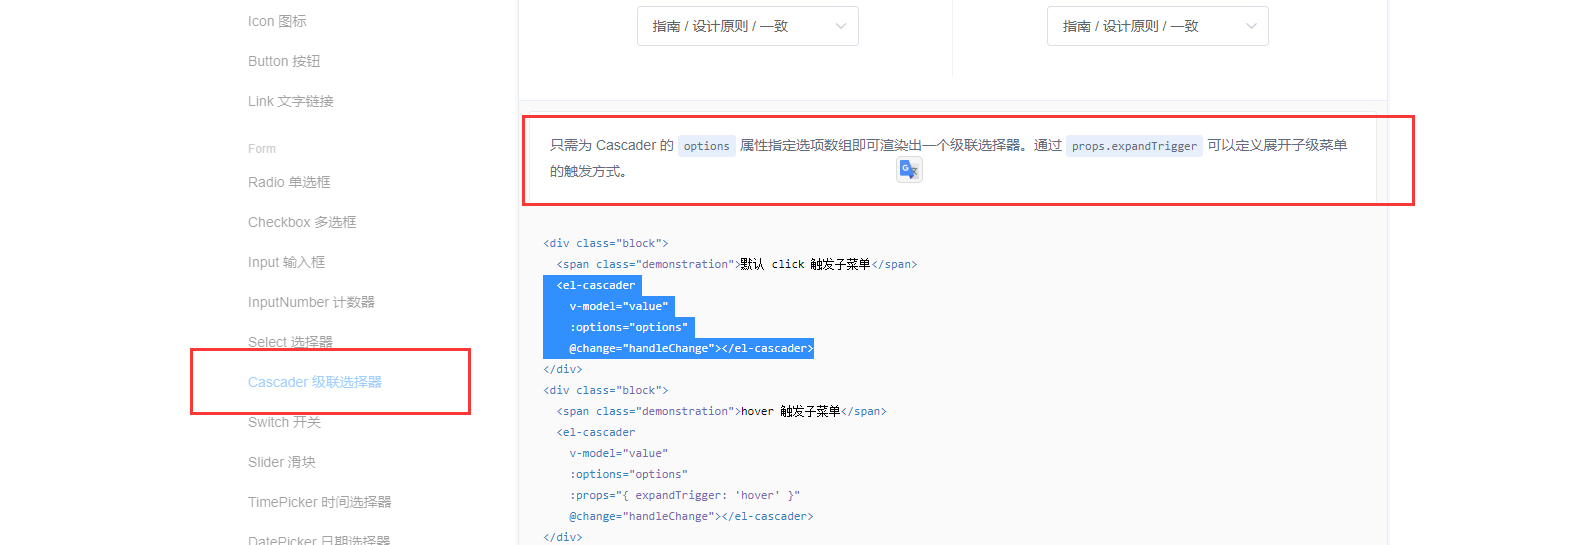
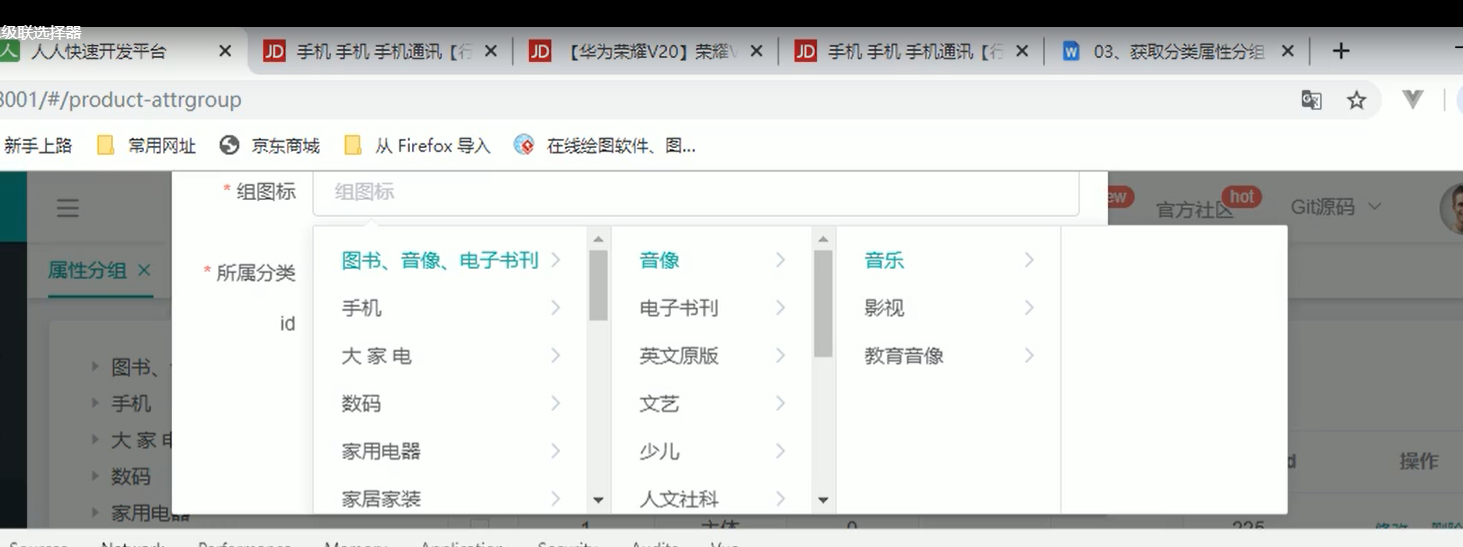
分组新增&级联选择器
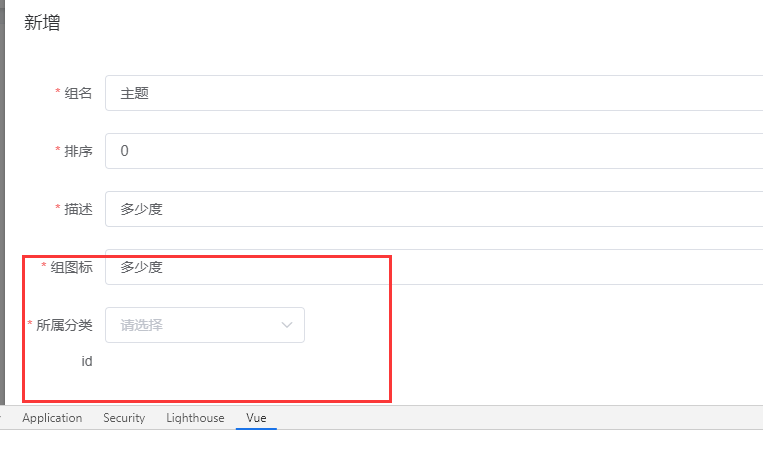
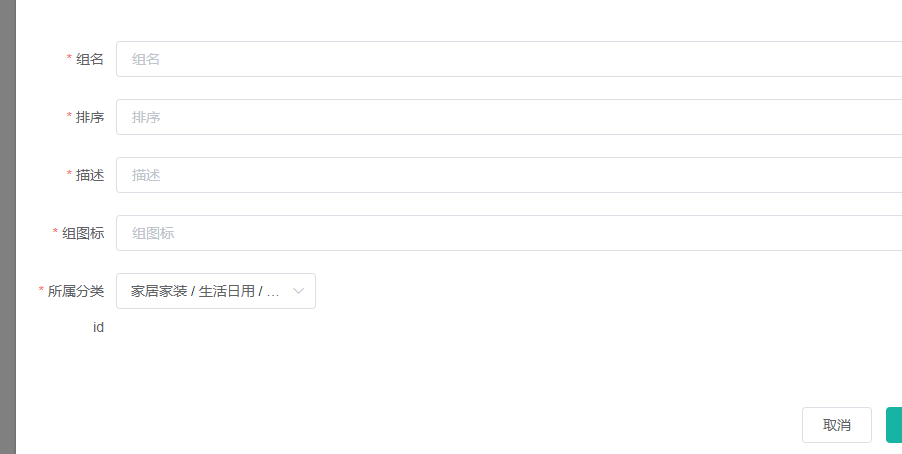
希望这里是新增的选择框,而且默认选中的是手机分类的id,因为之前选的是手机分类
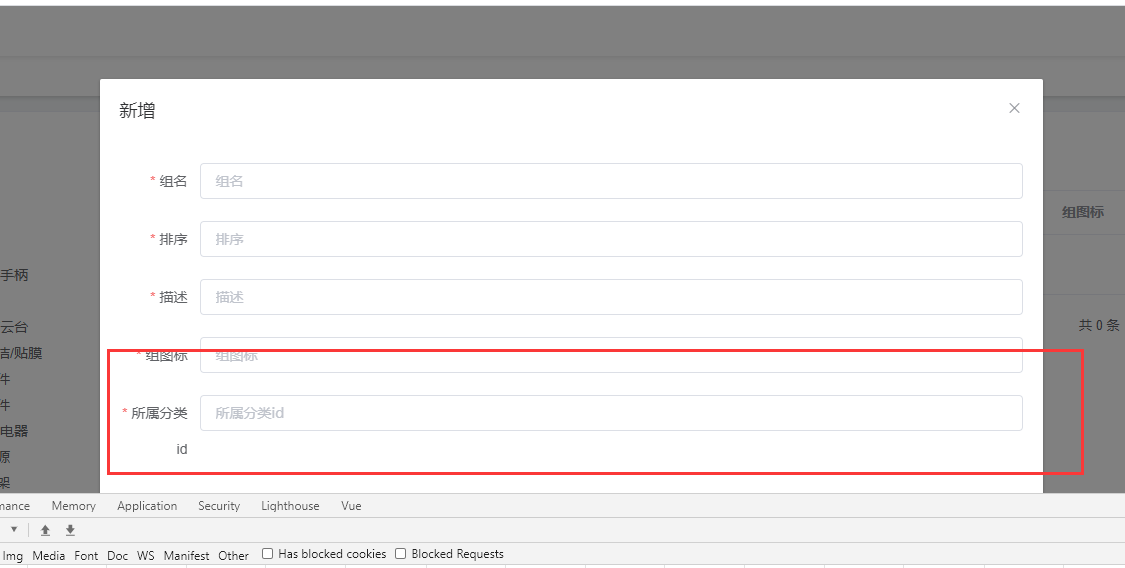

发现依旧是空白
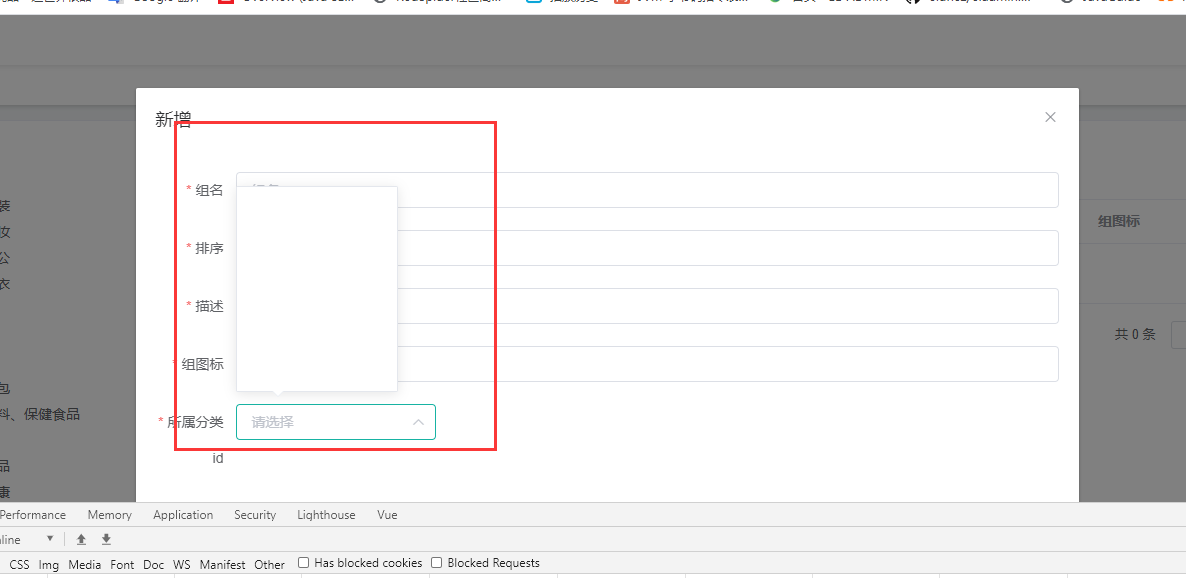
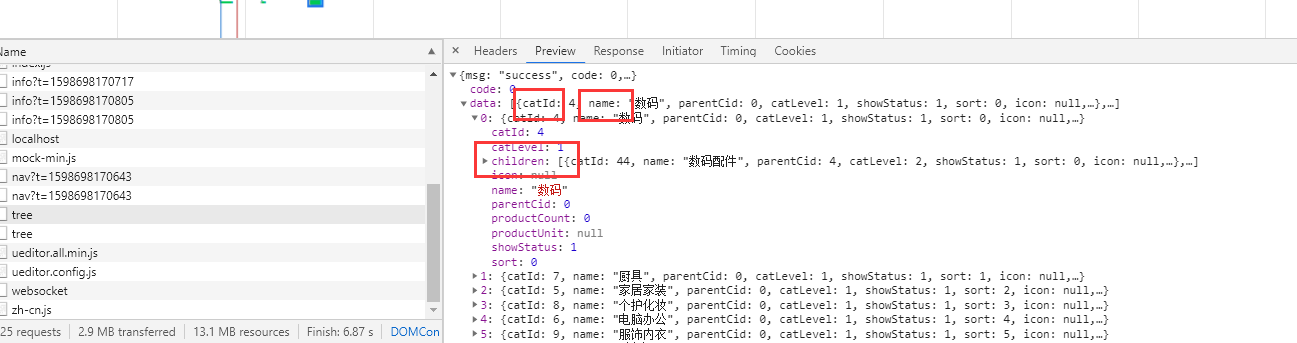
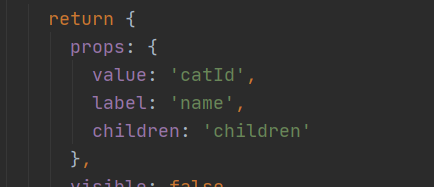
因为获取的数据和默认获取value值是不对的,需要自己设置
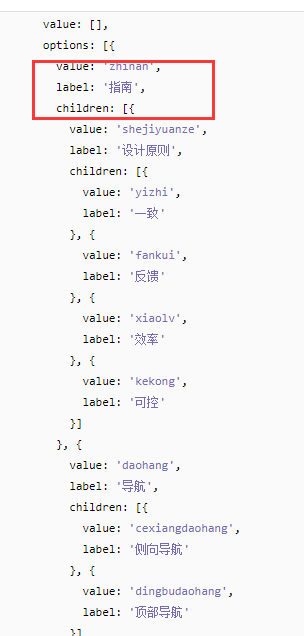
根据props自己设置
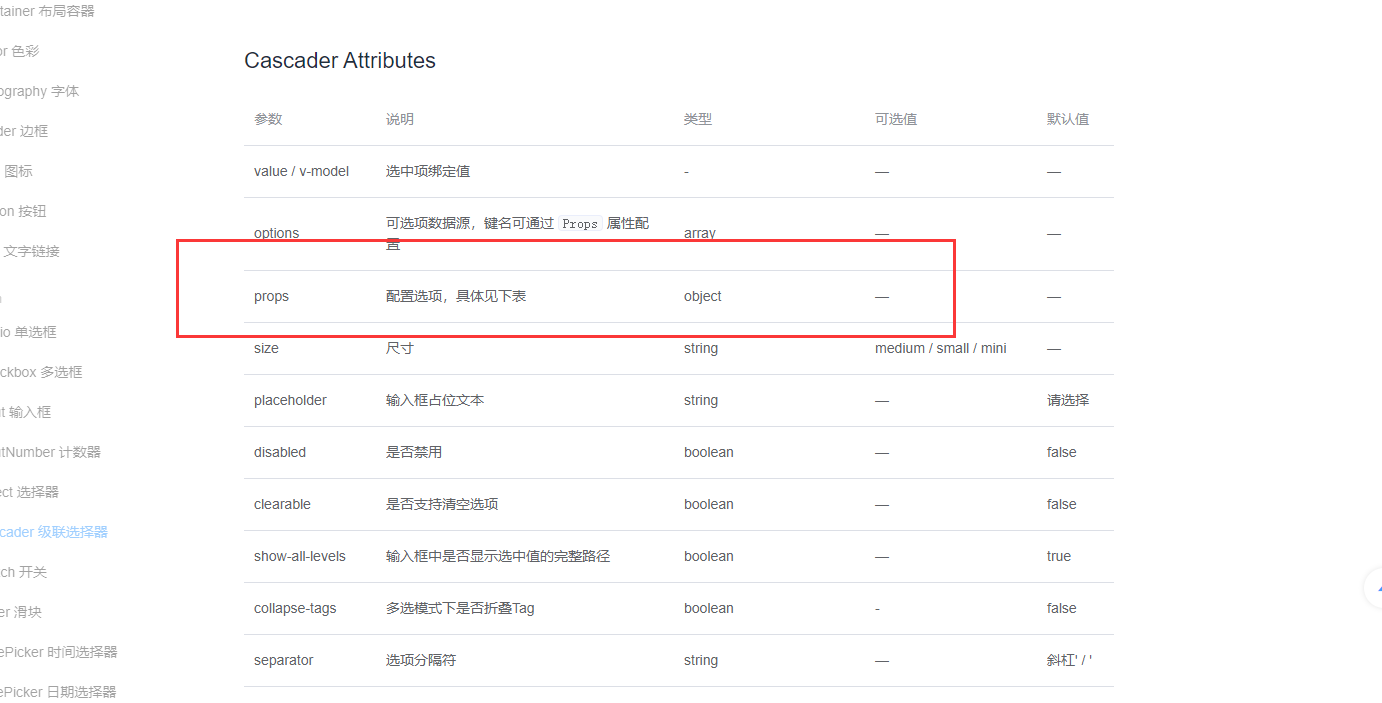
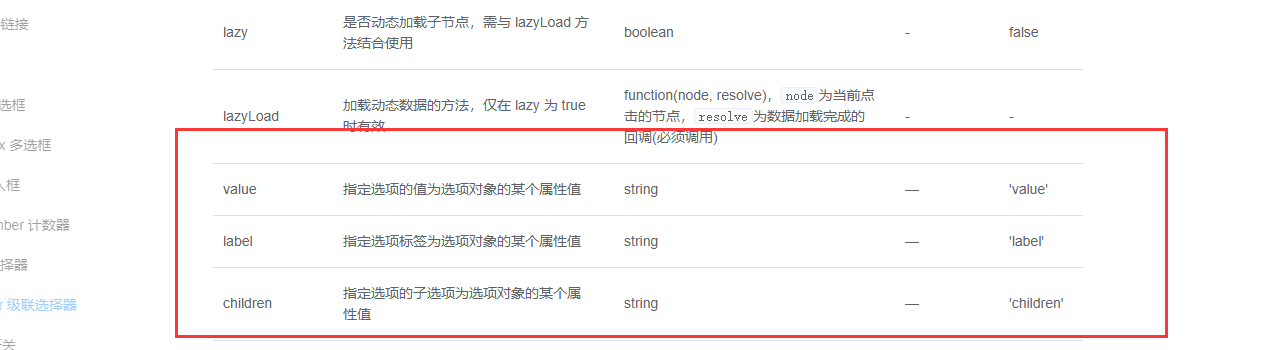
catId是选中以后要提交的值,name作为要显示的名字,children作为它的子集合

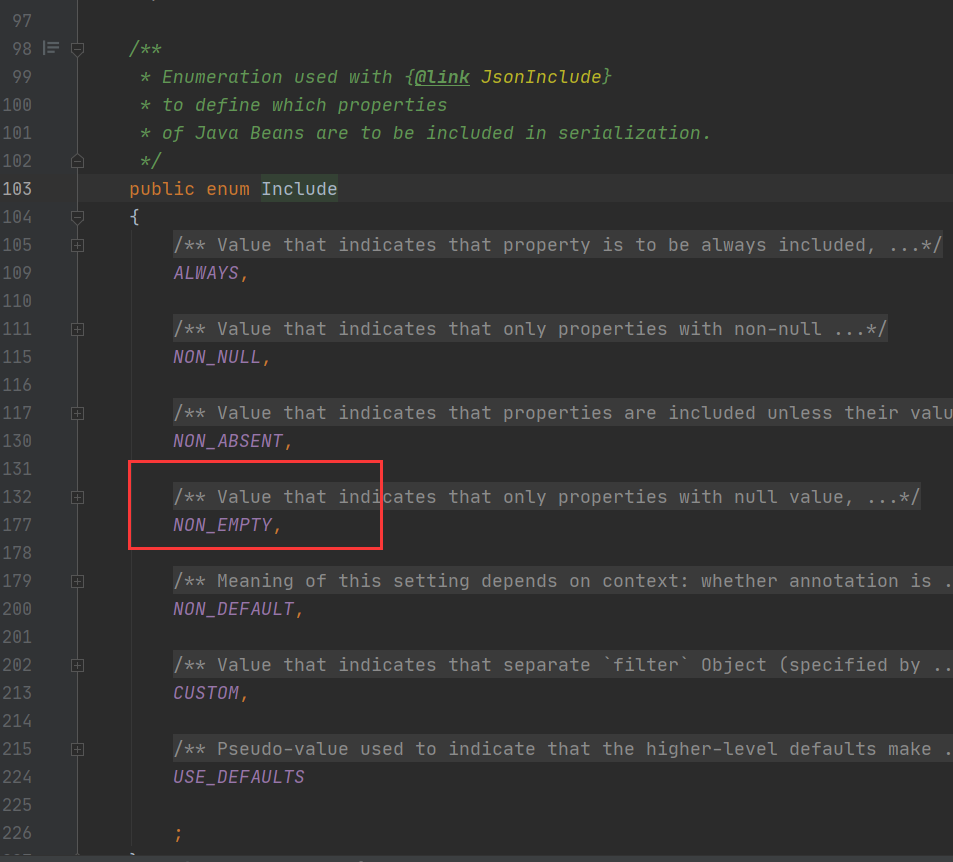
出现空集合
解决方案
添加注解

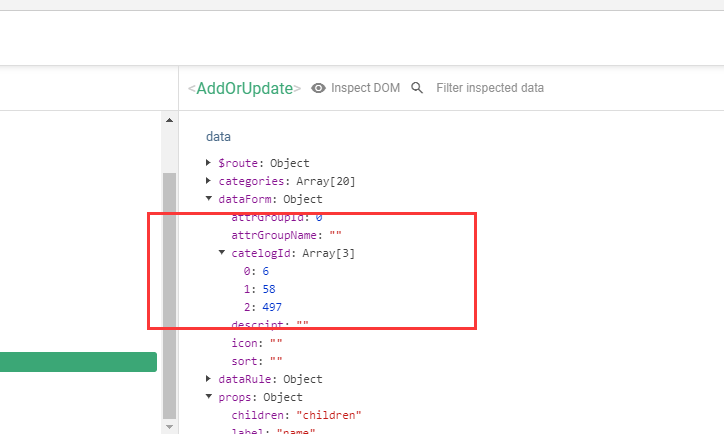
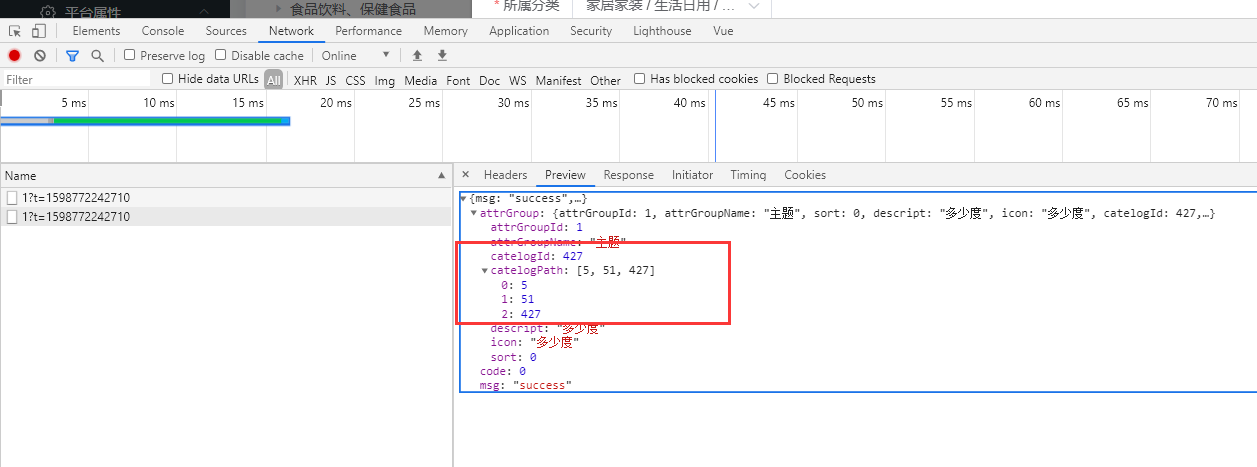
选中catelogId 发现是三个值,相当于把他当前分类以及父id都封装到这里啦
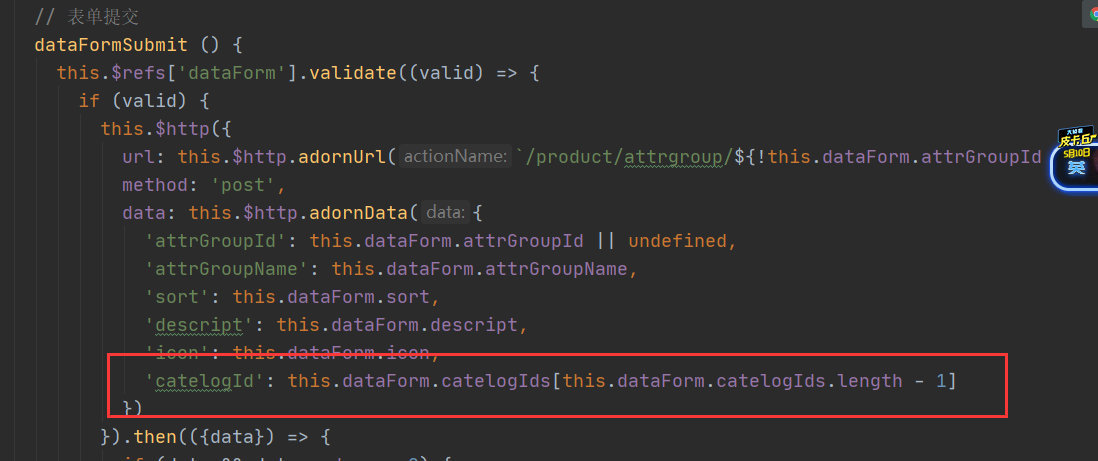
新增后页面也刷新了,原因是,成功后提交了一个事件,子组件给父组件发送了一个事件
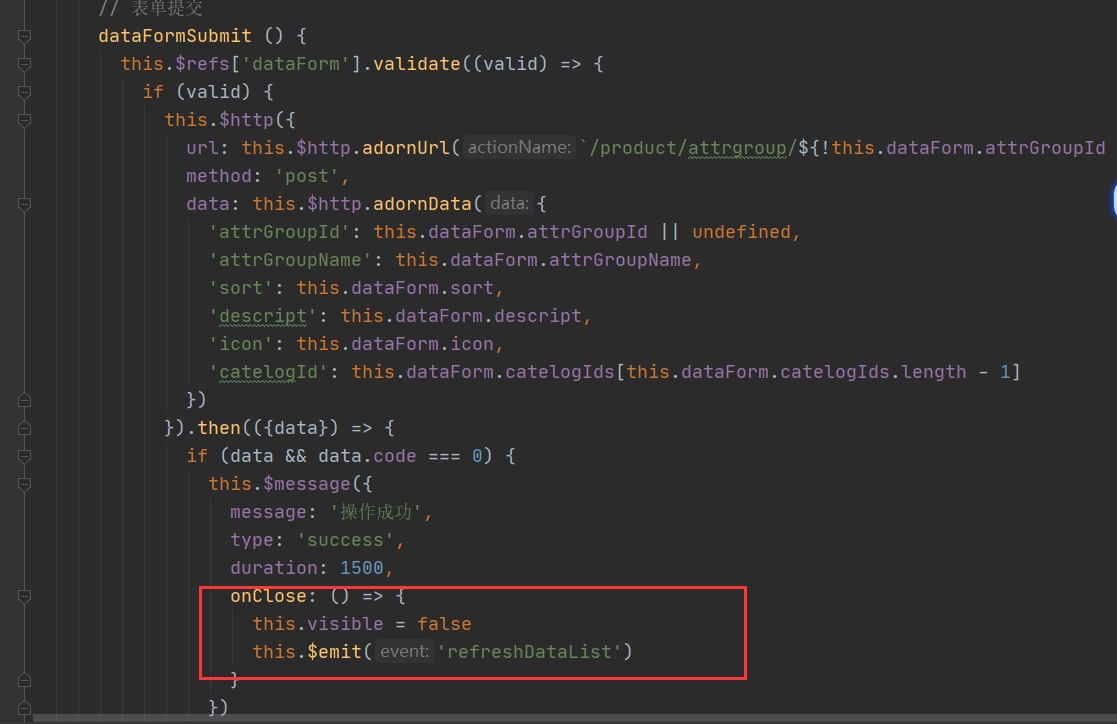
父组件在使用子组件的时候监听了这个事件,子组件发送事件后调用getDataList,相当于重新发了一遍请求,请求数据,看到的效果就是新增完成后,自动刷新表格,请求新的数据

但是发现点击修改还不能回显,因为提交请求的时候只保存了最后一个categoId,修改情况下,就算回显也只能查到当前分类id,并没有回显整个完整的路径
分组修改&级联选择器修改
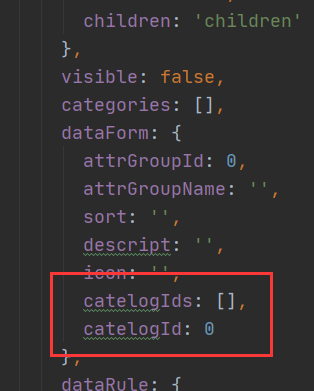
添加路径的字段


点击修改
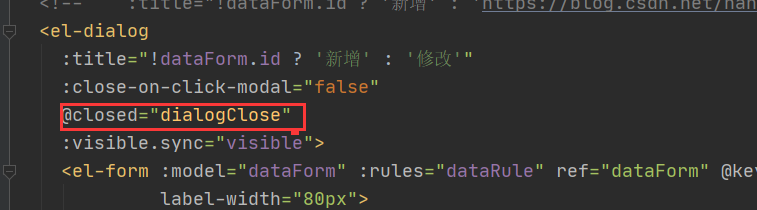
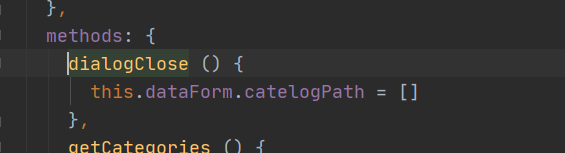
修改完 在点新增时发现上次修改的依旧保存下来了,应该是清空的
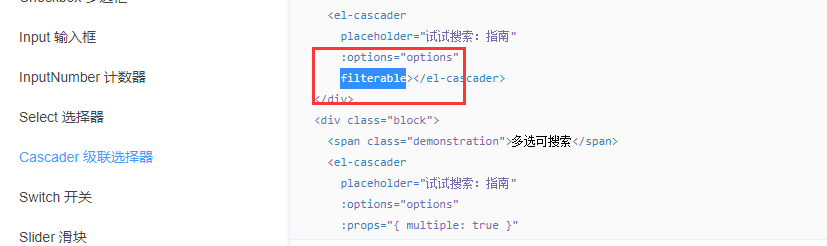
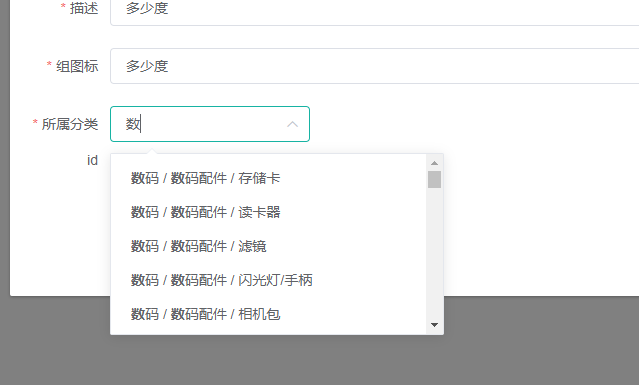
添加可搜索和提示信息

小插曲
//List<Long> 转Long[] 方式或者long[]方式
long[] longs = path.stream().mapToLong(t -> t.longValue()).toArray();
long[] longs2 = path.stream().mapToLong(Long::new).toArray();
Long[] longs1 = path.toArray(new Long[0]);
品牌分类关联及级联更新
引入Mybatis的分页https://baomidou.com/guide/page.html
/**
* @author tangyao
* @version 1.0.0
* @Description Mybaits 配置文件
* @createTime 2020年08月31日 18:46:00
*/
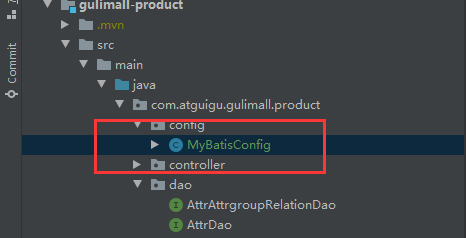
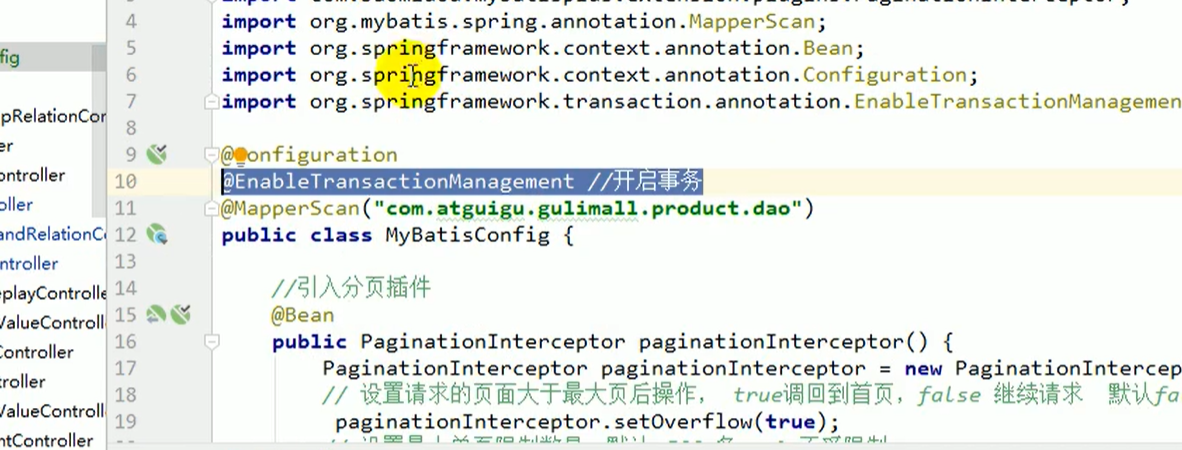
@Configuration
@EnableTransactionManagement
//指定mapper接口位置
@MapperScan("com.atguigu.gulimall.product.dao")
public class MyBatisConfig {
@Bean
public PaginationInterceptor paginationInterceptor() {
PaginationInterceptor paginationInterceptor = new PaginationInterceptor();
// 设置请求的页面大于最大页后操作, true调回到首页,false 继续请求 默认false
paginationInterceptor.setOverflow(true);
// 设置最大单页限制数量,默认 500 条,-1 不受限制
paginationInterceptor.setLimit(1000);
// 开启 count 的 join 优化,只针对部分 left join
paginationInterceptor.setCountSqlParser(new JsqlParserCountOptimize(true));
return paginationInterceptor;
}
}
这里有一个小问题,现在是格式有不完全规范的情况
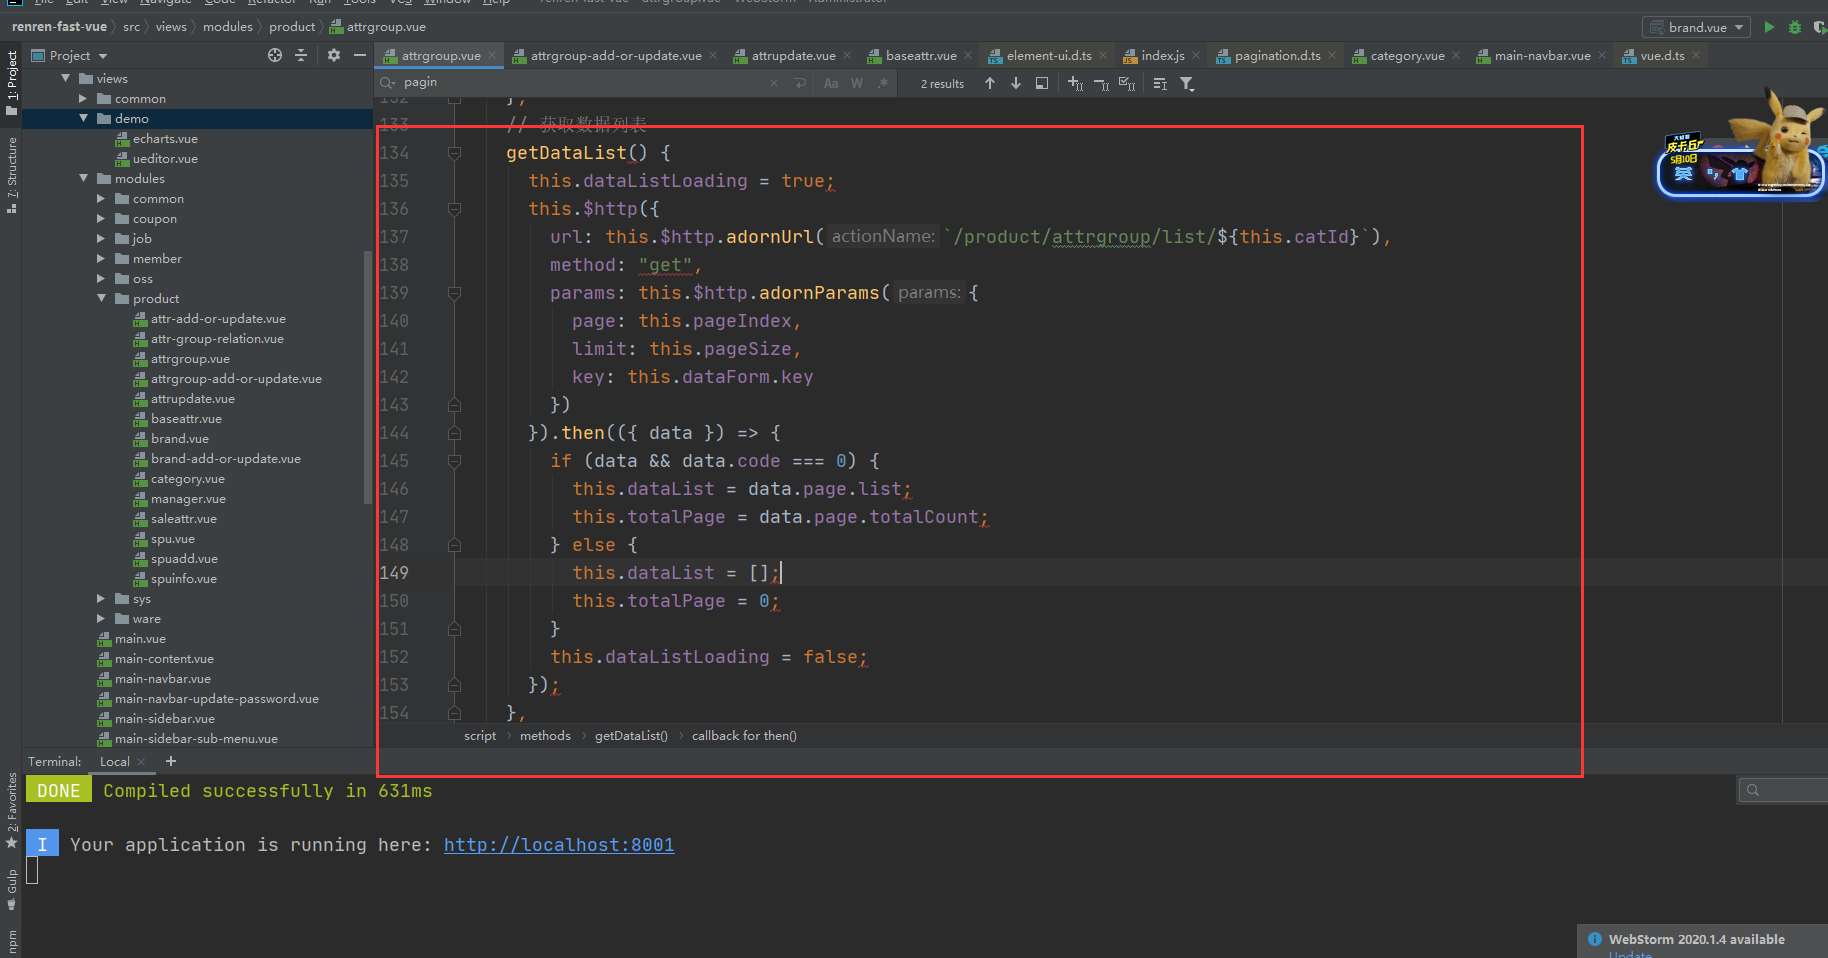
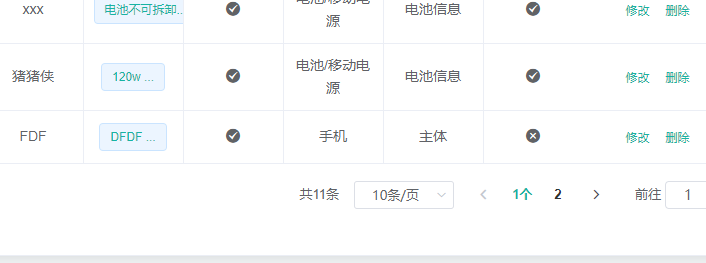
这里虽然现实有两页,但是却一直是共0条,我查看了返回的json数据,是有值的,也就是说,前端在获取的时候没有赋值成功,我试着webstrom ctrl +alt +l
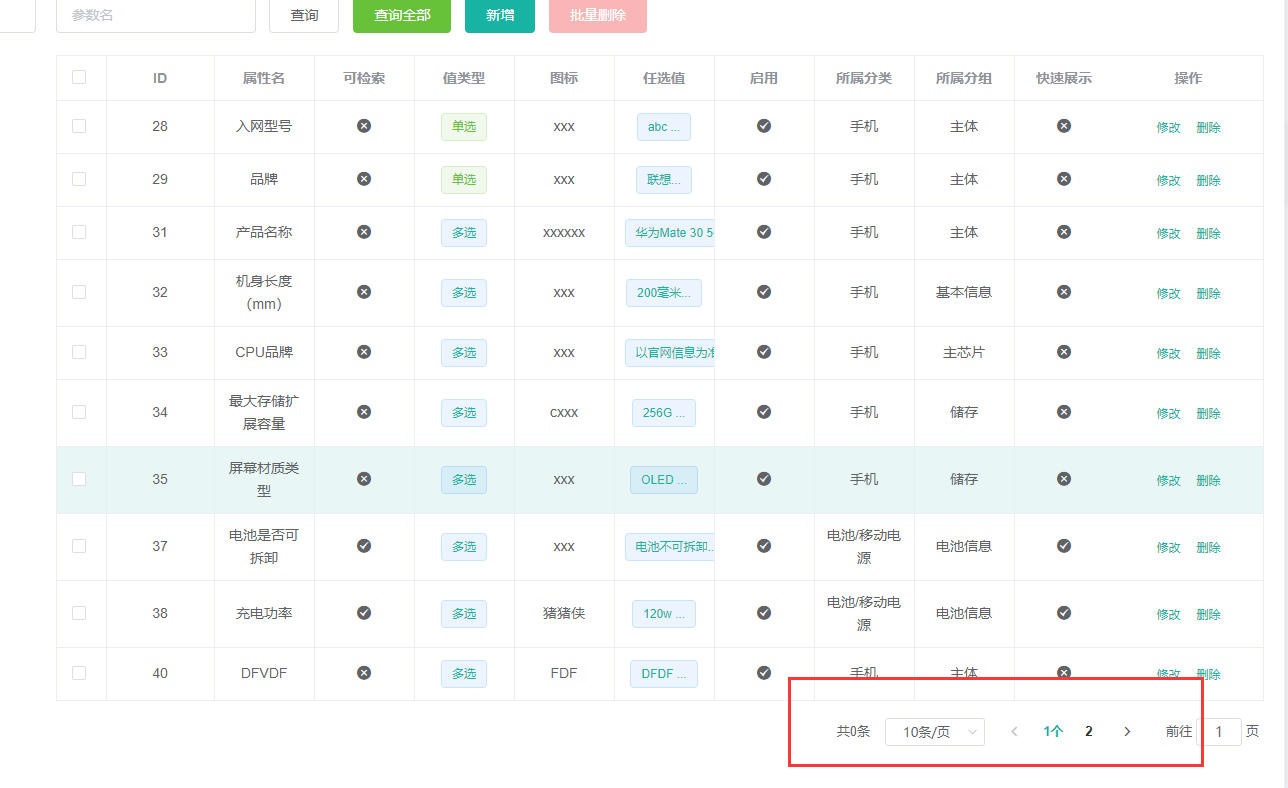
结果就好了
@Service("brandService")
public class BrandServiceImpl extends ServiceImpl<BrandDao, BrandEntity> implements BrandService {

    @Override
    public PageUtils queryPage(Map<String, Object> params) {
        String key = (String) params.get("key");
        QueryWrapper<BrandEntity> queryWrapper = new QueryWrapper<BrandEntity>();
        if (StringUtils.isNotEmpty(key)) {
            queryWrapper.eq("brand_id", key).or().like("name", key);
        }
        IPage<BrandEntity> page = this.page(new Query<BrandEntity>().getPage(params), queryWrapper);
        return new PageUtils(page);
    }

}
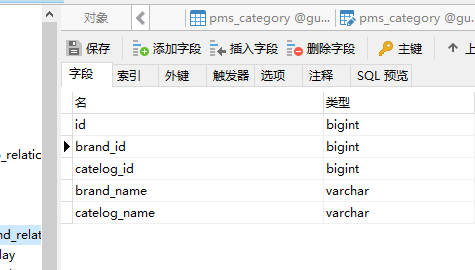
电商系统中,每个品牌都有他所属的分类,比如华为小米oppo都是手机分类下的品牌,但是一个品牌不只关联一个分类,小米既造手机,他有关联手机分类,又有电视,有关联家用电器的分类,一个品牌对应多个分类,一个分类下又会有很多品牌,形成多对多关系,有一张中间表,他来保存哪个品牌,关联了哪个分类,存储在pms_category_brand_relation中。在电商项目中,大表数据从不做关联,哪怕分步一点一点查,尽量少用关联,所以在设计的时候添加了两个冗余字段,相当于保存品牌id的时候保存品牌名字,保分类id的时候保存分类名字。
   @RequestMapping("/save")
    //@RequiresPermissions("product:categorybrandrelation:save")
    public R save(@RequestBody CategoryBrandRelationEntity categoryBrandRelation){
//    categoryBrandRelationService.save(categoryBrandRelation);
      categoryBrandRelationService.saveDetail(categoryBrandRelation);
        return R.ok();
    }
@Override
    public void saveDetail(CategoryBrandRelationEntity categoryBrandRelation) {
        Long brandId = categoryBrandRelation.getBrandId();
        Long catelogId = categoryBrandRelation.getCatelogId();

        BrandEntity brandEntity = brandService.getById(brandId);
        String brandEntityName = brandEntity.getName();

        CategoryEntity categoryEntity = categoryService.getById(catelogId);
        String categoryEntityName = categoryEntity.getName();

        categoryBrandRelation.setBrandName(brandEntityName);
        categoryBrandRelation.setCatelogName(categoryEntityName);
//        this.save(categoryBrandRelation);
        baseMapper.insert(categoryBrandRelation);
    }
冗余数据存储要保证数据一致性,比如品牌名和分类名在真正的在真正的品牌表和分类表中进行了修改,需数据同步过来。
第一种方式
 @RequestMapping("/update")
    //@RequiresPermissions("product:brand:update")
    public R update(@Validated({UpdateGroup.class}) @RequestBody BrandEntity brand){
//    brandService.updateById(brand);
      brandService.updateDetail(brand);
        return R.ok();
    }
@Transactional
@Override
public void updateDetail(BrandEntity brand) {
    //保证冗余字段 数据一致性
    this.updateById(brand);
    if (StringUtils.isNotEmpty(brand.getName())) {
        //同步更新其他表中的数据
        categoryBrandRelationService.updatebrand(brand.getBrandId(),brand.getName());
    }
}
@Override
public void updatebrand(Long brandId, String name) {
    CategoryBrandRelationEntity categoryBrandRelationEntity = new CategoryBrandRelationEntity();
    categoryBrandRelationEntity.setId(brandId);
    categoryBrandRelationEntity.setBrandName(name);
    this.update(categoryBrandRelationEntity,new QueryWrapper<CategoryBrandRelationEntity>().eq("brand_id",
        brandId));
    //其他更新关联
}
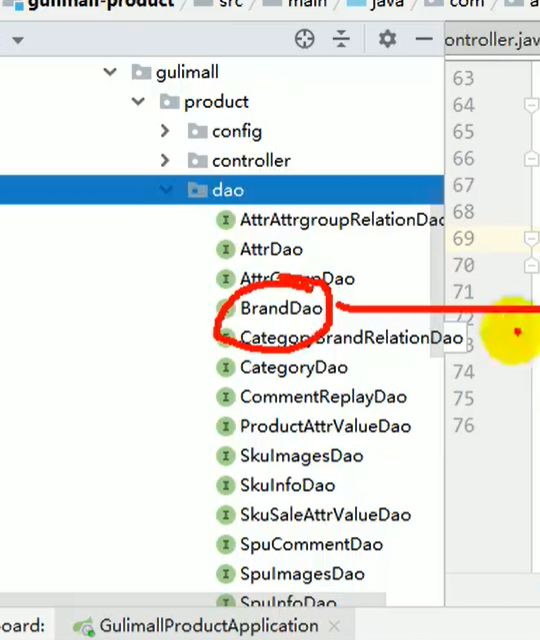
第二种方式 生成自己的dao
@RequestMapping("/update")
    //@RequiresPermissions("product:category:update")
    public R update(@RequestBody CategoryEntity category){
//    categoryService.updateById(category);
        categoryService.updateCascade(category);
        return R.ok();
    }
@Transactional
@Override
public void updateCascade(CategoryEntity category) {
    this.updateById(category);
     categoryBrandRelationDao.updateCategory(category.getCatId(), category.getName());
}
<update id="updateCategory">
    update pms_category_brand_relation set catelog_name=#{name} WHERE catelog_id=#{catId}
</update>
规格参数新增与VO
查询全部的时候也需要模糊查询
@Override
public PageUtils queryPage(Map<String, Object> params, Long catelogId) {
String key = (String) params.get("key");
//select * from pms_attr_group where catelog_id=? and (attr_group_id=key or attr_group_name like key)
QueryWrapper<AttrGroupEntity> wrapper = new QueryWrapper<AttrGroupEntity>();
if (StringUtils.isNotEmpty(key)) {
wrapper.and(obj -> obj
.eq("attr_group_id", key)
.or()
.like("attr_group_name ", key));
}
if (catelogId == 0) {
IPage<AttrGroupEntity> page = this.page(new Query<AttrGroupEntity>().getPage(params), wrapper);
return new PageUtils(page);
} else {
wrapper.eq("catelog_id", catelogId);
IPage<AttrGroupEntity> page = this.page(new Query<AttrGroupEntity>().getPage(params), wrapper);
return new PageUtils(page);
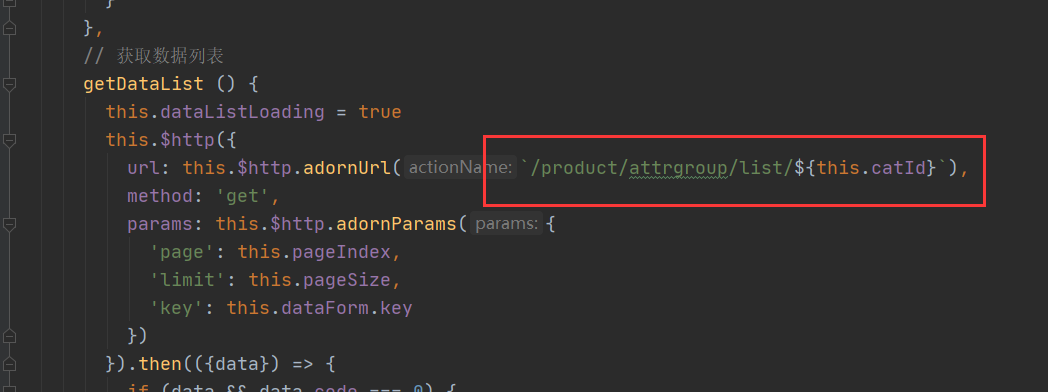
}
}
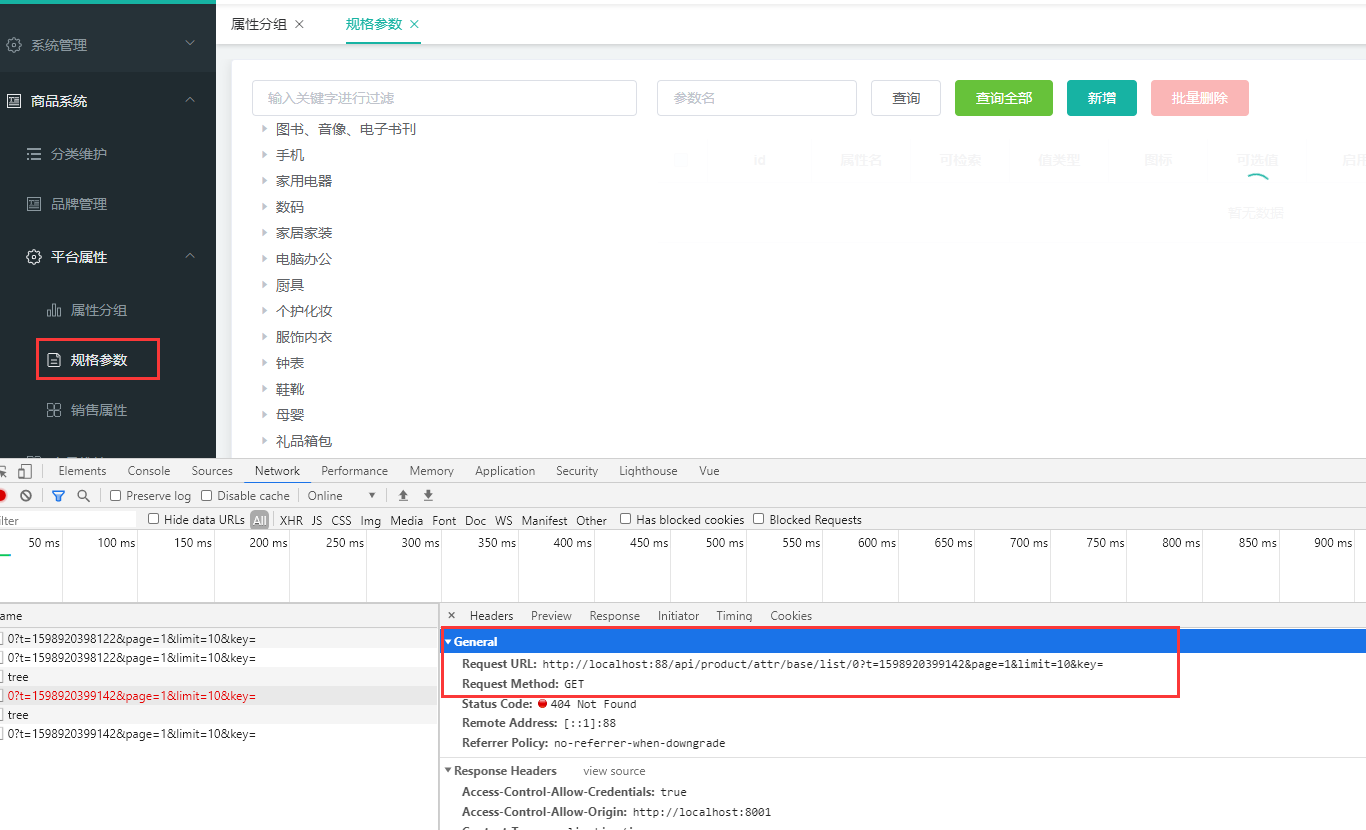
点击规格参数,会发送第一个请求
http://localhost:88/api/product/attr/base/list/0?t=1598920399142&page=1&limit=10&key=
可以录入一些属性,例如
http://localhost:88/api/product/attr/save
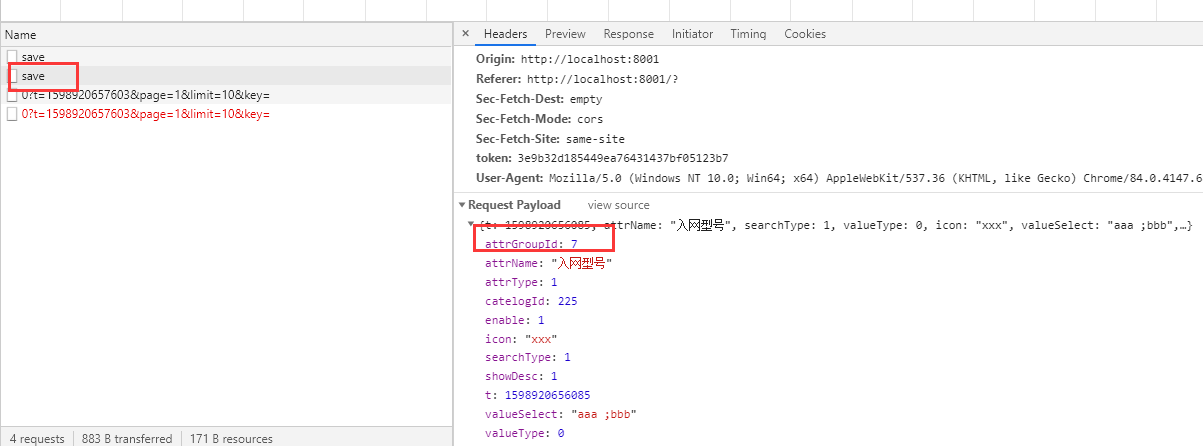
AttrEntity中包含了所属三级分类信息,但是并没有包含所属分组的
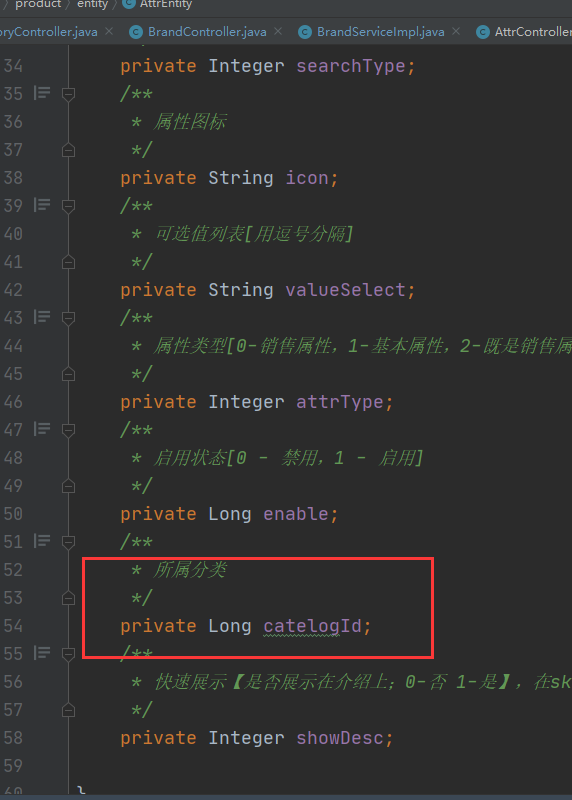
虽然把属性保存进来了,但是和属性的分组没有关联起来
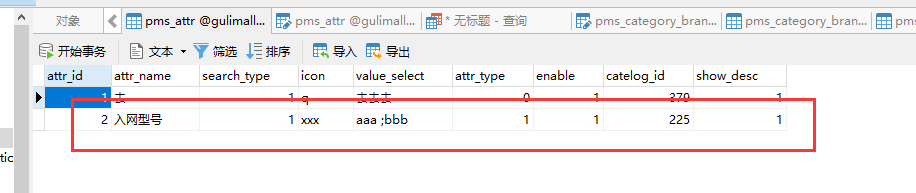
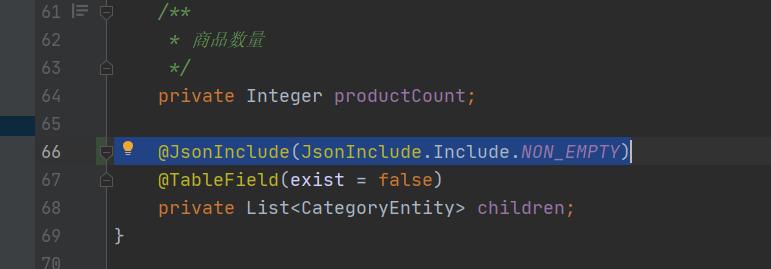
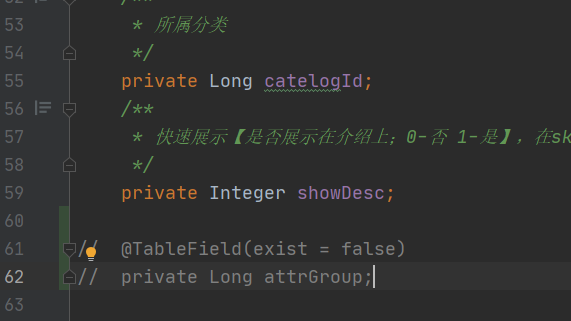
以往是新添加一个字段,并且加上注解告诉mybatis不属于表里面的值,但是不规范
,新建一个package vo
以前在进行数据校验的时候,注解直接标注在实体类上也就是po对应的数据库类上,每一个对象标注超多注解很乱,而且不规范
mybatis会为dao创建出代理对象,访问数据库
创建AttrVO
@Data
public class AttrVO {
    /**
     * 属性id
     */
    private Long attrId;
    /**
     * 属性名
     */
    private String attrName;
    /**
     * 是否需要检索[0-不需要,1-需要]
     */
    private Integer searchType;
    /**
     * 属性图标
     */
    private String icon;
    /**
     * 可选值列表[用逗号分隔]
     */
    private String valueSelect;
    /**
     * 属性类型[0-销售属性,1-基本属性,2-既是销售属性又是基本属性]
     */
    private Integer attrType;
    /**
     * 启用状态[0 - 禁用,1 - 启用]
     */
    private Long enable;
    /**
     * 所属分类
     */
    private Long catelogId;
    /**
     * 快速展示【是否展示在介绍上;0-否 1-是】,在sku中仍然可以调整
     */
    private Integer showDesc;

    /**
     * 属性分组id
     */
   private Long attrGroupId;
}
@RequestMapping("/save")
  //@RequiresPermissions("product:attr:save")
  public R save(@RequestBody AttrVO attr){
attrService.saveAttr(attr);

      return R.ok();
  }
@Override
public void saveAttr(AttrVO attr) {
    AttrEntity attrEntity = new AttrEntity();
    BeanUtils.copyProperties(attr,attrEntity);
    baseMapper.insert(attrEntity);
    AttrAttrgroupRelationEntity attrAttrgroupRelationEntity = new AttrAttrgroupRelationEntity();
    attrAttrgroupRelationEntity.setAttrGroupId(attr.getAttrGroupId());
    attrAttrgroupRelationEntity.setAttrId(attrEntity.getAttrId());
    attrAttrgroupRelationService.save(attrAttrgroupRelationEntity);
}
查询参数规格列表功能
老师写的版本
我写的版本
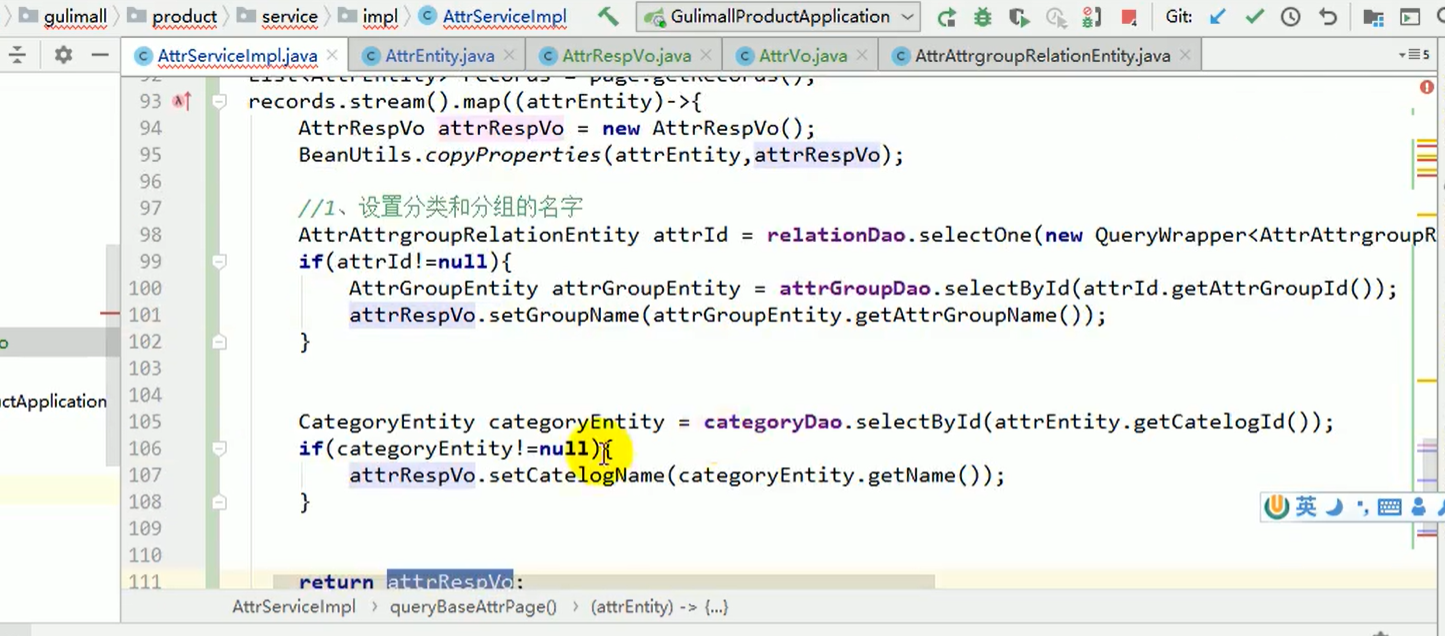
@Override
public PageUtils queryBaseAttrPage(Map<String, Object> params, Long catelogId) {
    QueryWrapper<AttrEntity> queryWrapper = new QueryWrapper<>();
    if (catelogId != 0) {
        queryWrapper.eq("catelogId", catelogId);
    }
    String key = (String) params.get("key");
    if (StringUtils.isNotEmpty(key)) {
        queryWrapper.and(wrapper -> {
            wrapper.eq("attr_id", key).or().like("attr_name", key);
        });
    }
    IPage<AttrEntity> page = this.page(
            new Query<AttrEntity>().getPage(params),
            queryWrapper
    );
    PageUtils pageUtils = new PageUtils(page);

    Map<Long, List<CategoryEntity>> CatIdMap = categoryService.list().stream()
            .collect(groupingBy(CategoryEntity::getCatId));
    List<AttrRespVO> respVOS = page.getRecords().stream().map(attrEntity -> {
        AttrRespVO attrRepoVO = new AttrRespVO();
        BeanUtils.copyProperties(attrEntity, attrRepoVO);
        //根据catelogId查询缓存中分类名称
        List<CategoryEntity> categoryEntities = CatIdMap.get(attrEntity.getCatelogId());
        if (categoryEntities != null) {
            attrRepoVO.setCatelogName(categoryEntities.get(0).getName());
        }
        //先去pms_attr_attrgroup_relation根据attr_id查询出attr_group_id
        //再根据attr_group_id在pms_attr_group中查询attr_group_name
        AttrAttrgroupRelationEntity byId = attrAttrgroupRelationService.getById(attrEntity.getAttrId());
        if (byId != null) {
            AttrGroupEntity entity = attrGroupService.getById(byId.getAttrGroupId());
            attrRepoVO.setGroupName(entity.getAttrGroupName());
        }
        return attrRepoVO;
    }).collect(toList());
    pageUtils.setList(respVOS);
    return pageUtils;
}
规格修改
修改/新增
@Transactional
@Override
public void updateAttr(AttrVO attr) {
    AttrEntity attrEntity = new AttrEntity();
    BeanUtils.copyProperties(attr, attrEntity);
    //修改本身
    this.updateById(attrEntity);
    //修改分组关联表
    AttrAttrgroupRelationEntity attrAttrgroupRelationEntity = new AttrAttrgroupRelationEntity();
    attrAttrgroupRelationEntity.setAttrId(attr.getAttrId());
    attrAttrgroupRelationEntity.setAttrGroupId(attr.getAttrGroupId());

    Integer count = attrAttrgroupRelationDao.selectCount(new QueryWrapper<AttrAttrgroupRelationEntity>().eq("attr_id", attr.getAttrId()));
    if (count > 0) {
        attrAttrgroupRelationDao.update(attrAttrgroupRelationEntity
                , new UpdateWrapper<AttrAttrgroupRelationEntity>().eq("attr_id", attr.getAttrId()));
    } else {
        attrAttrgroupRelationDao.insert(attrAttrgroupRelationEntity);
    }
}
保存
@Override
public void saveAttr(AttrVO attr) {
    AttrEntity attrEntity = new AttrEntity();
    BeanUtils.copyProperties(attr, attrEntity);
    baseMapper.insert(attrEntity);
    AttrAttrgroupRelationEntity attrAttrgroupRelationEntity = new AttrAttrgroupRelationEntity();
    attrAttrgroupRelationEntity.setAttrGroupId(attr.getAttrGroupId());
    attrAttrgroupRelationEntity.setAttrId(attr.getAttrId());
    attrAttrgroupRelationService.save(attrAttrgroupRelationEntity);
}
销售属性维护
与规格参数公用了一个接口,根据type不同来区分,区别是规格参数的相关操作需要维护属性与属性分组关系表,而销售属性不需要维护
@GetMapping("/{type}/list/{catelogId}")
public R baseAttrList(@RequestParam Map<String, Object> params,
                      @PathVariable("type") String type,
                      @PathVariable("catelogId") Long catelogId) {
    PageUtils page = attrService.queryBaseAttrPage(params,type,catelogId);
    return R.ok().put("page", page);
}
package com.atguigu.common.constant;

/**
 * @author tangyao
 * @version 1.0.0
 * @Description TODO
 * @createTime 2020年09月03日 08:39:00
 */
public class ProductConstant {
    public enum AttrEnum {
        //属性类型[0-销售属性,1-基本属性]
        ATTR_TYPE_SALE(0, "销售属性"),
        ATTR_TYPE_BASE(1, "基本属性");

        private int code;
        private String value;

        AttrEnum(int code, String value) {
            this.code = code;
            this.value = value;
        }

        public int getCode() {
            return code;
        }

        public void setCode(int code) {
            this.code = code;
        }

        public String getValue() {
            return value;
        }

        public void setValue(String value) {
            this.value = value;
        }
    }
}
@Override
public PageUtils queryBaseAttrsPage(Map<String, Object> params, String type, Long cateLogId) {
    QueryWrapper<AttrEntity> wrapper = new QueryWrapper<>();
    //属性类型[0-销售属性,1-基本属性]
    wrapper.eq("attr_type", "base".equalsIgnoreCase(type)
            ? ProductConstant.AttrEnum.ATTR_TYPE_BASE.getCode()
            : ProductConstant.AttrEnum.ATTR_TYPE_SALE.getCode());

    String key = (String) params.get("key");

    if (cateLogId != 0) {
        wrapper.eq("catelog_id", cateLogId);
    }
    if (StringUtils.isNotEmpty(key)) {
        wrapper.and(w -> w.eq("attr_id", key).or().like("attr_name", key));
    }
    IPage<AttrEntity> page = this.page(
            new Query<AttrEntity>().getPage(params),
            wrapper
    );
    PageUtils pageUtils = new PageUtils(page);

    //设置所属分类和所属分组
    List<AttrRespVO> collect = page.getRecords().stream().map(item -> {
        AttrRespVO attrRespVO = new AttrRespVO();
        BeanUtils.copyProperties(item, attrRespVO);

        //设置属性分类
        Long catelogId = item.getCatelogId();
        CategoryEntity categoryEntity = categoryService.getById(catelogId);
        if (categoryEntity != null) {
            String categoryName = categoryEntity.getName();
            attrRespVO.setCatelogName(categoryName);

        }
        //设置属性分组,销售属性不涉及分组
        if ("base".equals(type)) {
            Long attrId = item.getAttrId();
            AttrAttrgroupRelationEntity relationEntity =
                    attrAttrgroupRelationService.getOne(new QueryWrapper<AttrAttrgroupRelationEntity>().eq("attr_id", attrId));

            if (relationEntity != null && relationEntity.getAttrGroupId() != null) {
                AttrGroupEntity attrGroupEntity = attrGroupService.getById(relationEntity.getAttrGroupId());
                String groupName = attrGroupEntity.getAttrGroupName();
                attrRespVO.setGroupName(groupName);
            }
        }
        return attrRespVO;
    }).collect(toList());

    pageUtils.setList(collect);
    return pageUtils;
}
查询分组关联属性&&删除关联
//    /product/attrgroup/{attrgroupId}/attr/relation
@GetMapping("{attrgroupId}/attr/relation")
public R getAttrsInfo(@PathVariable("attrgroupId") int attrgroupId) {
    List<AttrEntity> entities = attrGroupService.getAttrsInfo(attrgroupId);
    return R.ok().put("data", entities);
}
@Override
public List<AttrEntity> getAttrsInfo(int attrgroupId) {

    List<AttrAttrgroupRelationEntity> relationEntities =
            attrAttrgroupRelationDao.selectList(
                    new QueryWrapper<AttrAttrgroupRelationEntity>().eq("attr_group_id", attrgroupId));
    List<Long> attrIds =
            relationEntities.stream().map(AttrAttrgroupRelationEntity::getAttrId).collect(Collectors.toList());
    if (attrIds != null && !attrIds.isEmpty()) {
        return attrDao.selectBatchIds(attrIds);
    }
    return new ArrayList<>();
}
///product/attrgroup/attr/relation/delete
@PostMapping("attr/relation/delete")
public R deleteRelation(@RequestBody AttrGroupRelationVO[] relationVOS) {
    relationService.deleteRelation(relationVOS);
    return R.ok();
}
@Override
public void deleteRelation(AttrGroupRelationVO[] relationVOS) {
    List<AttrAttrgroupRelationEntity> relationEntities = Arrays.stream(relationVOS).map(relationVO -> {
        AttrAttrgroupRelationEntity relationEntity = new AttrAttrgroupRelationEntity();
        BeanUtils.copyProperties(relationVO, relationEntity);
        return relationEntity;
    }).collect(Collectors.toList());
    //delete from pms_attr_attrgroup_relation where (attr_id=? and attr_group_id=?) or (attr_id=? and attr_group_id=?)
    baseMapper.deleteBatchRelation(relationEntities);
}
<delete id="deleteBatchRelation">
    delete from pms_attr_attrgroup_relation where
    <foreach collection="relationEntities" item="item" separator=" or ">
        (attr_id=#{item.attrId} and attr_group_id=#{item.attrGroupId})
    </foreach>
</delete>
查询分组未关联的属性
@Override
public PageUtils getOtherAttrs(Map<String, Object> params, int attrgroupId) {
    //根据分组得到三级分类id,然后查询出该三级分类下所有分组已经关联好的属性
    Long catelogId = attrGroupDao.selectById(attrgroupId).getCatelogId();
    List<AttrGroupEntity> group = attrGroupDao.selectList(new QueryWrapper<AttrGroupEntity>().eq("catelog_id",
            catelogId));
    List<Long> attrGroupIds = group.stream().map(AttrGroupEntity::getAttrGroupId).collect(toList());
    List<AttrAttrgroupRelationEntity> relationEntities =
            attrAttrgroupRelationDao.selectList(
                    new QueryWrapper<AttrAttrgroupRelationEntity>().in("attr_group_id", attrGroupIds));
    //三级分类下所有分组对应的属性id集合
    //所以那些没有分组的属性就是可以额外添加的
    List<Long> attrIds = relationEntities.stream().map(AttrAttrgroupRelationEntity::getAttrId).collect(toList());

    QueryWrapper<AttrEntity> wrapper = new QueryWrapper<AttrEntity>()
            .eq("catelog_id", catelogId)
            .eq("attr_type", ProductConstant.AttrEnum.ATTR_TYPE_BASE.getCode());
    if (attrIds != null && attrIds.size() > 0) {
        wrapper.notIn("attr_id", attrIds);
    }
    String key = (String) params.get("key");
    if (StringUtils.isNotEmpty(key)) {
        wrapper.and(item -> item.eq("attr_id", key).or().like("attr_name", key));
    }
    IPage<AttrEntity> page = this.page(new Query<AttrEntity>().getPage(params), wrapper);
    return new PageUtils(page);
}
新增分组与属性关联
@PostMapping("/attr/relation")
public R setRelation(@RequestBody List<AttrRespVO> attrRespVO){
    relationService.setRelation(attrRespVO);
    return R.ok();
}
@Override
    public void setRelation(List<AttrRespVO> attrRespVOS) {
        List<AttrAttrgroupRelationEntity> list=new ArrayList<>();
//        attrRespVOS.stream().forEach(item->{
//            AttrAttrgroupRelationEntity relationEntity = new AttrAttrgroupRelationEntity();
//            BeanUtils.copyProperties(item,relationEntity);
//            list.add(relationEntity);
//        });
        List<AttrAttrgroupRelationEntity> collect = attrRespVOS.stream().map(item -> {
            AttrAttrgroupRelationEntity relationEntity = new AttrAttrgroupRelationEntity();
            BeanUtils.copyProperties(item, relationEntity);
            return relationEntity;
        }).collect(Collectors.toList());
        this.saveBatch(collect);
    }
新增商品,调试会员等级接口
gateway添加路由配置
- id: member_route
  uri: lb://gulimall-member
  predicates:
    - Path=/api/member/**
  filters:
    - RewritePath=/api/(?<segment>/?.*), /$\{segment}
录入会员等级
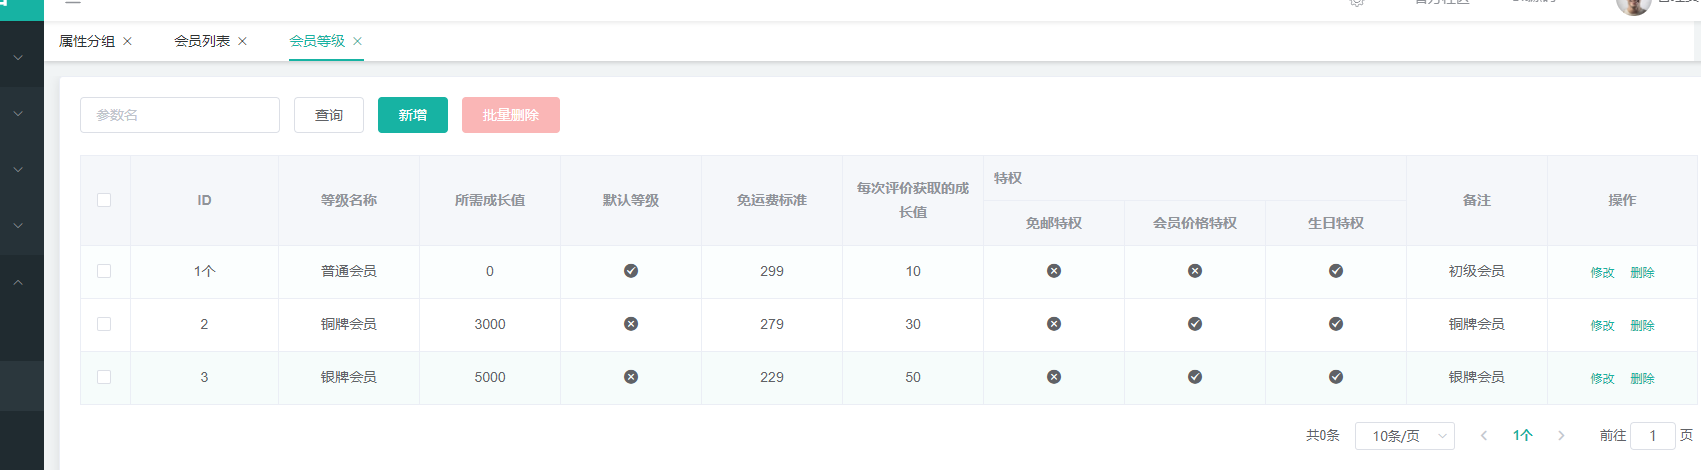
获取分类关联的品牌
※p84 关于pubsub、publish报错,无法发送查询品牌信息的请求:
1、npm install --save pubsub-js
2、在src下的main.js中引用:
① import PubSub from ‘pubsub-js’
② Vue.prototype.PubSub = PubSub
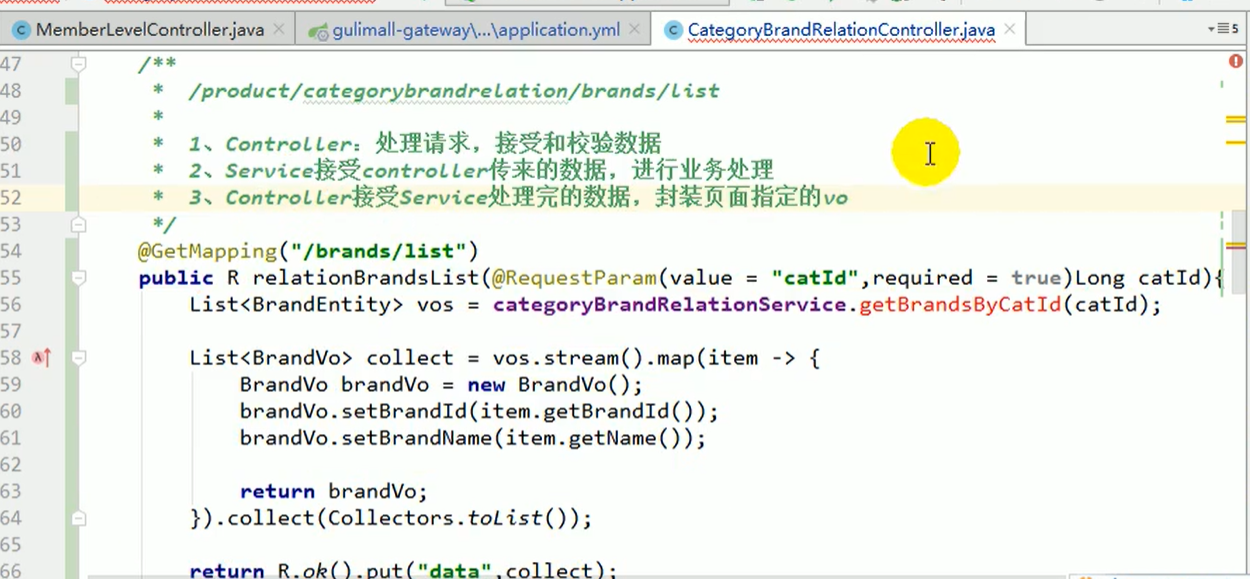
注入service比注入dao有更丰富的业务逻辑
 @Override
    public List<BrandEntity> getBrandsByCatId(Long catId) {
        List<CategoryBrandRelationEntity> list = categoryBrandRelationDao.selectList(
                new QueryWrapper<CategoryBrandRelationEntity>().eq("catelog_id", catId));
        List<Long> collect = list.stream().map(CategoryBrandRelationEntity::getBrandId).collect(Collectors.toList());
        List<BrandEntity> brandEntities = brandService.getBaseMapper().selectBatchIds(collect);
//        brandDao.selectBatchIds(collect);
        return brandEntities;
    }
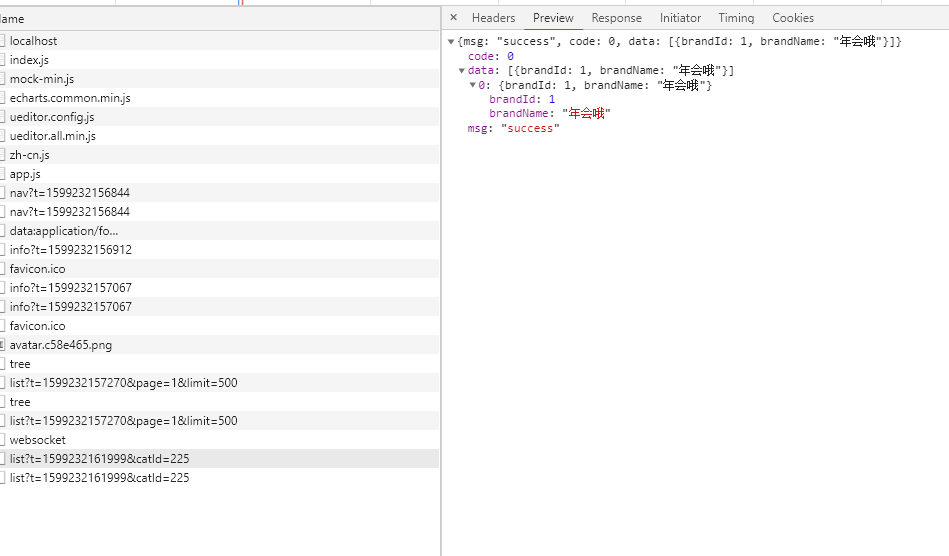
获取分类下所有分组及其属性
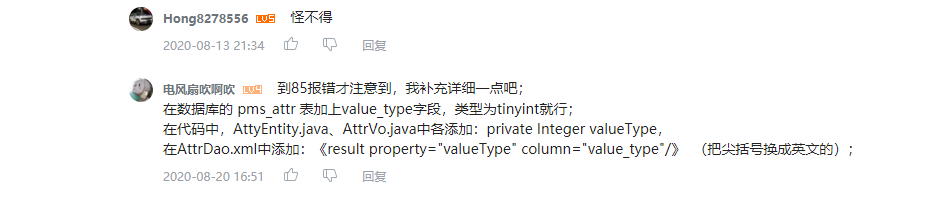
// /product/attrgroup/{catelogId}/withattr
@GetMapping("/{catelogId}/withattr")
public R getAttrgroupWithAttrs(@PathVariable("catelogId") Long catelogId) {
    List<AttrGroupWithAttrsVO> attrGroupWithAttrsVOS=attrGroupService.getAttrgroupWithAttrsByCatelogId(catelogId);
    return R.ok().put("data",attrGroupWithAttrsVOS);

}
@Override
public List<AttrGroupWithAttrsVO> getAttrgroupWithAttrsByCatelogId(Long catelogId) {

    List<AttrGroupEntity> groupEntities = this.list(new QueryWrapper<AttrGroupEntity>().eq("catelog_id", catelogId));
    List<AttrGroupWithAttrsVO> collect = groupEntities.stream().map(group -> {
        AttrGroupWithAttrsVO attrGroupWithAttrsVO = new AttrGroupWithAttrsVO();
        BeanUtils.copyProperties(group, attrGroupWithAttrsVO);
        List<AttrEntity> attrs = attrGroupService.getAttrsRelation(attrGroupWithAttrsVO.getAttrGroupId());
        attrGroupWithAttrsVO.setAttrs(attrs);
        return attrGroupWithAttrsVO;
    }).collect(Collectors.toList());
    return collect;
}
@Override
public List<AttrEntity> getAttrsRelation(Long attrgroupId) {

    List<AttrAttrgroupRelationEntity> relationEntities =
            attrAttrgroupRelationDao.selectList(
                    new QueryWrapper<AttrAttrgroupRelationEntity>().eq("attr_group_id", attrgroupId));
    List<Long> attrIds =
            relationEntities.stream().map(AttrAttrgroupRelationEntity::getAttrId).collect(Collectors.toList());
    if (attrIds != null && !attrIds.isEmpty()) {
        return attrDao.selectBatchIds(attrIds);
    }
    return new ArrayList<>();
}
商品新增vo抽取
http://www.bejson.com/json2javapojo/new/
根据浏览器生成的json抽象出对应的vo
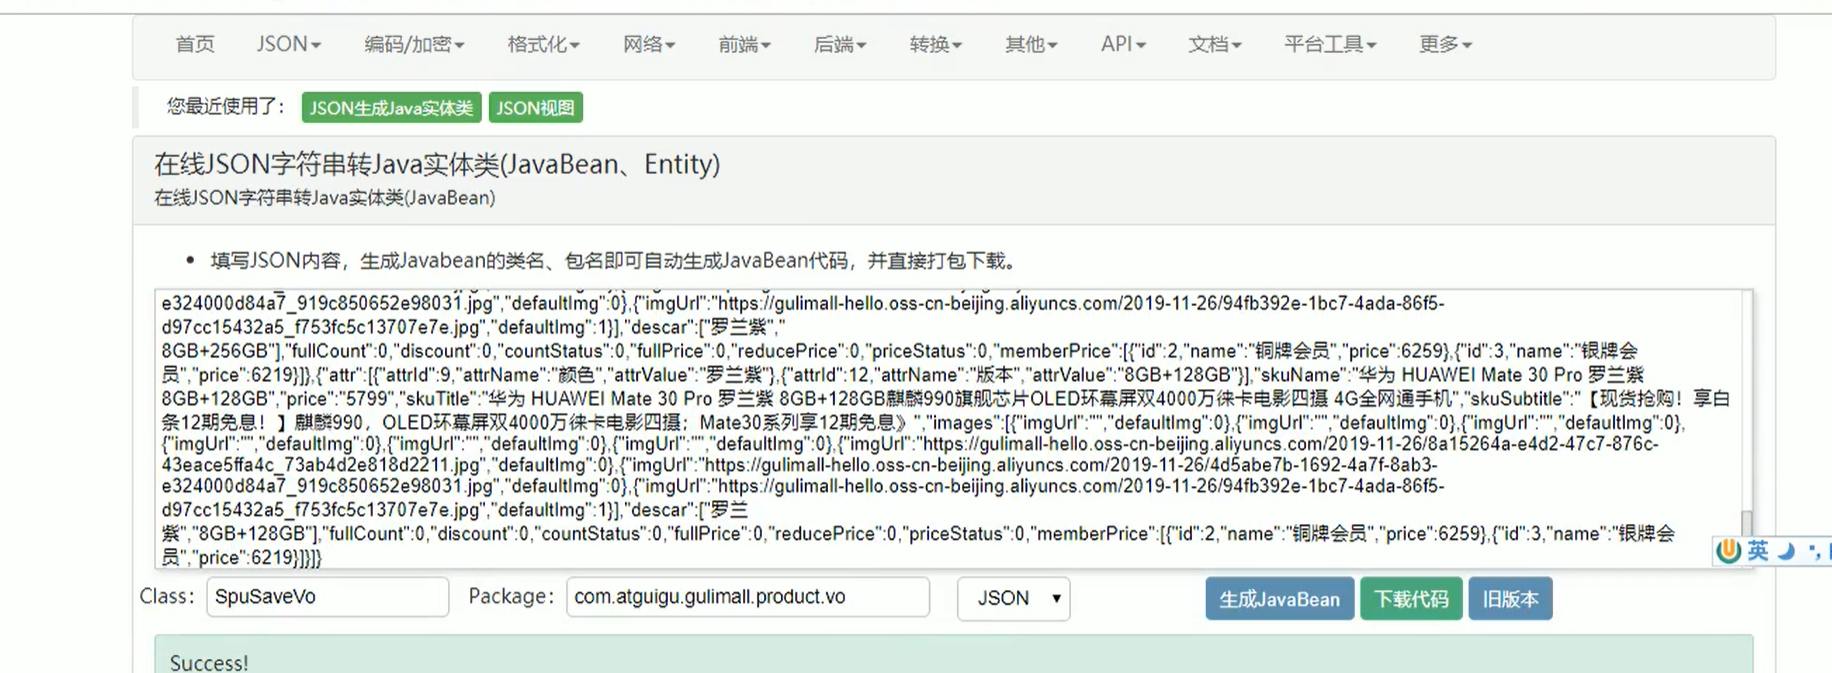
商品新增业务流程分析
生成的vo中double和其他会有小数的字段都换为bigdicimal,id都换为Long
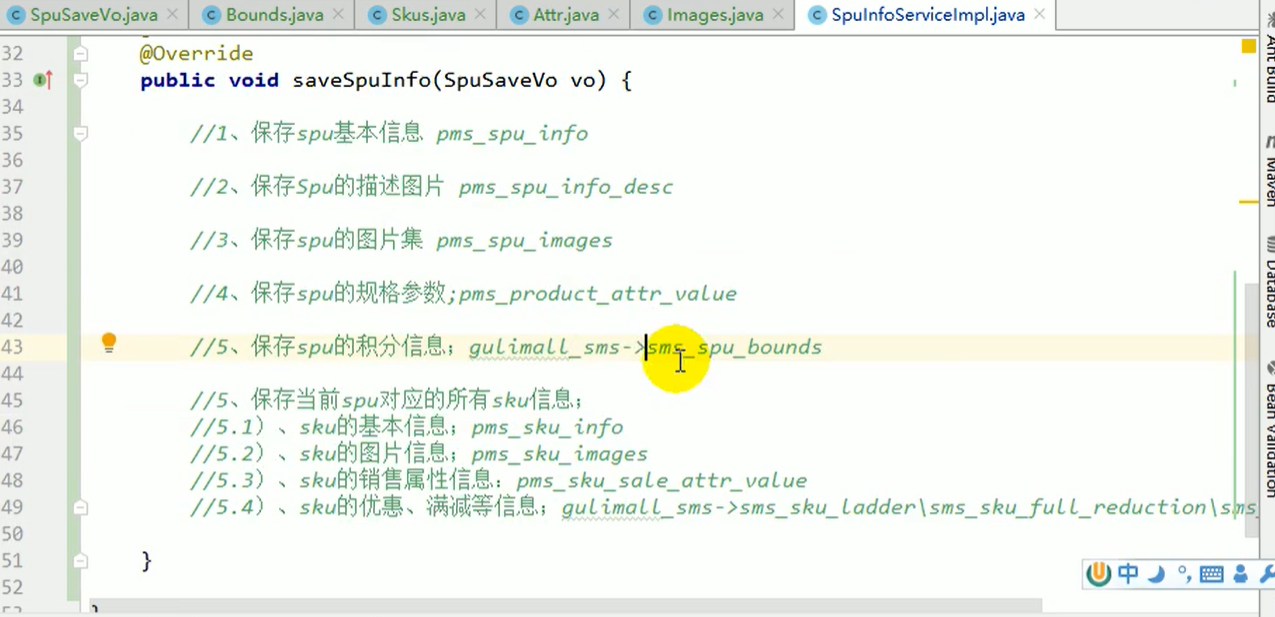
这两个名词将会贯穿从此开始到高级篇结束的所有内容。
SPU: Standard Product Unit (标准产品单位)
SPU是商品信息聚合的最小单位,是一组可复用、易检索的标准化信息的集合,该集合描述了一个产品的特性。通俗点讲,属性值、特性相同的商品就可以称为一个SPU。 例如:iPhone 11就是一个SPU,与商家,与颜色、款式、套餐都无关。
SKU: Stock Keeping Unit(库存量单位) SKU即库存进出计量的单位, 可以是以件、盒、托盘等为单位。 SKU是物理上不可分割的最小存货单元。在使用时要根据不同业态,不同管理模式来处理。在服装、鞋类商品中使用最多最普遍。 例如:iPhone 11的颜色(深空灰等),存储容量(64GB 256GB)
  @Transactional
    @Override
    public void saveSpuInfo(SpuSaveVo vo) {
        //1.保存spu基本信息 ->pms_spu_info
        SpuInfoEntity spuInfoEntity = new SpuInfoEntity();
        BeanUtils.copyProperties(vo, spuInfoEntity);
        spuInfoEntity.setCreateTime(new Date());
        spuInfoEntity.setUpdateTime(new Date());
        this.saveBaseSpuInfo(spuInfoEntity);

        //2.保存spu的描述图片 pms_spu_info_desc
        List<String> decript = vo.getDecript();
        SpuInfoDescEntity spuInfoDescEntity = new SpuInfoDescEntity();
        spuInfoDescEntity.setSpuId(spuInfoEntity.getId());
        spuInfoDescEntity.setDecript(String.join(",", decript));

        //3.保存spu的图片集 pms_spu_images
        List<String> images = vo.getImages();
        spuImagesService.saveImageInfo(spuInfoEntity.getId(), images);

        //4.保存spu的规格参数 pms_product_attr_value
        List<BaseAttrs> baseAttrs = vo.getBaseAttrs();
        productAttrValueService.saveBaseAttrsInfo(spuInfoEntity.getId(), baseAttrs);

        //5.保存spu的积分信息 gulimall_sms sms_spu_bounds


        //5.保存当前对应的所有sku信息;
//        private List<Attr> attr;
//        private String skuName;
//        private BigDecimal price;
//        private String skuTitle;
//        private String skuSubtitle;
        List<Skus> skus = vo.getSkus();
        if (skus != null && skus.size() != 0) {

            skus.forEach(item -> {
                String defaultImage = "";
                for (Images image : item.getImages()) {
                    if (image.getDefaultImg() == 1) {
                        defaultImage = image.getImgUrl();
                    }
                }
                SkuInfoEntity skuInfoEntity = new SkuInfoEntity();
                BeanUtils.copyProperties(item, skuInfoEntity);
                skuInfoEntity.setSpuId(spuInfoEntity.getId());
                skuInfoEntity.setBrandId(spuInfoEntity.getBrandId());
                skuInfoEntity.setCatalogId(spuInfoEntity.getCatalogId());
                skuInfoEntity.setSaleCount(0L);
                skuInfoEntity.setSkuDefaultImg(defaultImage);
                //5.1)、sku的基本信息 pms_sku_info
                skuInfoService.save(skuInfoEntity);

                Long skuId = skuInfoEntity.getSkuId();

                List<SkuImagesEntity> collect = item.getImages().stream().map(image -> {
                    SkuImagesEntity skuImagesEntity = new SkuImagesEntity();
                    skuImagesEntity.setSkuId(skuId);
                    skuImagesEntity.setImgUrl(image.getImgUrl());
                    skuImagesEntity.setDefaultImg(image.getDefaultImg());
                    return skuImagesEntity;
                }).collect(Collectors.toList());
                //5.2)、sku的图片信息 pms_sku_images
                skuImagesService.saveBatch(collect);


                List<Attr> attr = item.getAttr();
                List<SkuSaleAttrValueEntity> skuSaleAttrValueEntities = attr.stream().map(a -> {
                    SkuSaleAttrValueEntity skuSaleAttrValueEntity = new SkuSaleAttrValueEntity();
                    BeanUtils.copyProperties(a, skuSaleAttrValueEntity);
                    skuSaleAttrValueEntity.setSkuId(skuId);

                    return skuSaleAttrValueEntity;
                }).collect(Collectors.toList());
                //5.3)、sku的销售属性信息 pms_sku_sale_attr_value
                skuSaleAttrValueService.saveBatch(skuSaleAttrValueEntities);

            });
        }


        //5.4)、sku的优惠满减信息 gulimall_sms sms_sku_ladder sms_sku_full_reduction sms_member_price
    }
调用远程服务保存优惠等信息
sku的积分信息和sku的优惠满减信息,在本服务已经没办法出来了,想要调用远程服务需要保证以下几点
- 远程服务必须上线放到注册中心中
- 远程服务要开启服务注册和发现功能 @EnableDiscoveryClient,
- 调用服务的服务也需要在注册中心中,找到被调用的服务在注册中心的位置,声明一个接口,(内容是是哪个服务的哪个请求对应的方法)
//就算不标注,也能扫描到,带有@FeignClient的接口,前提是主配置类是一个父包,其他都是子包,那就能扫描到子包里面内容
//如果自己额外写了配置类,父子不同包,就一定要显示的声明
@EnableFeignClients(basePackages = {"com.atguigu.gulimall.product.feign"})
Bound中含有成长积分和购物积分,还要提交spuId才能算一个完整数据,所以又有一个领域对象模型。

A服务要给B服务传数据,这些数据发送出去,可以封装成一个对象,特别是在SpringCloud中,封装的对象要给B服务传,该对象会被springCloud转成一个json,B服务接受到json后逆转成为一个对象,传输期间的数据模型称为TO,因为TO不仅A服务要往出传,B服务也要接受用到,所以介意可以把TO放在common模块里面。
创建To对象
@Data
public class SpuBoundTo {

    private Long spuId;
    private BigDecimal buyBounds;
    private BigDecimal growBounds;

}
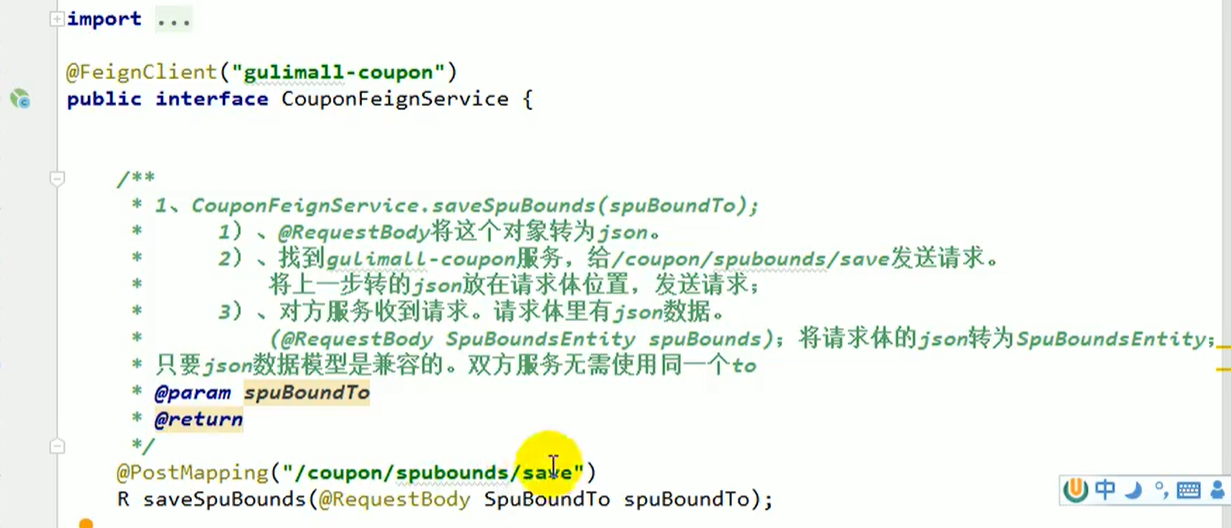
@Data
public class SkuReductionTo {

    private Long skuId;
    private int fullCount;
    private BigDecimal discount;
    private int countStatus;
    private BigDecimal fullPrice;
    private BigDecimal reducePrice;
    private int priceStatus;
    private List<MemberPrice> memberPrice;
}
@Data
public class SpuBoundTo {

    private Long spuId;
    private BigDecimal buyBounds;
    private BigDecimal growBounds;

}
@Data
public class MemberPrice {

    private Long id;
    private String name;
    private BigDecimal price;

}
Spring依赖注入的时候发现的问题
https://juejin.im/post/6844904056230690824
设置每一个服务的内存占用,商品保存debug
创建一个Compound并把模块添加进去,重启时只需重启gulimall就可以了
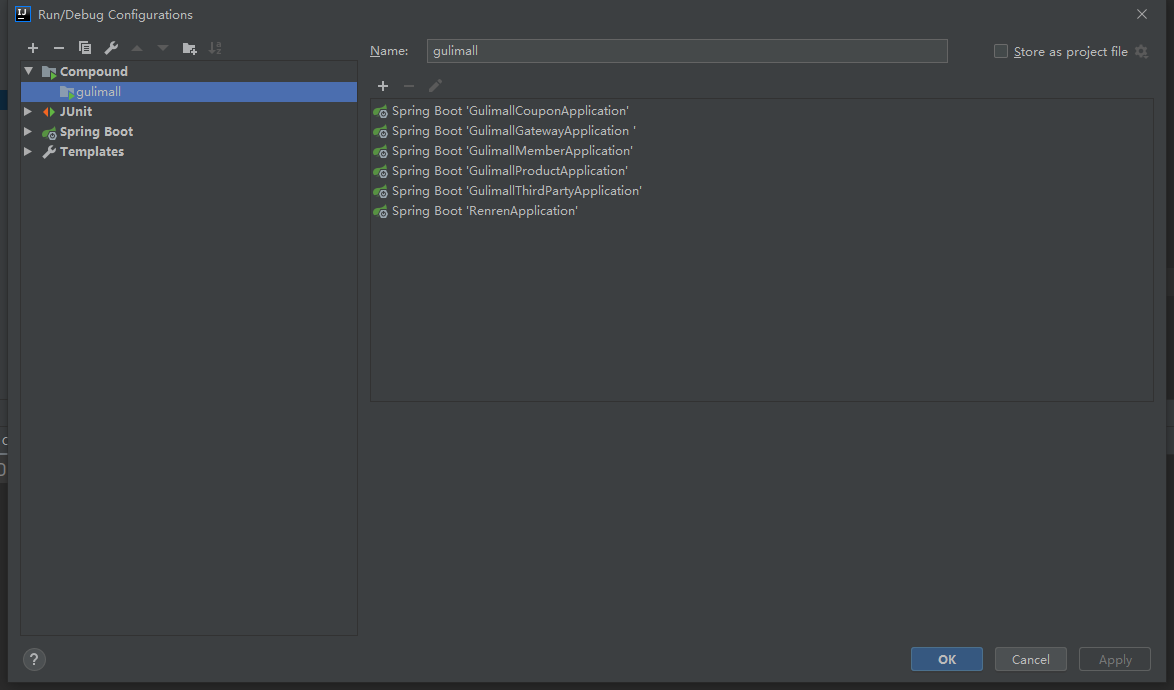
依次设计每个模块占用最大内存100m
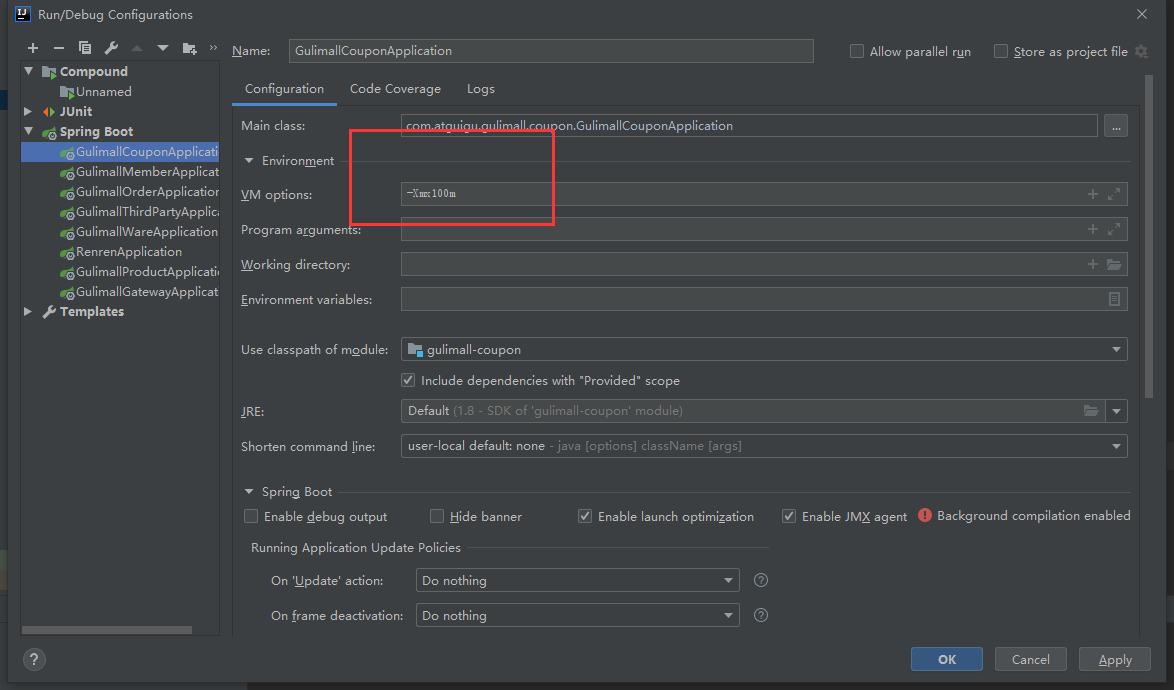
debug到这里的时候,由于是事务,事务在提交之前是读不出来的,mysql默认的事务隔离级别是可重复读,也就是说最起码读到已经提交的数据。为了方便测试,设置当前会话隔离级别等级为读未提交,当前的窗口就可以读到未提交的数据,可以很方便看数据库变化(sqlyog可以用,mysql暂时不好使)
SET SESSION TRANSACTION ISOLATION LEVEL READ UNCOMMITTED
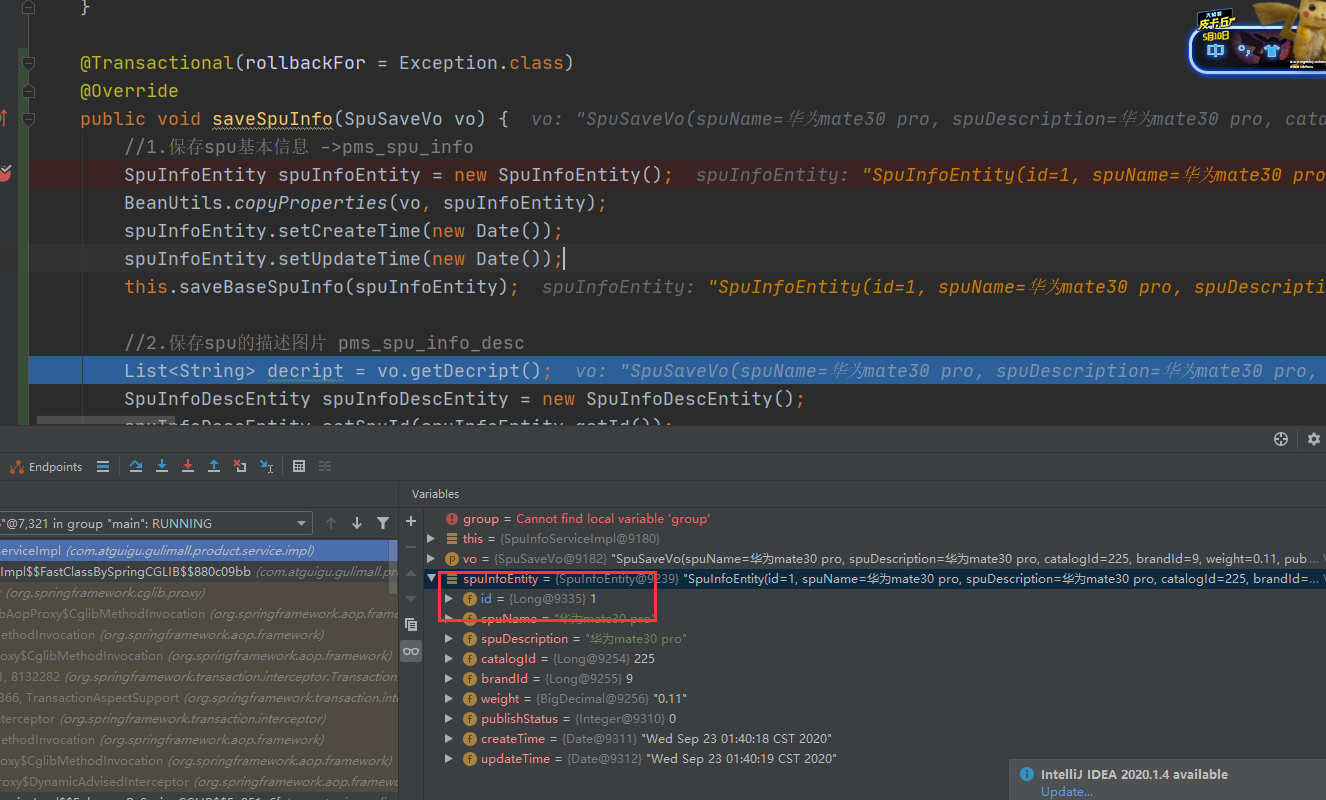
在插入商品描述的时候出现一个异常,查看sql语句可知

原因是原设计中,插入的spu_id是指定的,而从sql语句中看出,mybaits把spu_id当做自增了
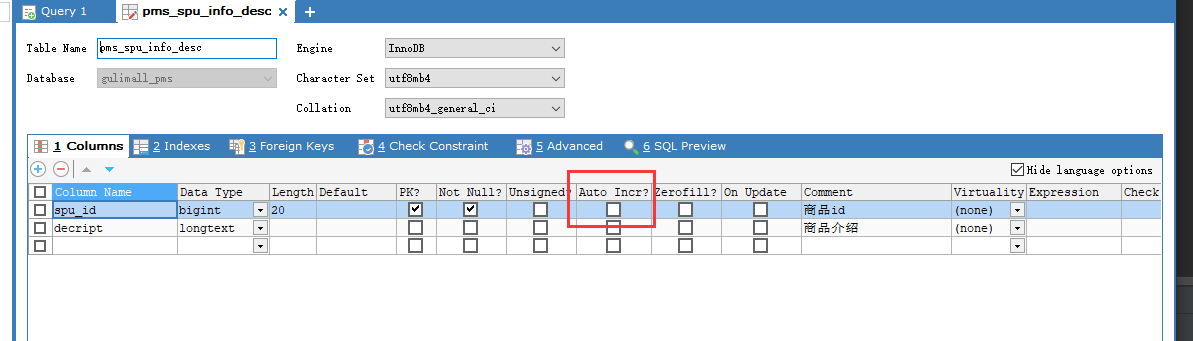
因为是事务,上面保存的spuinfo就没提交,解决方式,修改@TableId注解的IdType
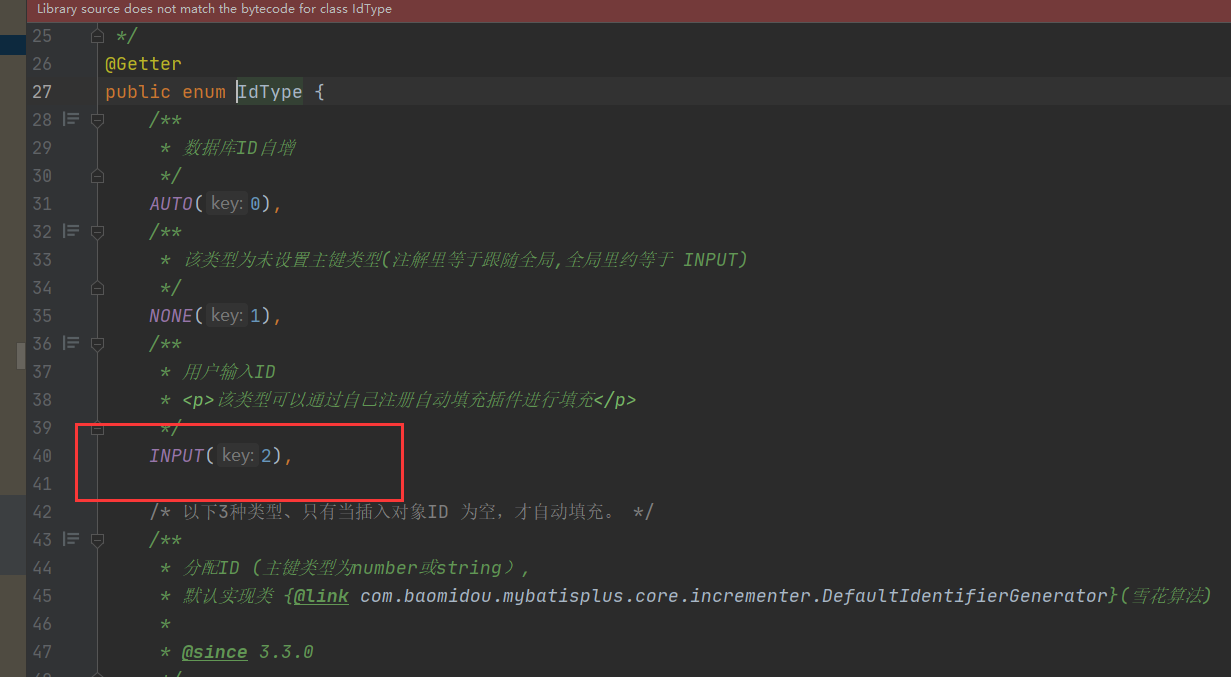
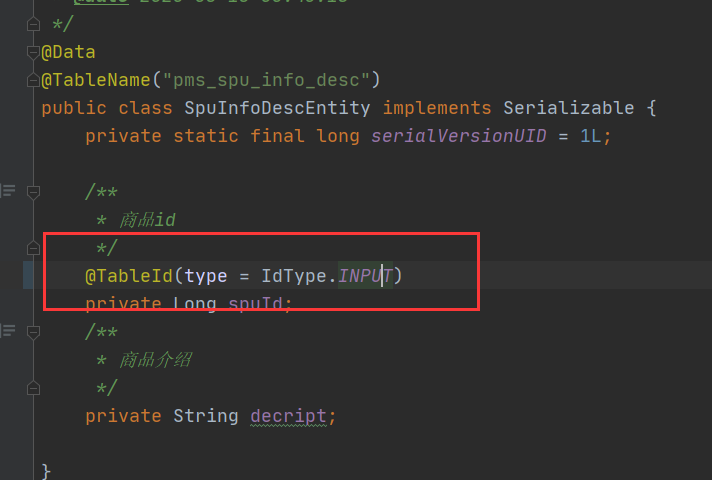
页面提交的是全亮图片,只有被选举中的图片才有图片路径,有些图片是没有路径的,相当于没有选中,也就是将没有选中的图片不在数据库中保存
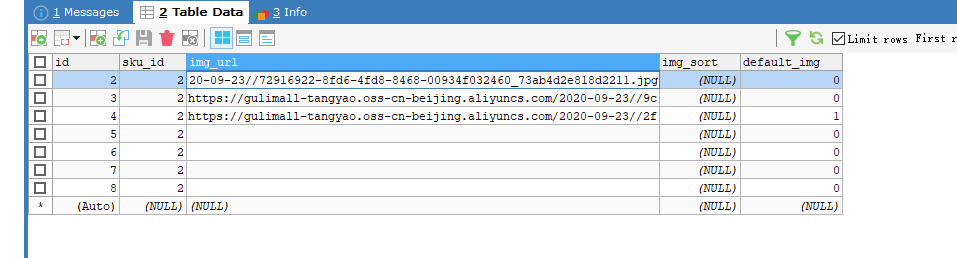
//TODO 没有图片路径的无需保存
商品保存其他问题处理
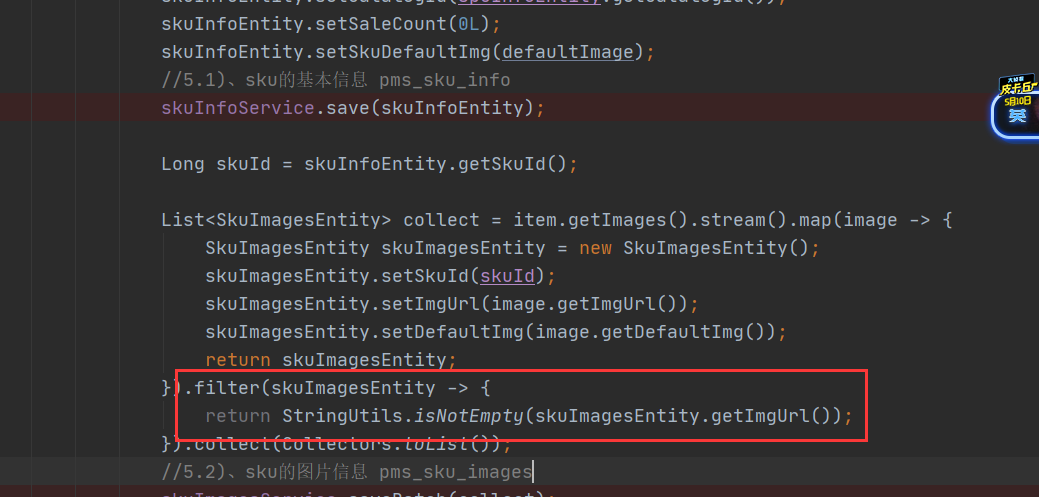
有些之前打折信息和满减信息没填的也需要数据库都是默认的0;这些数字没意义
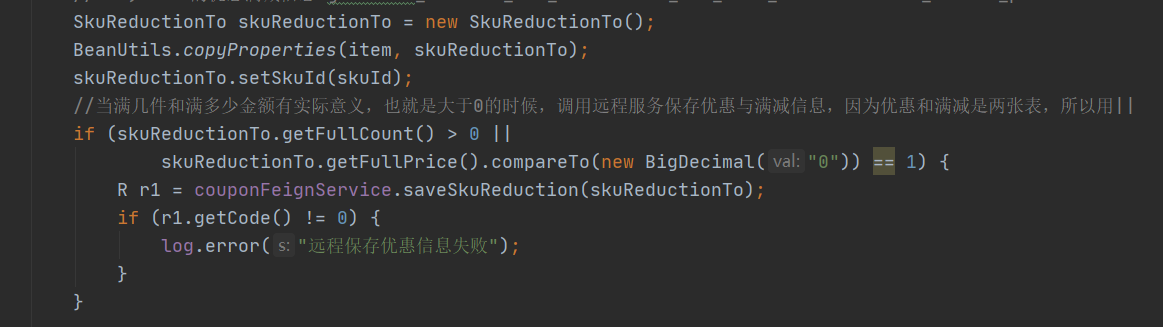
看到这里应该回顾一下所有流程,成功保存容易,可是对错误的处理难,比如部分错误需要回滚吗,其他正确的信息怎么处理等,会在高级篇讲解。
Spu检索
返回的时间统一做格式化
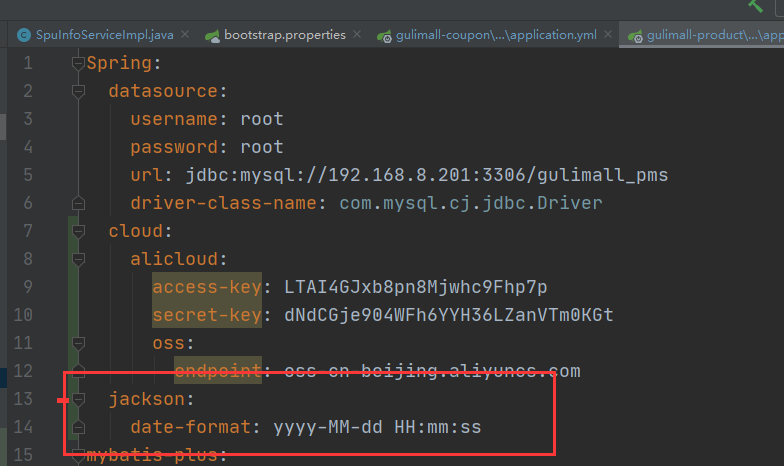
Sku检索
< 的全称是 : less than 小于 ,对应 <
> 的全称是:great than 大于 ,对应 >
获取仓库列表
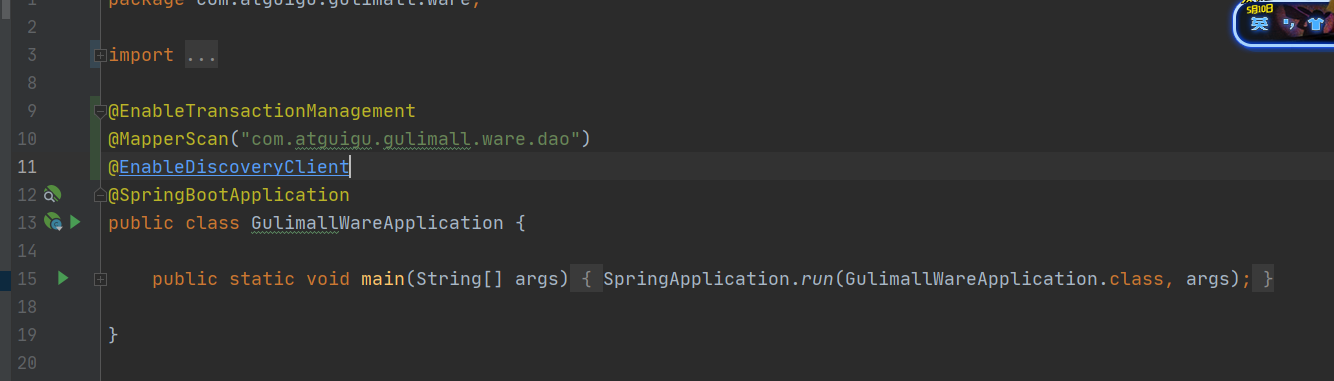
创建采购需求
采购人员按照采购单商品数量要求采购进来,有一系列硬件流程,比如扫码成功,放到货架上,自动入库。
采购需求有几种渠道,
- 人工在后台建立了采购需求
- 系统自动发出了低库存预警,并且创建出采购需求
将多个采购需求合并为一个采购单
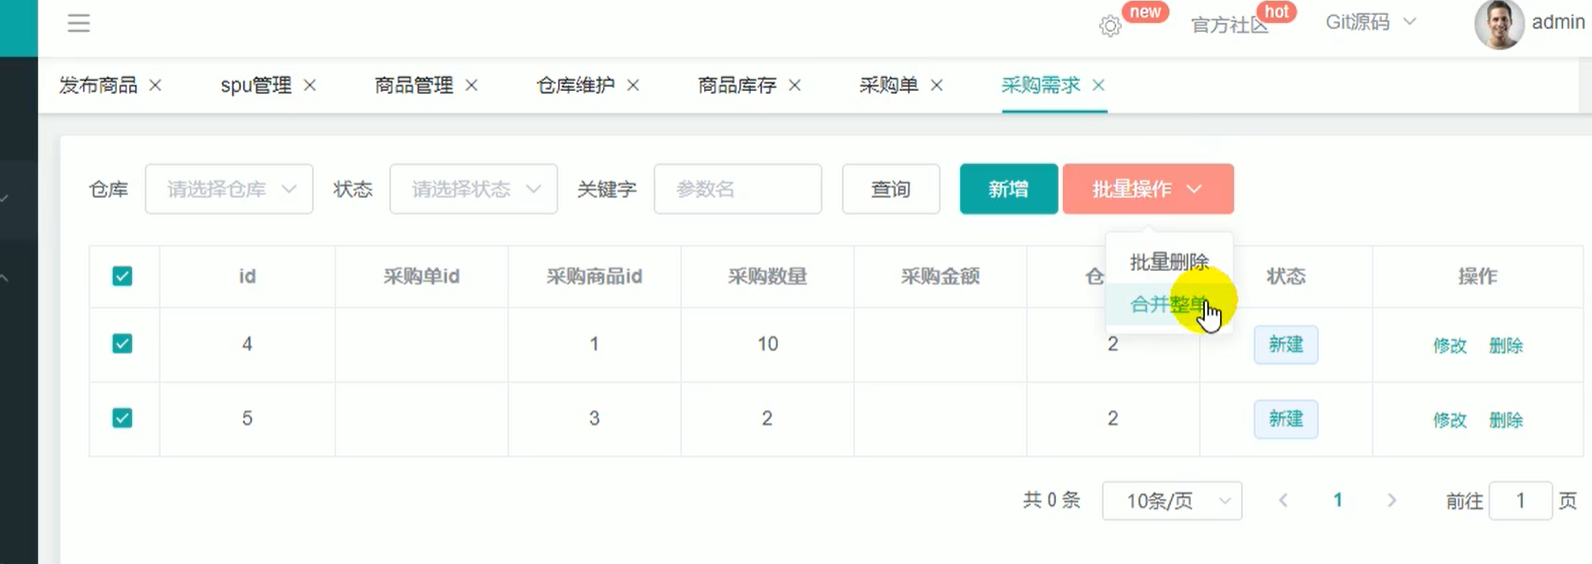
合并采购需求
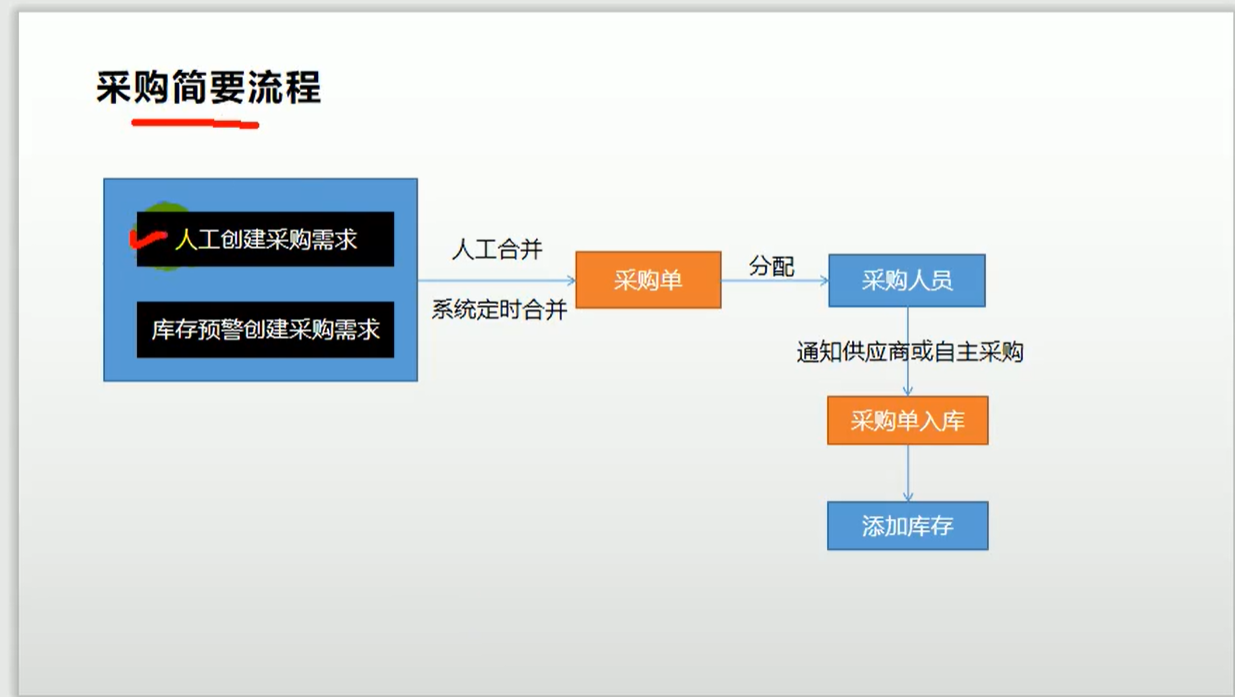
@Transactional
@Override
public void meragePurchase(MerageVo merageVo) {
    //如果有采购单id就修改 wms_purchase_detail 中的 purchase_id 和status,如果没有就新增,
    Long purchaseId = merageVo.getPurchaseId();
    if (purchaseId == null) {
        //新建一个
        PurchaseEntity purchaseEntity = new PurchaseEntity();
        purchaseEntity.setStatus(WareConstant.PurchurseStatusEnum.CREATED.getCode());
        purchaseEntity.setCreateTime(new Date());
        purchaseEntity.setUpdateTime(new Date());
        this.save(purchaseEntity);
        purchaseId=purchaseEntity.getId();
    }
    List<Long> items = merageVo.getItems();
    Long finalPurchaseId = purchaseId;
    List<PurchaseDetailEntity> collect = items.stream().map(item -> {
        PurchaseDetailEntity purchaseDetailEntity = new PurchaseDetailEntity();
        //确定是哪个采购需求的
        purchaseDetailEntity.setId(item);
        //指定相应的采购单id
        purchaseDetailEntity.setPurchaseId(finalPurchaseId);

        purchaseDetailEntity.setStatus(WareConstant.PurchurseDetailStatusEnum.ASSIGNED.getCode());
        return purchaseDetailEntity;
    }).collect(Collectors.toList());

    purchaseDetailService.updateBatchById(collect);

    PurchaseEntity purchaseEntity = new PurchaseEntity();
    purchaseEntity.setId(purchaseId);
    purchaseEntity.setUpdateTime(new Date());
    this.updateById(purchaseEntity);
}
jackson:
  date-format: yyyy-MM-dd HH:mm:dd
  time-zone: GMT+8
仓库管理-领取采购单
采购人员用app查看分配给他的所有采购单, 他今天出去采购哪些,可以确定领取,哪些采购单状态就更新为已领取,被领取的采购单就不能继续分配新的采购需求,采购需求的状态更新为正在采购中,且不能重新分配过去了,采购完成后,手机app上选择完成。
领取采购单和采购完成接口,不属于后台管理系统的一半功能,属于对接员工系统采购人员两个功能,用postman模拟发送请求,模拟手机。
首先领取哪个采购单(假设2号),就会改变哪个采购单状态为已领取,有关2号代购单所有采购需求都应该改为正在采购,前提是要领取的采购单是没有被领取的(新建或已分配状态)
@FeignClient("gulimall-product")
public interface PurchurseFeignService {

    /**
     *      /product/skuinfo/info/{skuId}
     *
     *
     *   1)、让所有请求过网关;
     *          1、@FeignClient("gulimall-gateway"):给gulimall-gateway所在的机器发请求
     *          2、/api/product/skuinfo/info/{skuId}
     *   2)、直接让后台指定服务处理
     *          1、@FeignClient("gulimall-product")
     *          2、/product/skuinfo/info/{skuId}
     *
     * @return
     */
    @GetMapping("/product/skuinfo/info/{skuId}")
    public R info(@PathVariable("skuId") Long skuId);
}
SPU规格维护
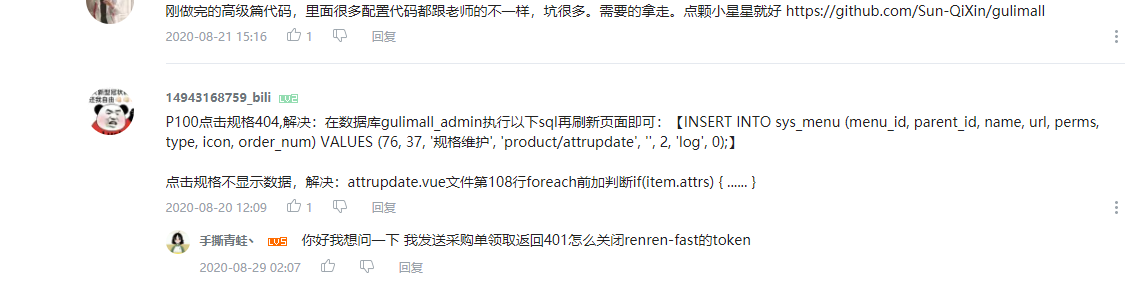
INSERT INTO sys_menu (menu_id, parent_id, name, url, perms, type, icon, order_num) VALUES (76, 37, '规格维护', 'product/attrupdate', '', 2, 'log', 0);
返显不成功的将规格参数里面的值类型改为单选就可以啦
分布式基础总结
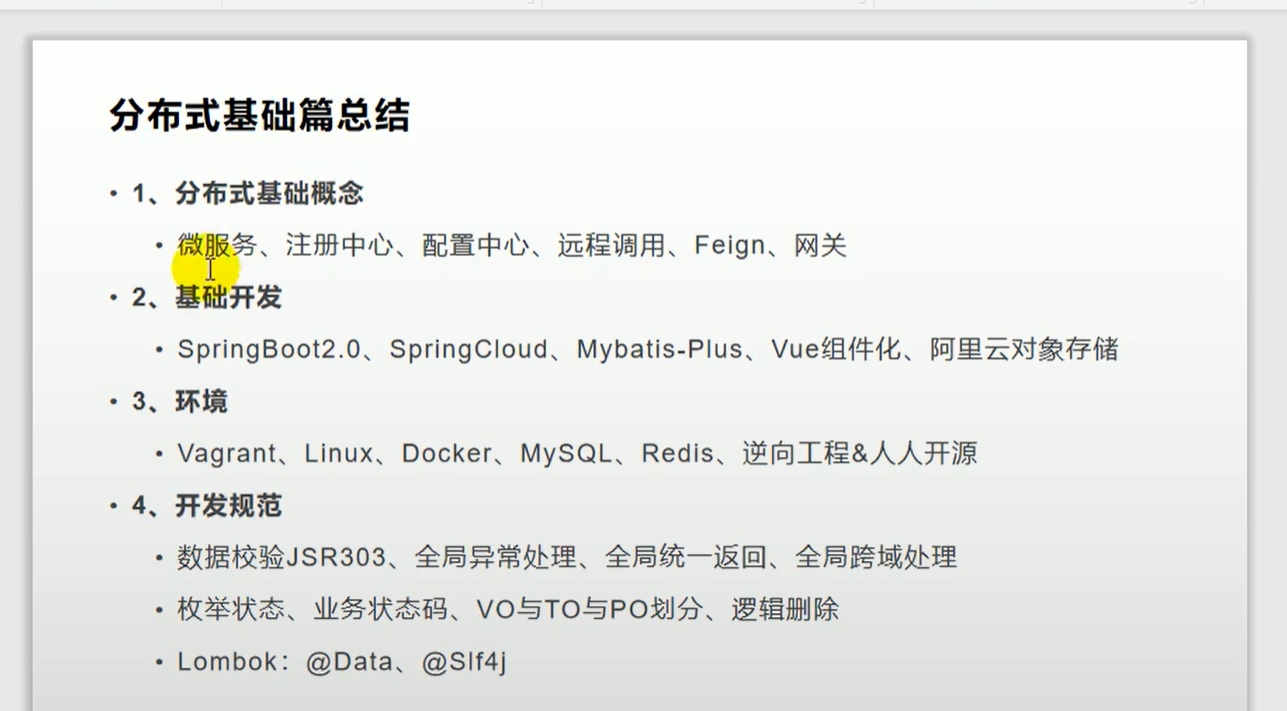
微服务最大的特点,独立自治,为每一个不同的项目都创建了自己的微服务,在实际开发中,项目可以分配给不同的开发人员进行并行开发,
注册中心,将项目拆成不同的微服务,服务之间进行调用,商品系统调用会员服务和库存服务, 需要一个注册中心,实时感知每一个服务都在什么位置,只要从注册中心获取都地址列表,给对方发送请求就行了,
配置中心,不论是微服务还是单体应用,都推荐有一个配置中心,好处是服务上线后,不是修改本地源代码这些配置,重新打包再发布,而是通过线上可视化配置中心界面将配种中心进行修改,改完后服务自动更新用到最新的配置
远程调用 在SpringCloud用Feign,给对方服务发送请求,发送请求方式有 ajax发送请求,超链接跳转,想要获取到别的服务的数据,用feign发送请求,首先导入feign的依赖,开启远程调用功能,指定要调用哪个服务的哪个请求。要想开启远程调用功能,这些服务就要注册到注册中心,每个服务都要配置注册中心地址,都用的nacos,只需要配置好地址和名字就好了,开启服务注册发现注解@EnableDiscoveryClient
网关,所有请求发送给网关,由网关代理给其他服务,在网关中做很多统一功能设置 比如跨域解决,前端请求发ajax的时候,由于服务的地址不一样,会引起跨域,在网关处统一配置跨域,不用在微服务各个位置配置跨域了。
SpringBoot2.0基于Spring5最大的变化引入了Reactive发反应式编程,带来web开发里面的webFlux,非常容易的创建出一个高性能,高并发的web应用,只有在配置网关跨域的时候用了一下
每一个数据提交新增都需要数据校验JSR303
无需安装部署,在线快速体验 Byzer
更多推荐


 58
58 0
0- 0


 已为社区贡献1条内容

所有评论(0)